To prepare for the beginning of the academic year, there are settings in the administration area that require attention to ensure a smooth transition to the new year.

Rolling Forward
At the end of the school year, schools tend to enable the ‘roll forward’ setting within Edulink. Located in the General tab, this setting pulls through the new timetable for the next academic year from your MIS into Edulink One. This occurs once the academic year and timetable for the current academic year finishes.

If your school has this setting switched off, you will automatically roll forward when your MIS changes to a new timetable and academic year in September.
The timetable information is always pulled in after the first cache has run. To run a cache, follow the process outlined in this article.

I have set up roll forward and the new timetable hasn’t pulled through, why?
If you have turned on roll forward, a cache has run and your timetable hasn’t pulled through, this could have to do with the fact that Edulink One looks for days timetabled in the future academic year. Sometimes a new timetable may not have applied or settings may not have been saved. The solution is to apply the new timetable in SIMS by going to Tools > Academic Management > Apply Timetable. Ensure you save your changes. Have your data manager review the map calendar dates.
Once Edulink One registers that the current timetable and current academic year expired, you can run a full cache/sync.
Another possibility is that timetables have been turned off in the General Settings. Some schools do this when they roll forward to prevent staff and students from viewing the new timetable before they are ready. You need to ensure that if you temporarily revoke access you reinstate it and save your settings.
Achievement and Behaviour Settings
Should you wish to reset your achievement and behaviour records from the beginning of the academic year, you need to go to the administration settings and then to the Achievement and Behaviour tabs.

Scroll to the ‘Show from’ date selector in both tabs. Change the calendar date if you want to reset your points for the new academic year.

Be sure to save your settings.

Common Login Issues at the Beginning of the Year
1) I can’t find a student in the user accounts table
If you are using LDAP, Microsoft or Google accounts, you will not see the student appear in the user accounts table until they have logged in with their school credentials or their credentials for Microsoft or Google.

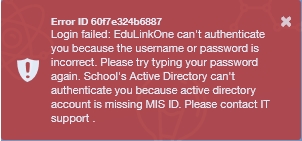
2) A student or staff member can’t log in because of an MIS id error
If you are using LDAP, this is a fairly common problem with newer starters and staff members who may have a missing MIS id number.
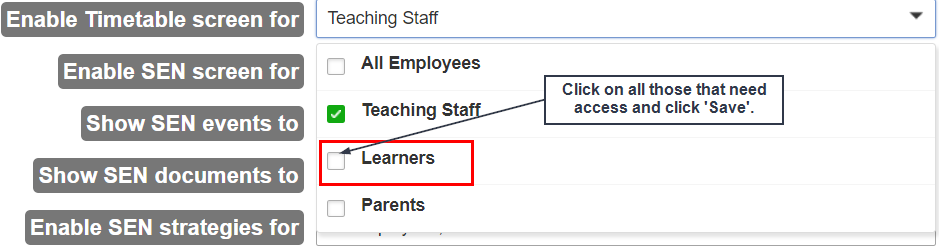
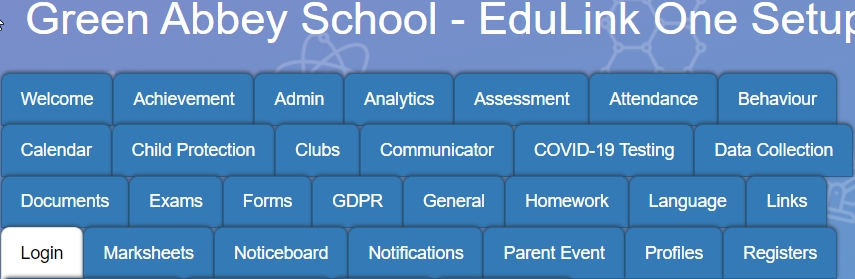
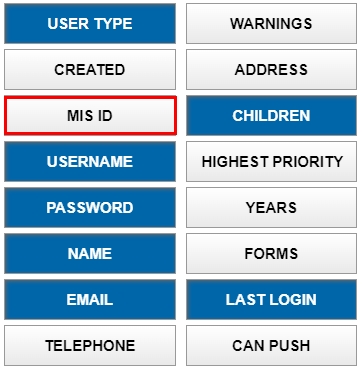
To check this, you need to go to the ‘Show LDAP’ setting in the Login tab, located in the administration settings.
The Show LDAP button provides a list of user IDs that have been configured using the Edulink SIMS Agent.

You can change between Staff and Student lists by clicking on the button at the top of the table.
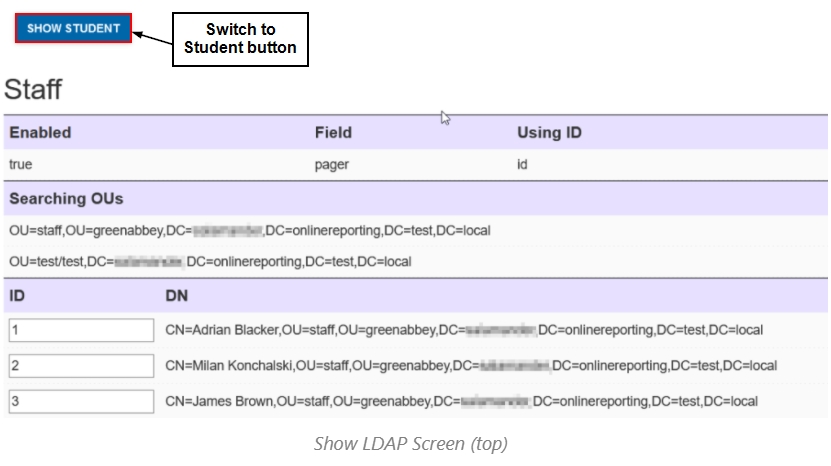
The ID section of the table pulls the staff or student ID numbers directly from SIMS. If an ID number is assigned to a staff member, it indicates that a match has been made in your LDAP. However, if staff or students don’t have an ID number populated in this section, they may not have a SIMS account or their forename/surname is spelt differently from their SIMS account.

Additionally, the Field section of the table indicates which AD field is set in the LDAP Settings of the Agent.
Also, the Searching OUs section details the OUs that Edulink One is trying to match to accounts in your AD. There can be multiple OUs, e.g. Teachers, School support, ICT, etc…

Missing accounts have no ID numbers. You can locate missing staff by scrolling to the bottom of the table. Find the staff member’s or student’s name and ID number and enter that number manually into the white box provided in the IDs column above. Alternatively, you can press CTRL F to type the name you are searching for. The name will be highlighted in the show LDAP screen.


Press ‘Enter’ after you have typed the number in the box to save the entries. Once the written value is confirmed, you know that the MIS id is saved.

If you still cannot find the missing ID number here, the user may not have a SIMS account. You will need to create one for them.
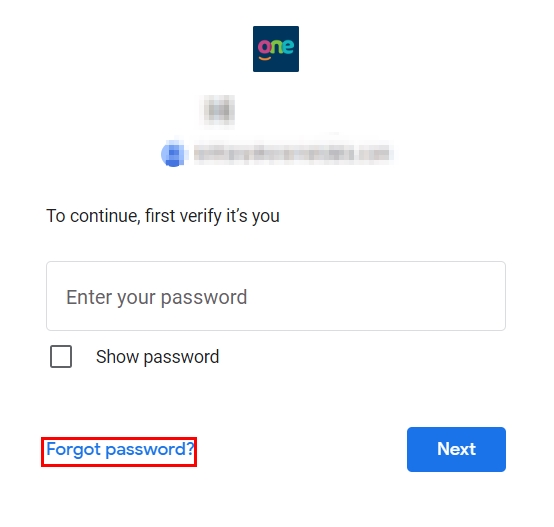
3) I can’t remember my password or I need to reset my password
Parents:
If you can’t remember your password and you are a parent, you can reset your password by clicking on ‘Reset Password’ on your login screen.
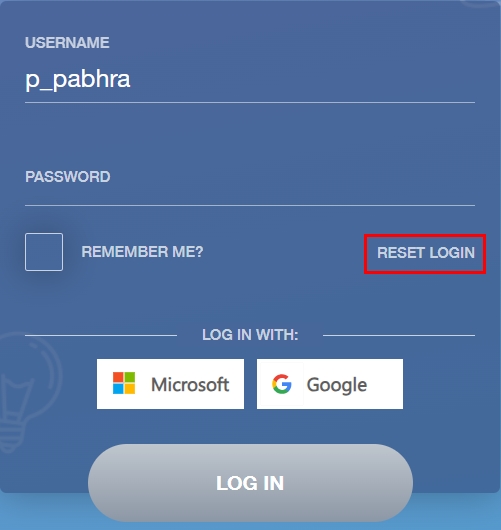
Next, enter your email and the password should be emailed to you.

It is recommended you change your password in the settings after.
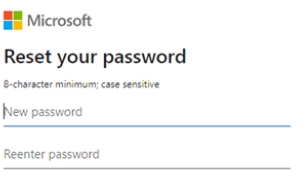
Staff and Students
If you are a student or staff member, how you reset your password depends on whether you are logging in using Microsoft or Google, which have options to reset your password directly there, or whether your school is using LDAP.

LDAP means using your school username and password to log in to Edulink. If you use your school username and password to log in, you need to change your school password on a school machine. This could happen when your school password expires or if you have forgotten it. Alternatively, your school may have a VPN where you can log in remotely and change your password. Please check with your school about password resets.
4) The new Year 7s aren’t pulling through
If your Year 7 accounts are not pulling through to Edulink One and the students have been accepted in SIMS, it is likely that you need to create an OU for this group of students if you are logging in using LDAP. This only happens if your school uses sub OUs such as Year 07-2023.
If you add the top-level OU for students and staff, you can avoid issues at the start of the academic year.
5) Why do parents have two accounts?
Your parents will likely not have two accounts but are logging in using two different manual methods, which is normal in Edulink One. Parents have the option to log in using both their username, e.g. p_parent, or email address, parent@example.com.
You can check this by going to the Load User Accounts table. Scroll to the bottom and select Column Visibility, then MIS id.

If the parent has a matching MIS id for both login methods then they are linked to the same account.
6) I have a staff member that is also a parent, how do I proceed?
You can link the parent account messages to the employee account, but employees will need separate accounts to complete work-related tasks. For example, employees must log into their work accounts for parents’ evenings.
7) There’s a staff member that can’t log in, what should I check?
If you have checked the MIS id and there’s still an issue with the staff member’s account, you can look to see if they have been registered in your MIS. Edulink One will not know they are there if they have not been added. Once they have been added, you can run a cache to pull their information into Edulink.
You can also check for an employee’s leaving date in the staff member’s employment details. Edulink One will not pull staff in with a leaving date so ensure that there isn’t one entered.
Additionally, you can check to ensure the staff member had been assigned to the correct OU if your school is using LDAP logins. You can also check to see if there are duplicate OUs as this can also cause an issue with staff being able to log in.
What’s the best way to give parents their login details?
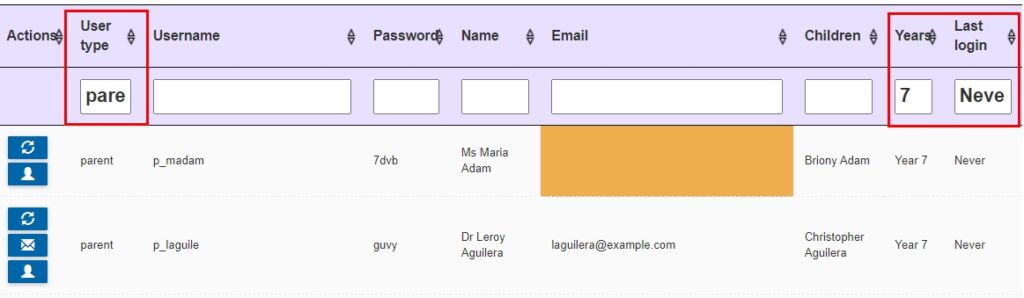
If you have a new group of parents to give logins to (or if you are giving out parent logins for the first time), scroll to the bottom of the login tab and click Load User Accounts.

Once open, you can filter the parents you need to send logins to by using the ‘Year’ filter in ‘Column Visibility’ and writing ‘Parent’ in the ‘User Type’ filter and ‘Never’ in ‘Last Login’.
You can also send the login details to an applicant’s parents following these instructions.
After you have filtered the users, scroll to the bottom of the table to find the ‘Bulk Email’ button and when you are ready click ‘Yes’ to send.

What are the criteria for parents/carers to receive emails or communication?
Edulink One looks for those with parental responsibility ticked in the MIS and NO court order when creating an account. Otherwise, in terms of email communication Edulink can be customised to send based on priority. By default, Edulink sends emails to those with the highest priority but you can change this in the Communicator settings. Turn on Custom Parent Identification to change the settings.

Change the Max Priority from the highest to the priority you would like, e.g. up to 3. There are other settings you can change but all settings in Custom Parent Identification should be changed with caution.

Common Seating Plan Questions
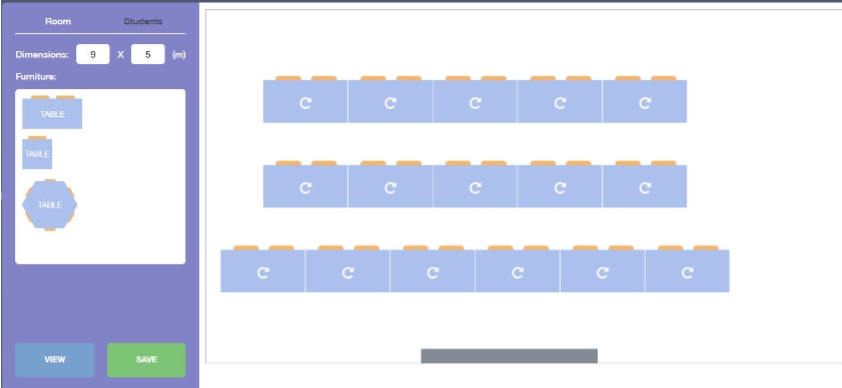
1) Why do I need to move all my desks around for each class this year?
When a teacher creates a seating plan for a specific room, that seating plan will be saved from one year to the next. This is done to save time for the teacher; however, if you change the layout of the room you will need to amend the seating plan manually. This will need to be done for each class individually. The following article explains how Edulink One uses scenarios to decide how to display seating plans.
2) Why are some students appearing in my class and others are not?
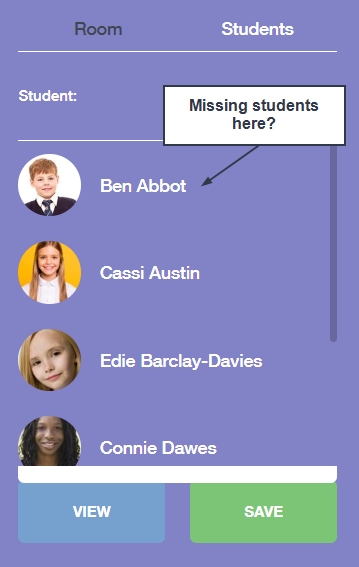
This might have to do with the student not being added to your school’s MIS or your AD, there could also be issues with their account, such as a missing MIS id. It is best to contact your IT department which may be able to help diagnose the issue; they will also be able to contact Overnet Data Support for more guidance. Edulink One will need to run a cache sync to pull in any details regarding students that have missing details.
3) Why is a room not appearing in Seating Plans?
This could be because a room was not allocated to a group in your MIS. Check your MIS to see if the room is in your pastoral structure or academic structure, if not add the room to your timetable and run a cache.
MIS Compatibility