Parents can book a Parents’ Evening slot by logging in to their Edulink One account
Booking An Appointment
Parents must log in to Edulink One (either on the desktop/browser version or the app). However, if they are downloading the app for the first time, then they must use the school ID or the school postcode to access the Edulink One login screen.
Then, parents must log in using the username and password provided by the school. If they can’t remember their password, they can reset their password by following the instructions in the article How do I reset my password?

If parents cannot see Parents’ Evening on the main homepage, then they should select the More button to view additional features that are not in view.

Next, parents select the Parents’ Evening button to book Parents’ Evening appointments for their child.
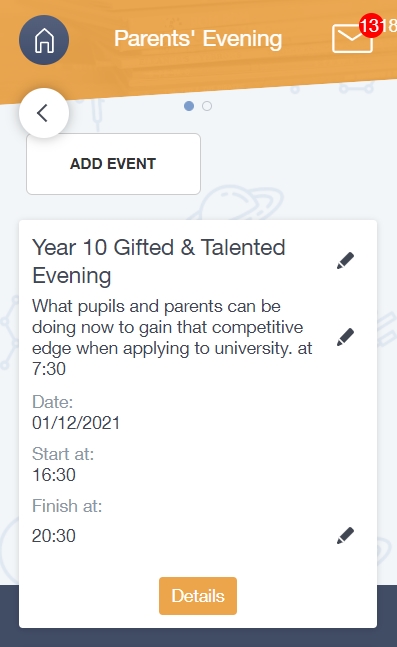
All Parents’ Evening events for a child will appear in the Parents’ Evening window. To access the booking window, click anywhere on the event.

Then, the parent will see a table of all the teachers/ subjects they can make bookings for (if this is a form tutor event there may only be one). If more than one child is attending the event, scroll horizontally to see the subjects of the other child.

Phone View:
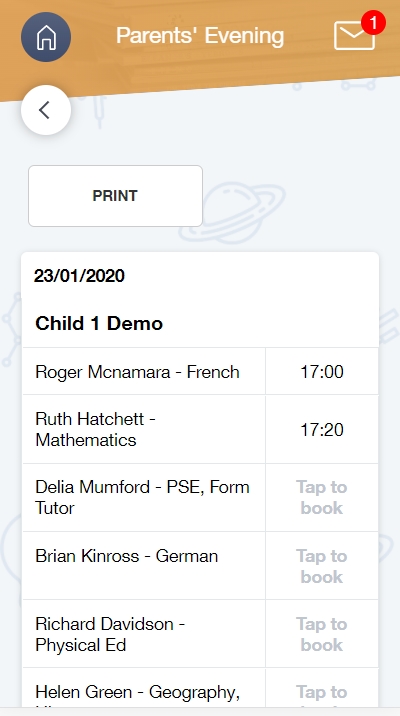
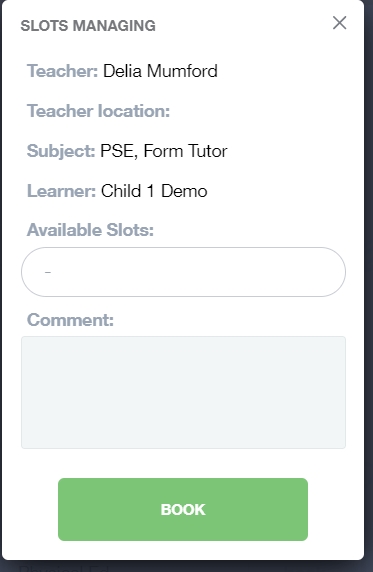
Next, parents click on a time slot to book the subject and teacher. They can add a comment here if there is something specific they would like to discuss with the teacher.

Booked slots appear in green. Some schools will not allow parents to book consecutive slots to give them time to move to the next appointment location— these blocked slots appear as a grey box with a red x.
The same grey box with a red x will appear on slots that have already been booked by another parent.

All booked slots are automatically saved.
Unbooking An Appointment
To unbook an appointment, parents must log in to Edulink One and locate the Parents’ Evening button.
Following this, parents click on the Parents’ Evening Event in the Parents’ Evening window. Clicking on the event brings the parent to the booking window where they booked their time slots.
To Unbook a time slot, select the Booked appointment. This also applies when using a smartphone or device.

A window will appear with the option to Unbook the appointment in red.

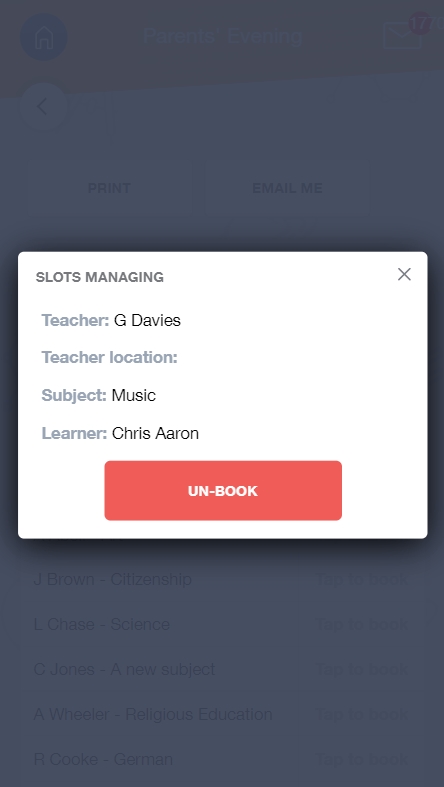
Slots that are still available to rebook appear in white. If a parent can no longer attend that appointment or Parents’ Evening, they can leave this subject blank or unbook all of their appointments.
Adding a Guest (Other Parent) to a Booking
Parents can add another parent or a person with parental responsibility to their bookings for parents’ evening. The other parent or person with parental responsibility must have an Edulink One account to do this.
The person booking should click on the event to book time slots for the parents’ evening.

Once the parent has made their bookings as above, they can select whether they would like to add a ‘Guest’ to the booking by clicking the ‘Guest: +’ button at the top of the table.
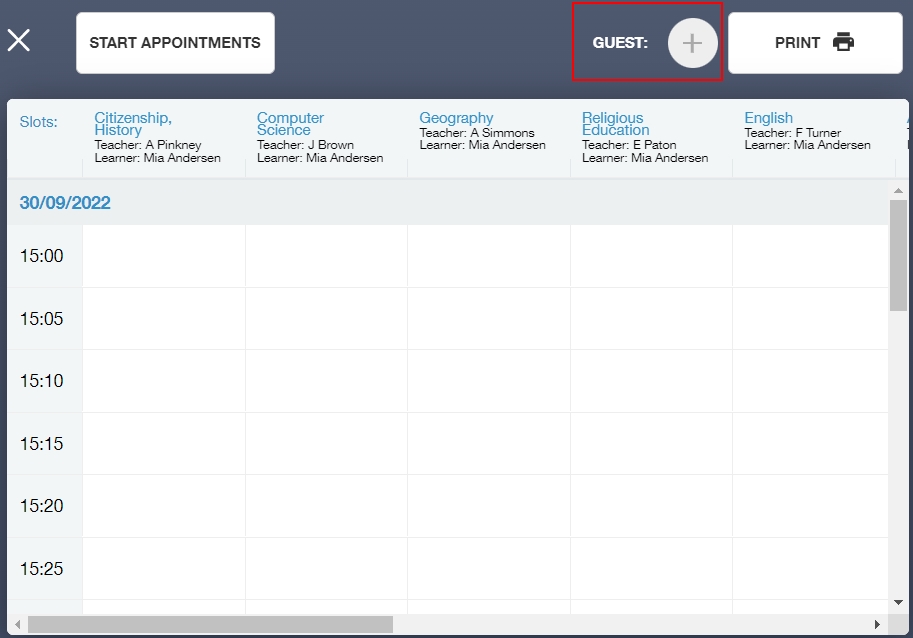
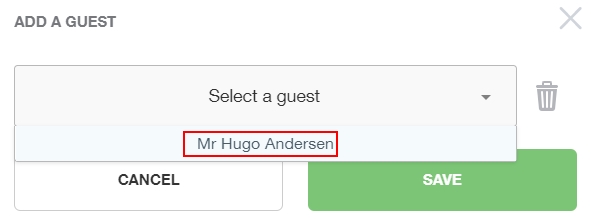
A new window opens and you can select the guest from the dropdown menu. Only guests with parental responsibility and an Edulink One account will have this ability. Additionally, teachers and admin staff cannot book a guest for a parent, only parents can add a guest to their booking. Click ‘Save’ to add the guest.
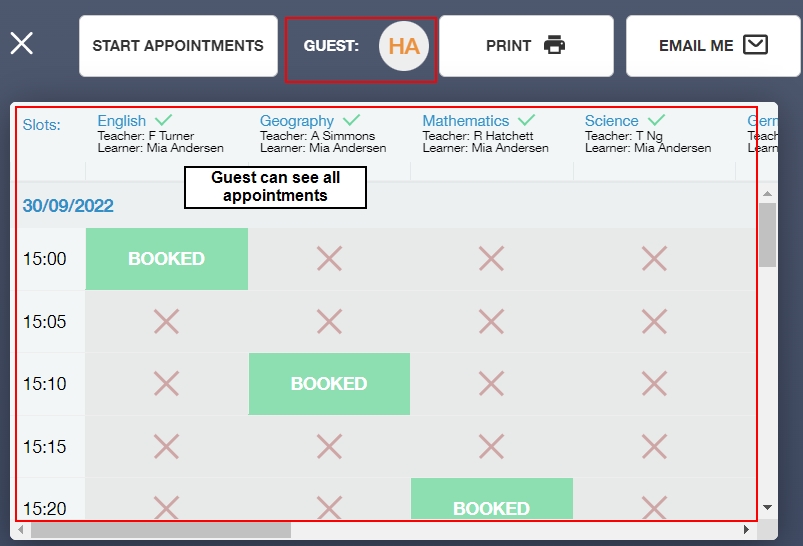
The guest’s initials will appear next to ‘Guest’ at the top of the booking table. Your guest will be able to see all of the bookings made by you and will be able to print them, etc… However, they cannot make bookings for themselves.

To view the appointments that the booking parent has made, the guest must log in to their Edulink One account, click on the Parents’ Evening icon and select the appropriate parent event.
If the guest decides they do not want to join the parents’ evening or they want to make bookings for themself, they can delete their guest status by clicking on their initials at the top of the window. Then they can click the bin icon to delete themself as a guest.
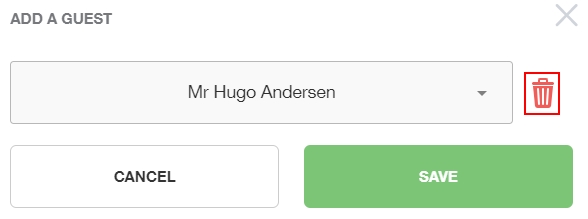
If the other parent has made the bookings, the guest cannot ‘delete’ themself and try to add the other parent as a guest. The parent or carer who made the bookings first must be the one to add the guest.
Joining a Parent Event
If the parents’ evening is in person, the guest has full visibility of all bookings made— they can print and email the bookings to themselves as well. They simply need to arrive with the parent who booked the appointment and proceed to their bookings as usual.
If this is an online (video) conference, both parents can join the meeting by clicking on the event and then on the ‘Start Appointments’ button in the top left corner. This is particularly useful if parents are joining from two locations. They need to wait in the video conference ‘waiting area’ until the teacher starts the appointment.

The owner of the account will appear in the top right window and will be labelled ‘Me’. On the large screen, the teacher will appear on one side and the other parent (or guest) will appear on the other. Each window will be labelled with the name of the person in the video.
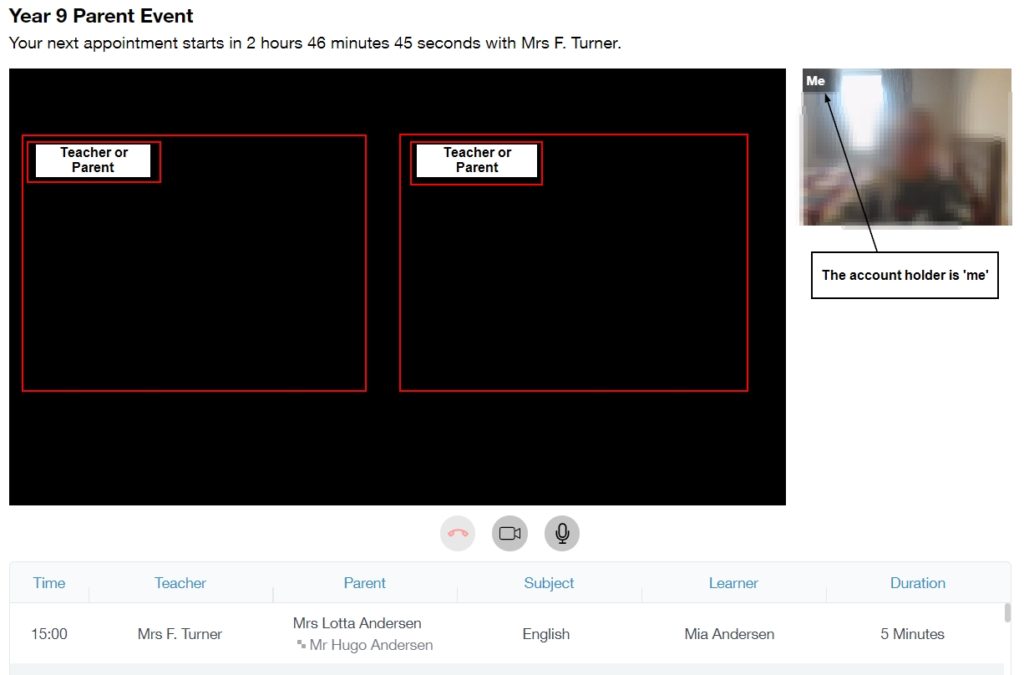
You simply need to wait for the next appointment and the teacher for that class will start it.
Print or Email Your Bookings
Once the parent’s bookings or modifications are complete, they can Print their Parents’ Evening Appointments or they can Email them to themselves.

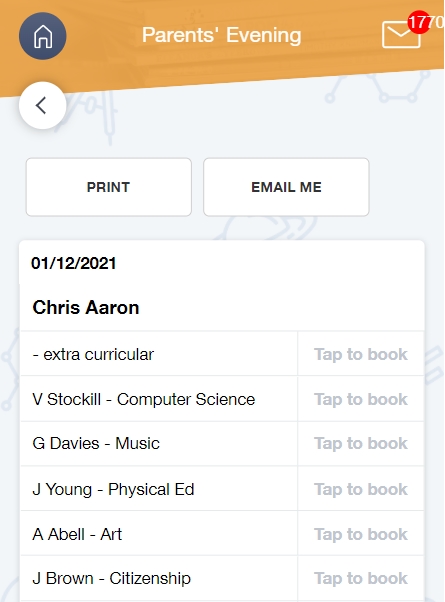
Print View:
A PDF version of the bookings appears. Parents can save the file or open it with their browser.

In their browser, parents have the option to print the PDF.

Email View:
An email confirmation will be sent to the parents’ Edulink One message box. This is located at the bottom of the Edulink One homepage.

How to Attend a Video Conference
On the day of the Parents’ Evening, parents need to log in to Edulink One and click on the Parents’ Evening icon to begin. This might be located in the ‘More’ section of Edulink One, depending on the number of features your school is using.

A new window will open. They must click anywhere on the Parents’ Evening information, e.g. Year 8 Parents’ Evening.

Once you have clicked on the event, a booking window will open. At the top of the table, there is a button called Start Appointments. Click on Start Appointments which will open the video conferencing.

The child’s teacher will start the appointments at the correct time and the appointments will happen automatically— parents just need to have the video conference open.

The next appointment is shown at the top and the list of the following appointments is shown at the bottom.
How Do I Book a Parents’ Evening (Video)
MIS Compatibility
