Enable Guests in the Parent Event Tab
To enable guests in parent event, administrators must log in to Edulink One and go to the administration settings.
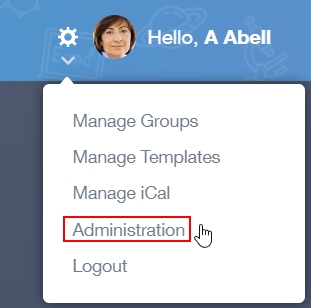
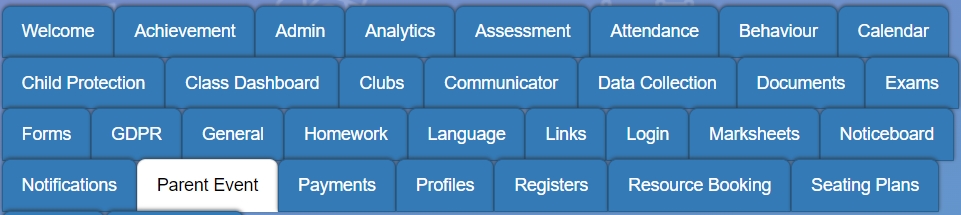
Select the Parent Event tab and scroll to ‘Enable Guests’ (assuming you have set up the other aspects of the tab already; if not, see Parents’ Evening Setup).
Turn on ”Enable Guests’ to allow parents to select a guest for parents’ evening (guests must have parental responsibility and an Edulink One account). Only parents can select a guest; staff cannot book a guest for them.

Click ‘Save’ to save your settings.

Adding a Guest (Other Parent) to a Booking
Parents can add another parent or a person with parental responsibility to their bookings for parents’ evening. The other parent or person with parental responsibility must have an Edulink One account to add them. Only a parent can add a guest to a Parents’ Evening; the school staff cannot do it for them.
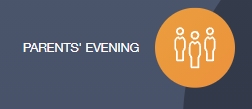
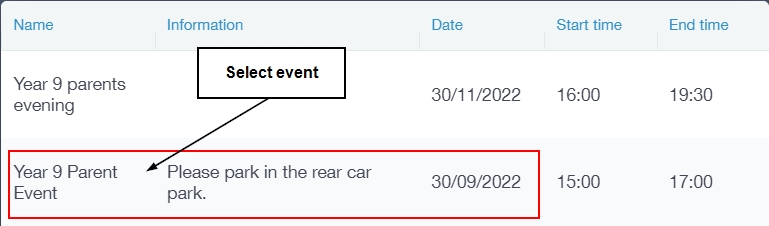
Firstly, the person booking should log in to Edulink One and select the Parents’ Evening icon.
Then, they should click on the event to book time slots for the parents’ evening.
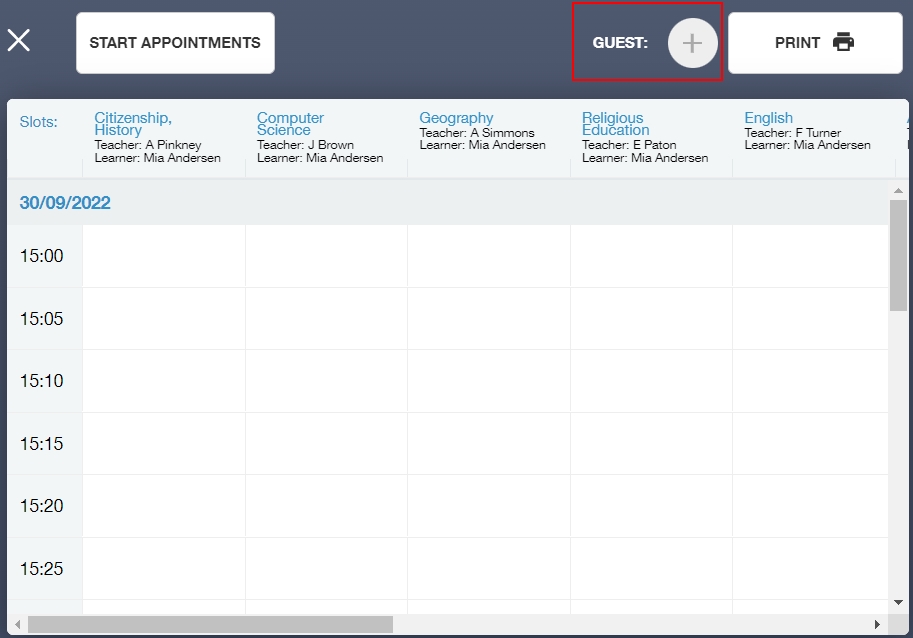
Once the parent has made their bookings as above, they can select whether they would like to add a ‘Guest’ to the booking by clicking the ‘Guest: +’ button at the top of the table.
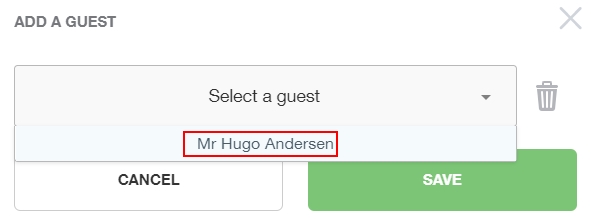
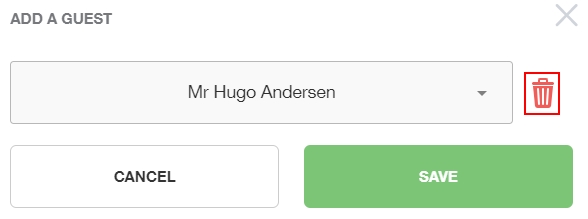
A new window opens and you can select the guest from the dropdown menu. Only guests with parental responsibility and an Edulink One account will have this ability. Click ‘Save’ to add the guest.
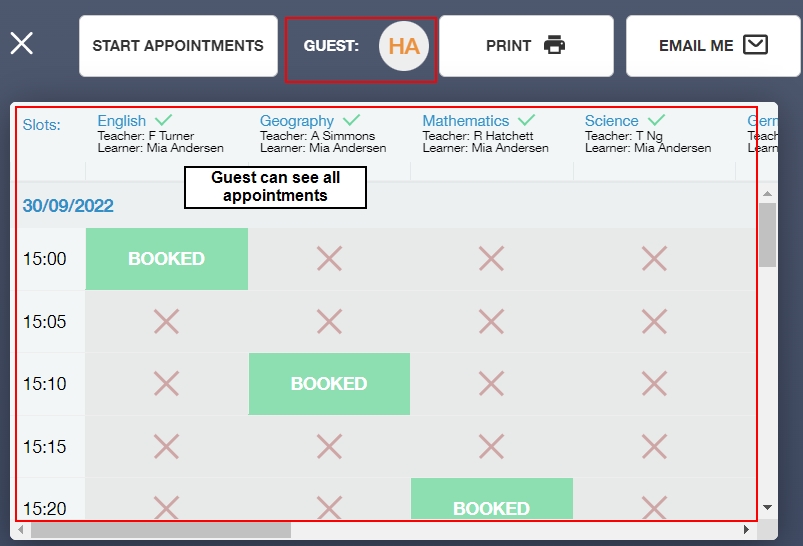
The guest’s initials will appear next to ‘Guest’ at the top of the booking table. Your guest will be able to see all of the bookings made by you and will be able to print them, etc… However, they cannot make bookings for themselves.

To view the appointments that the booking parent has made, the guest must log in to their Edulink One account, click on the Parents’ Evening icon and select the appropriate parent event.
If the guest decides they do not want to join the parents’ evening or they want to make bookings for themself, they can delete their guest status by clicking on their initials at the top of the window. Then they can click the bin icon to delete themself as a guest.
If the other parent has made the bookings, the guest cannot ‘delete’ themself and try to add the other parent as a guest. The parent or carer that made the bookings first must be the one to add the guest.
Joining a Parent Event
If the parents’ evening is in person, the guest has full visibility of all bookings made— they can print and email the bookings to themselves as well. They simply need to arrive with the parent that booked the appointment and proceed to their bookings as usual.
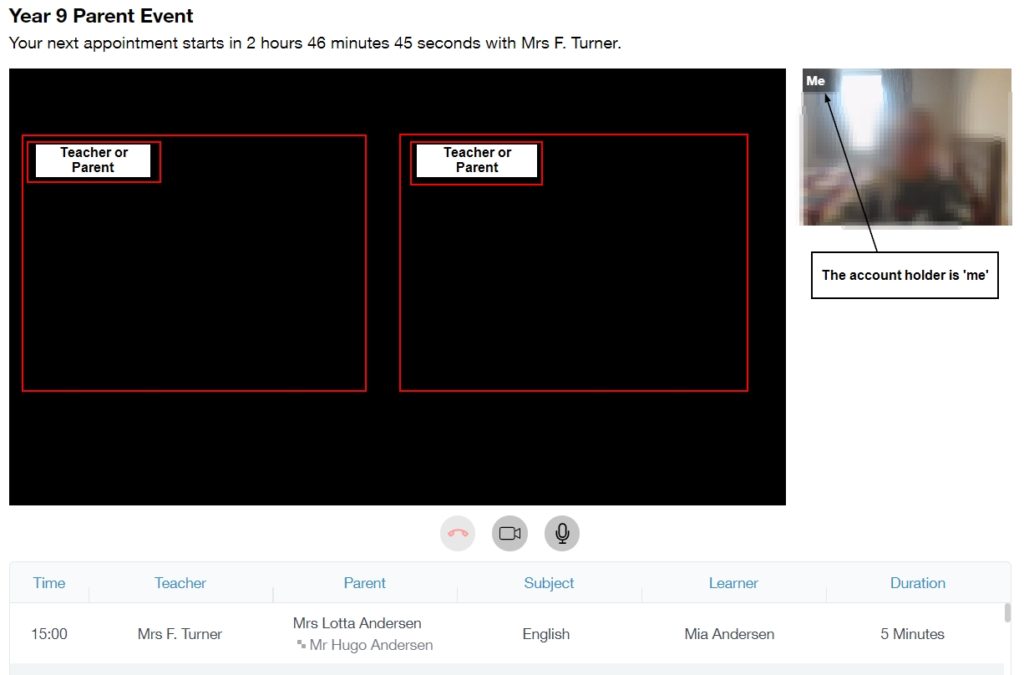
If this is an online (video) conference, both parents can join the meeting by clicking on the event and then on the ‘Start Appointments’ button in the top left corner. This is particularly useful if parents are joining from two locations. They need to wait in the video conference ‘waiting area’ until the teacher starts the appointment.

The owner of the account will appear in the top right window and will be labelled ‘Me’. On the large screen, the teacher will appear on one side and the other parent (or guest) will appear on the other. Each window will be labelled with the name of the person in the video.
You simply need to wait for the next appointment and the teacher for that class will start it.
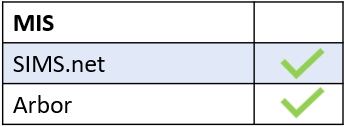
MIS Compatibility