Administrators for Parents’ Evening Events can view events, modify existing events, modify learners/teachers in events, create events or delete events.
Configure your administrators for Parents’ Evening by selecting the Parent Event tab in the Administration settings.
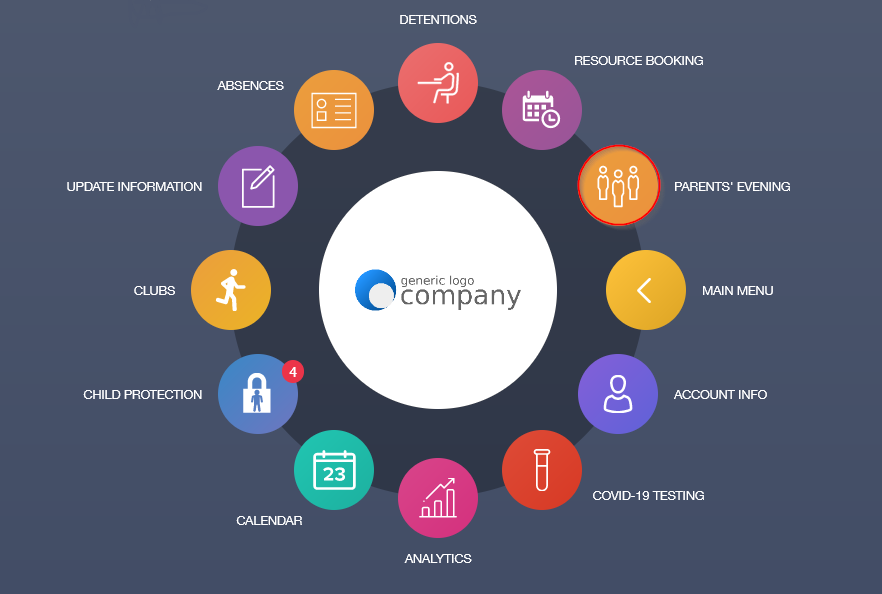
To get started, log in using your Edulink One credentials to access the app or website, locate and click the Parents’ Evening icon.
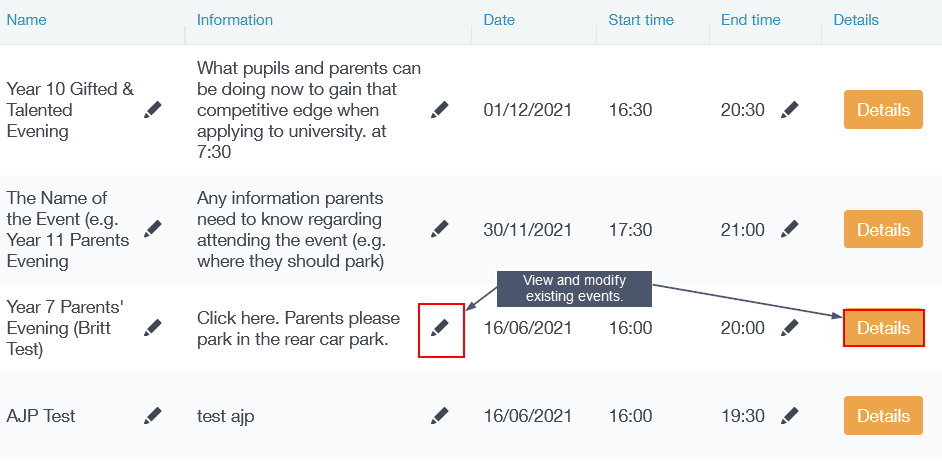
You can view Active and Archived events in the Parents’ Evening window.
To modify an existing event (Active), you can select the pen icon to change the ‘Name’ of the event, ‘Information’ regarding the event or the ‘End time‘ of the event.
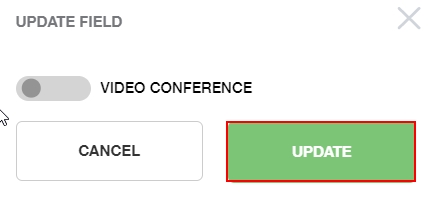
Making Your Parents’ Evening a Video Conference
If you have forgotten to make an event a video conference during the initial creation, in that case, you can make your parents’ evening a video conference or a face-to-face event by turning on/off the camera button next to the name of the event.

A new window opens where you can toggle the video conference option to disable or enable it, depending on the original setup.
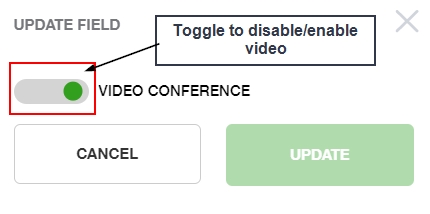
When you have selected whether or not you would like to enable/disable the video conference option, click Update.
The new setup will be reflected in the parents’ evening information for all users. The camera will appear if the video conference has been enabled.
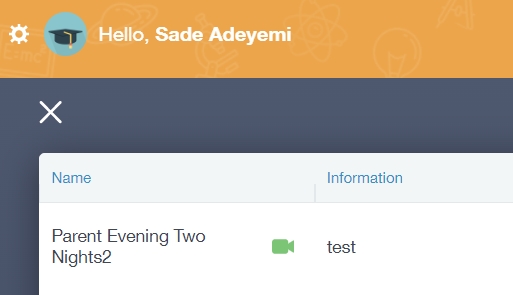
If the conference has been disabled, the users will not see a camera.
Details
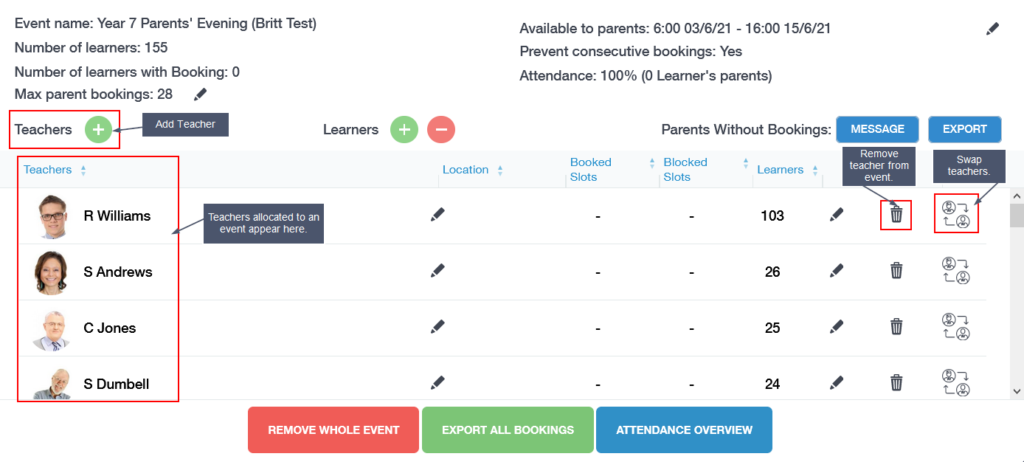
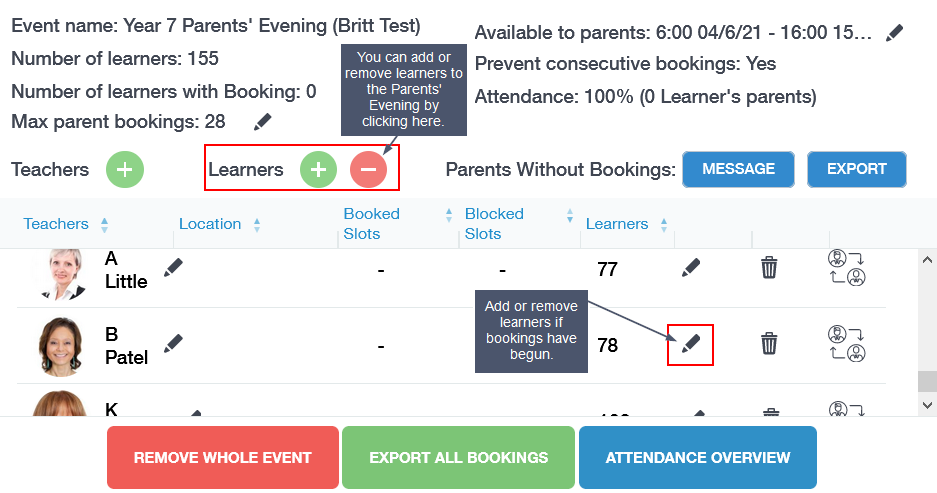
Administrators can modify who is involved in the parents’ evening (teachers and learners), see statistics for the evening, delete the event and view contact options for parents of any learners who have not booked a time slot.
Review the details of your Parents’ Evening event in the Details window.
Select the Details button to view.
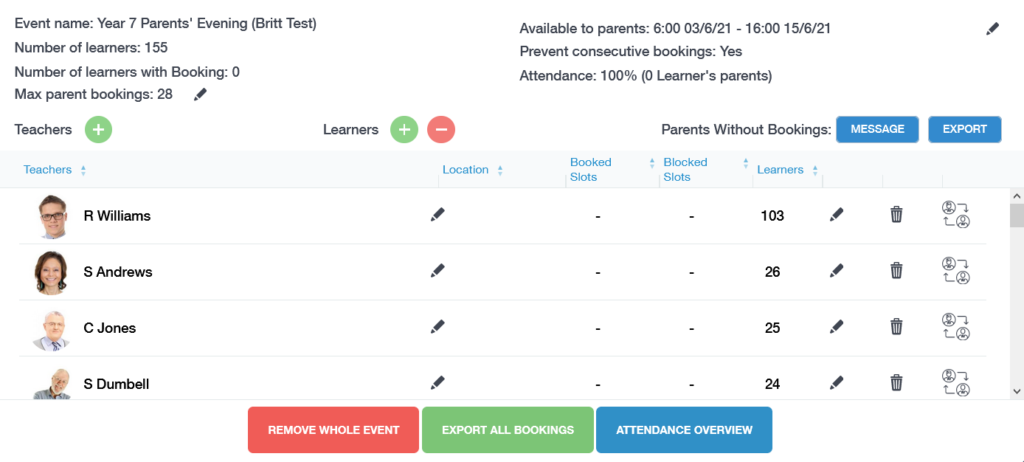
Available to parents: Select the pen icon to modify the booking from date and time and the booking to date and time available to parents. Click update once modified.

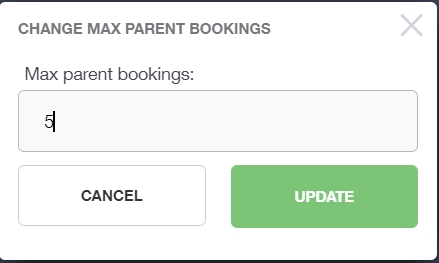
Max Parent Bookings: Modify the maximum amount of bookings allocated to teachers by changing the number of ‘Max parent bookings‘. Select the pen icon to modify this feature.
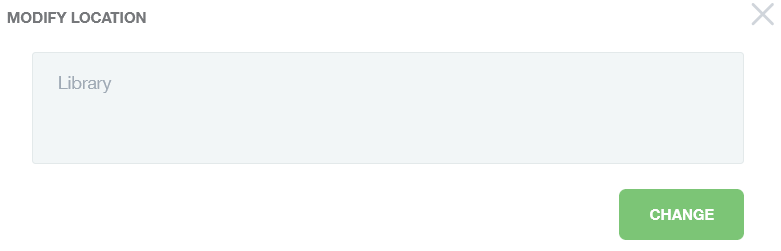
Location: You can include or modify the location of your teachers by selecting the pen icon next to Location in the details table.
Modifying Teachers
Add, remove, or switch teachers for your Parents’ Evening Event.
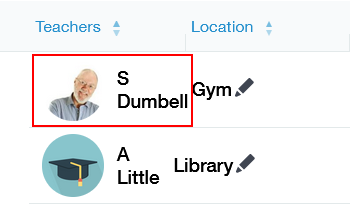
Teachers column: View the teachers allocated to your Parents’ Evening event in the far left column of the table. Scroll to see more teaching staff.
Add Teacher: Add a teacher to your event that is not currently on your teacher list.
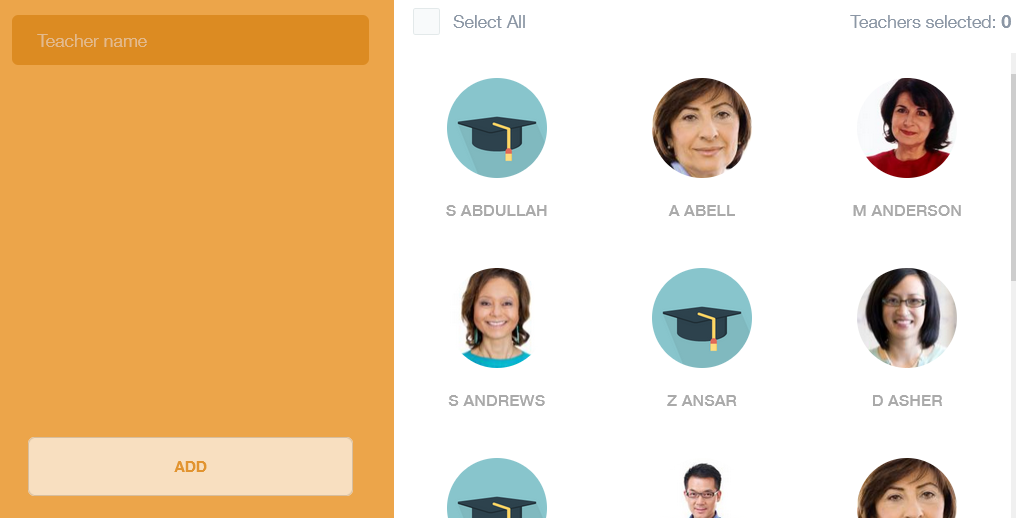
Click the Teachers + button to add the teacher.
Select the teacher(s) from the images on the right or type the name of the teacher you wish to allocate to the event. Click Add when complete.
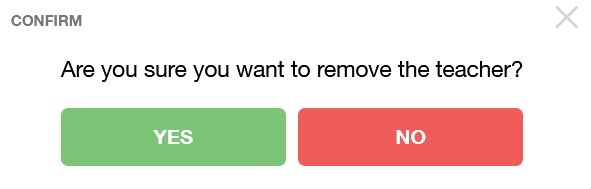
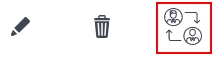
Delete Teacher: Select the bin icon to delete a teacher from the event. You must confirm if you want to remove the teacher from the event.
Please note that deleting a teacher from an event will also delete all bookings for that teacher.
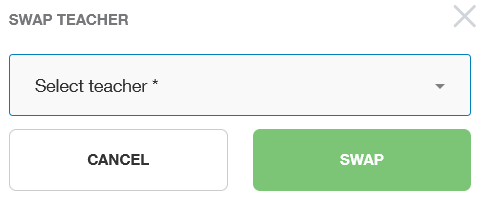
Switch Teacher: If a teacher leaves the school or takes sick leave between the creation of the Parents’ Evening event and the date of the Parents’ Evening event, you may wish for their replacement to act as the class teacher for your event. This can be done using the switch teacher button. Only employees who are not already involved with the event can be selected.
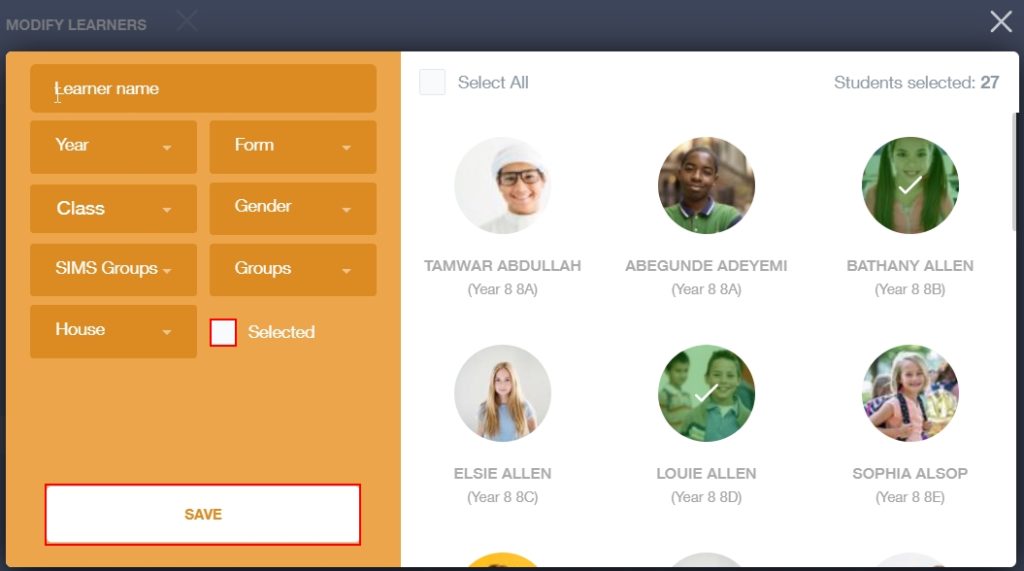
Modifying Learners
The pen icon at the end of a teacher row allows you to modify which learners/parents have that teacher as an option for the event.
Add Learners: You can add/ refresh learners by clicking the Learner + button above the details table. This would be most suitable to use in the event of a new admission, to add a student missing from the event or to re-add a learner in the event their parents’ details have changed since the event’s creation.
Remove Learners: If a learner has left the school before the Parents’ Evening event takes place, you can remove the learner from the event by clicking on the Learner – button.
You can also remove learners from individual teachers by clicking the pen icon, tick the Selected box, locate the learner’s image in the right hand and untick their image.
Select Save.
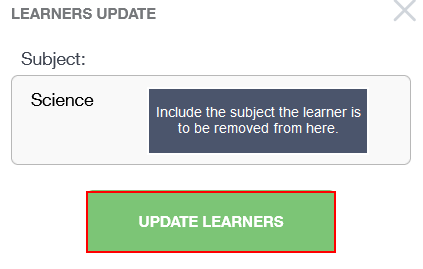
Next, an update window opens. Type the subject(s) you wish to remove the learner/ parents from attending.
Click Update Learners.
Booking on behalf of a Parent: Method 1
There are two methods administrators and/or teachers can use to book on behalf of a parent. One option is to select the Details section on the Parents’ Evening page.
Next, click on the image of the teacher the parent would like to book.
Click the Book button.
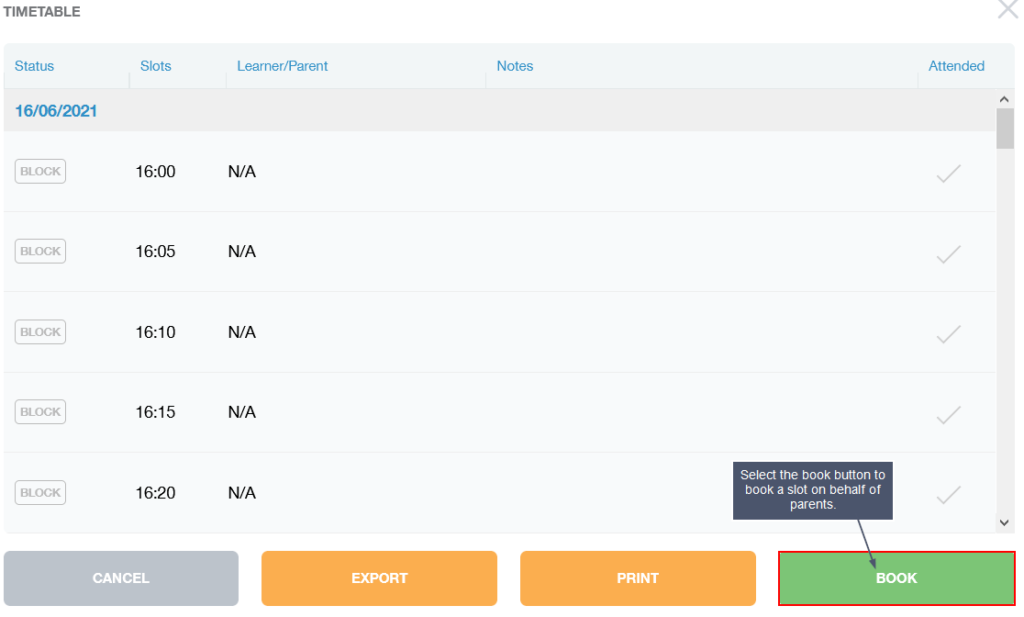
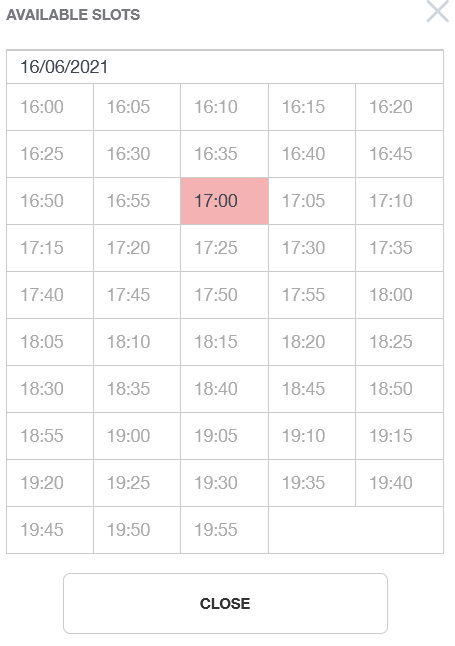
Select the learner and the parent you are booking for. Select Show Slots to reveal the available appointments.

Select from the slots available— any slots in red have been booked.
Once the slot has been selected, it will populate the teacher’s bookings.
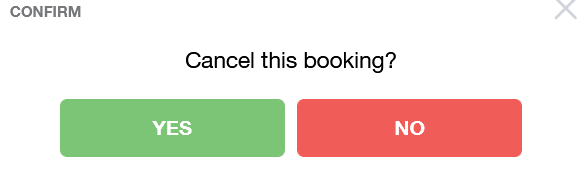
Delete Booking: To cancel a booking, select the image of the teacher whose bookings you wish to modify. Confirm the cancellation of the booking to delete it.
Export: Click on the Export button to create a .csv file of individual teacher bookings.
Print: Click Print to print individual teacher bookings.

Booking on behalf of a Parent: Method 2
The second method administrators or teachers could use is through the Learners icon.
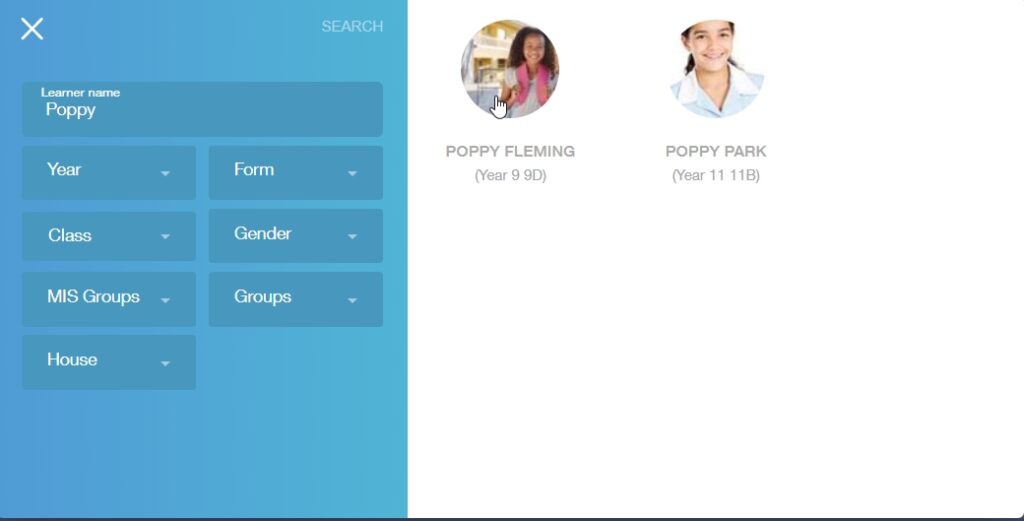
Select the learner you need to book parents’ evening appointments for. You can find the correct learner using the filters to help or you can type in their name. Click on their image to select the learner and to view their screen.
Once on the learner’s screen, go to the Parents’ Evening icon.
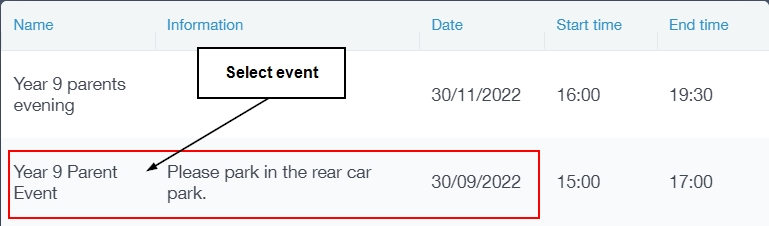
Select the correct Parent Event from the list and click on it to begin booking.
When using this method, you will see a list of the student’s teachers at the top of the table. You can book on behalf of a learner or parent for every teacher on the list. Click on an empty slot to book it.
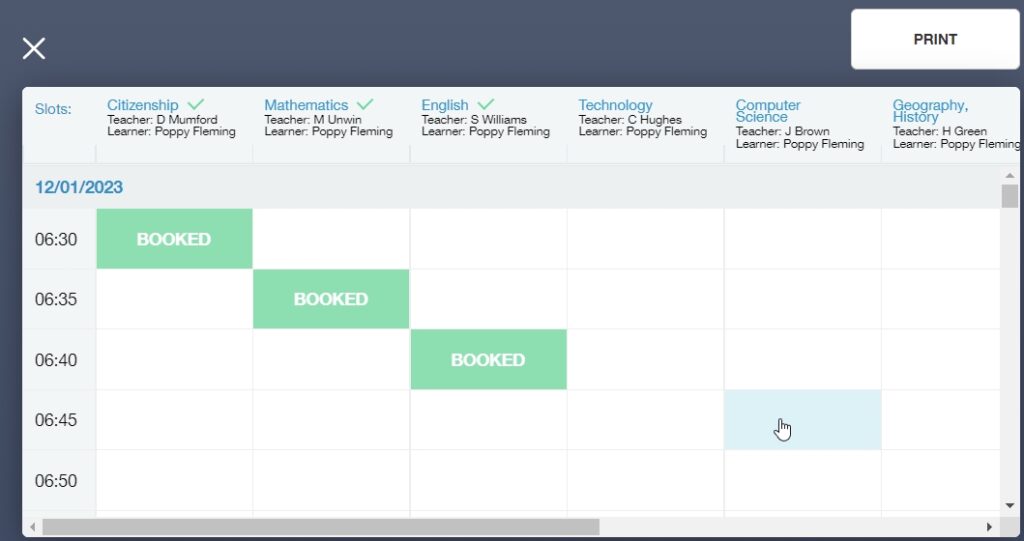
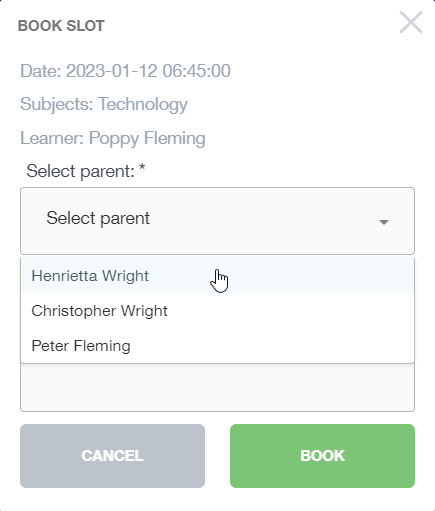
The booking slot window will open where you can select the parent requesting the booking.
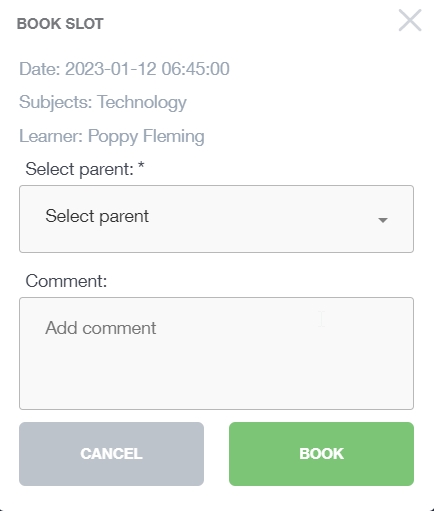
Select the parent requesting the booking from the dropdown list— you can also add comments to a subject if the parent wants to discuss a particular thing. When you have finished adding the details, click the ‘Book’ button and the student’s Booking table will be populated with the new booking.
You can repeat this process for all of the learner’s teachers. When you are finished, you can print the appointments for the learner or parent using the ‘Print’ button.

Parents Without Bookings
Message or export a .csv file with information regarding parents without Parents’ Evening appointments.

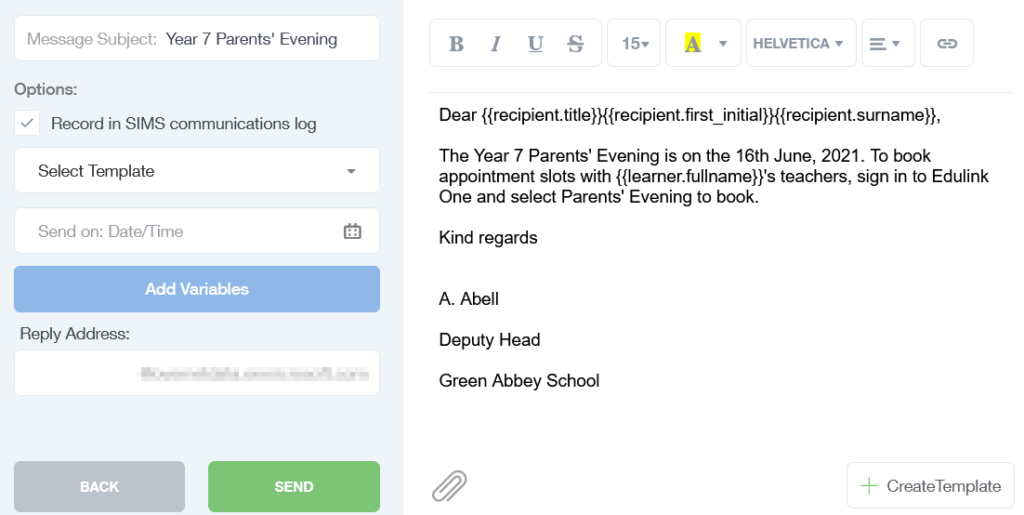
Message Parents Without Bookings: Clicking on Message redirects you to Communicator and automatically populates the parents without bookings into the Parent Recipient Type.
Click Next Step to compose your message.
Compose your message, including any variables you would like to add, and click Send.
To return to Parents’ Evening, exit Communicator and reopen Parents’ Evening on the home page.
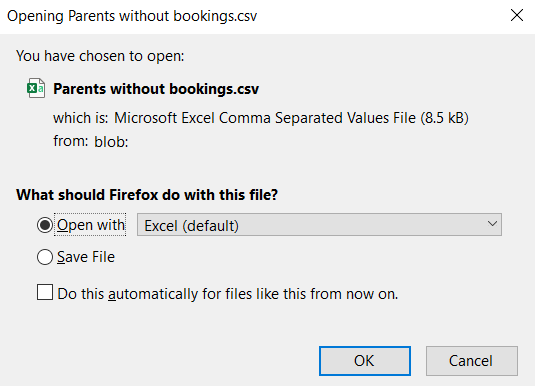
Export Parents Without Bookings: To export Parents Without Bookings, click Export to create a .csv file with the information of parents who have not booked.
Remove Whole Event
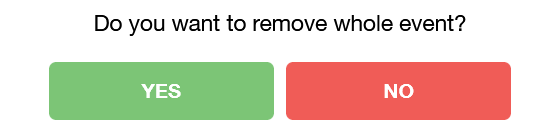
Select the Remove Whole Event to delete an event.

You must confirm this action to proceed. Select Yes or No to remove the event.
Export All Bookings
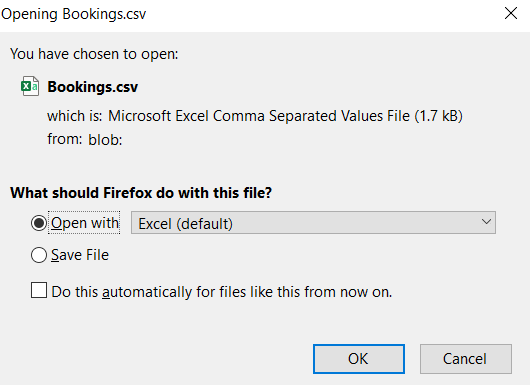
Select the Export All Bookings button to create a .csv file of all Parents’ Evening bookings.
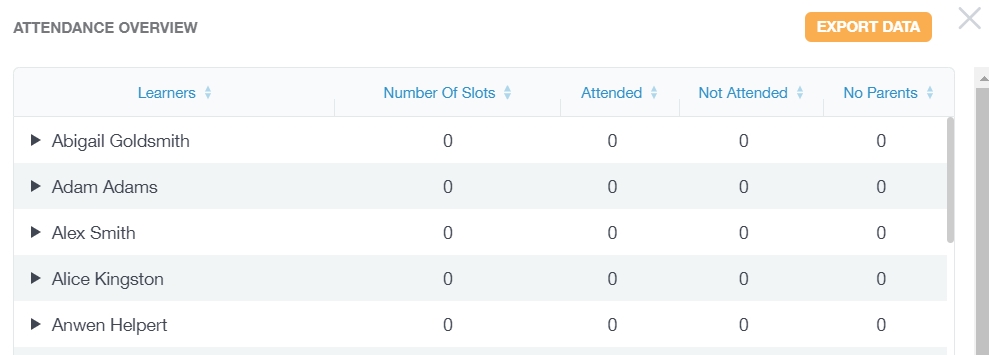
Attendance Overview
To view Attendance Statistics, click the Attendance Overview button.
The overview will show Learners, the Number of Slots booked per learner, the appointments Attended, the appointments Not Attended, and those with No Parents attending the Parents’ Evening event.
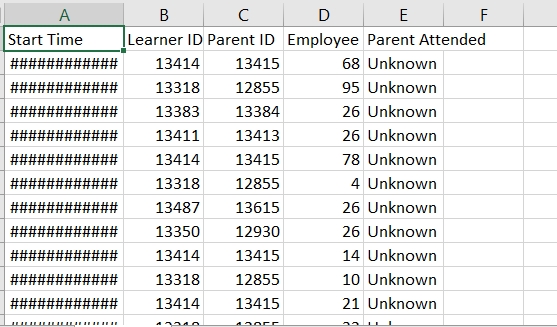
Additionally, you can export the data from the event by clicking on the Export Data button. This will download a zip file that includes four .csv files: Bookings, Employees, Learners and Parents.

Click the back arrow to exit the Parents’ Evening icon.

‘How Do I Modify a Parents Evening?’ Video
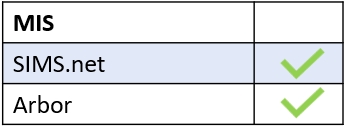
MIS Compatibility