Accessing the Login Screen
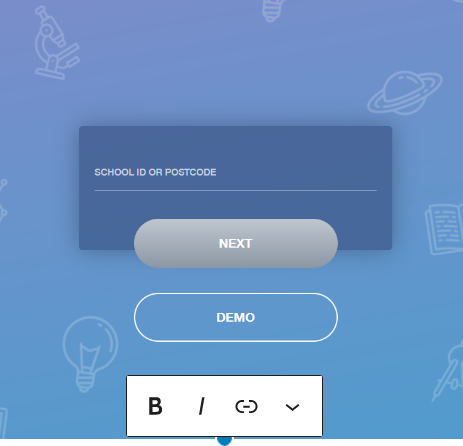
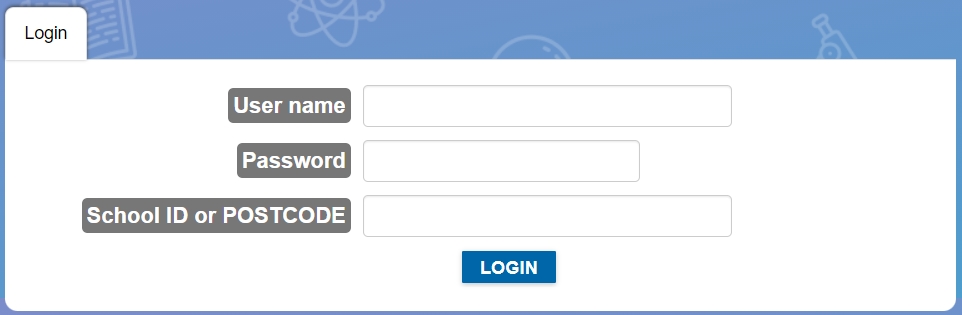
You can access your Edulink One Administration Settings using the web-based user interface at https://www.edulinkone.com. Here you will need to enter your school’s ID (you can also use your school’s postcode).
Then, enter the username and password according to the login method you are using. This would be decided during setup. Schools usually elect to log in using single sign-on with Microsoft or Google or by using LDAP.
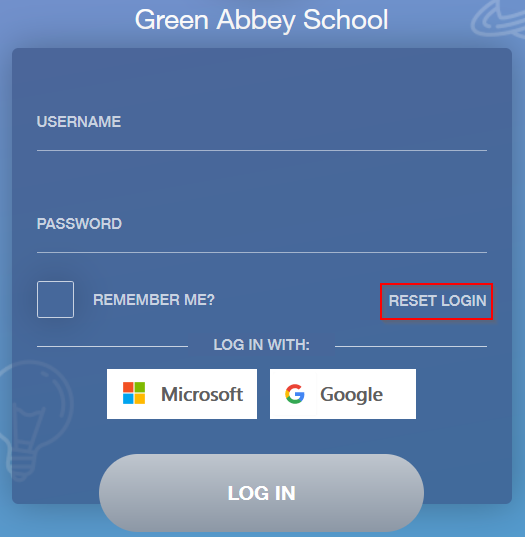
If using LDAP authentication for staff and students, users can use their normal school login credentials to log in to the system. Additionally, Edulink One integrates with existing Microsoft or Google platforms, so you can use the same credentials to log in to Edulink. Overnet Data Support will check to ensure the administrator credentials are working during your initial Edulink One setup.
Configuration and Administration Settings
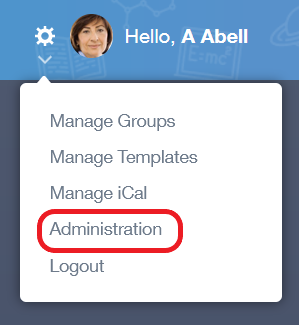
Click on the cog in the top left corner and select Administration.
If your installation is on the Overnet Data Cloud or if you have multiple schools connected to the same Edulink Integrator server, you need to enter the School ID or postcode you are searching for. You should log in with the same credentials you use to log in to the main interface.
The Welcome Tab
The main ‘Edulink One Setup’ screen appears when you click on ‘Administration‘ or log into the setup screen. The Welcome tab includes information regarding setup, support contact, the admin guide, usage statistics and cache refresh options.
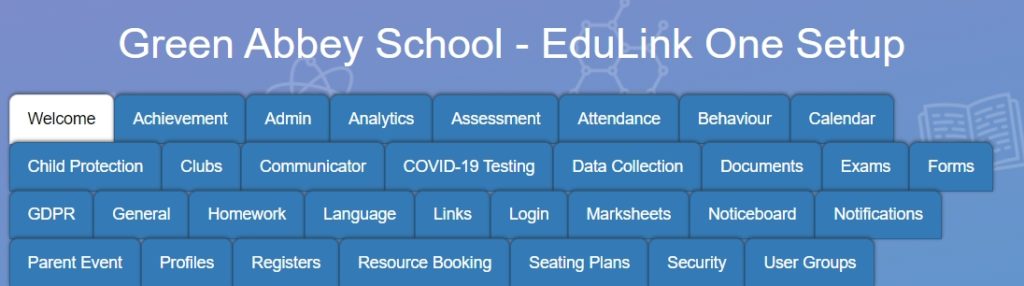
Additionally, the main setup screen features different tabs linking to the functionality of Edulink One. Clicking on a tab allows you to configure a feature, such as Admin.
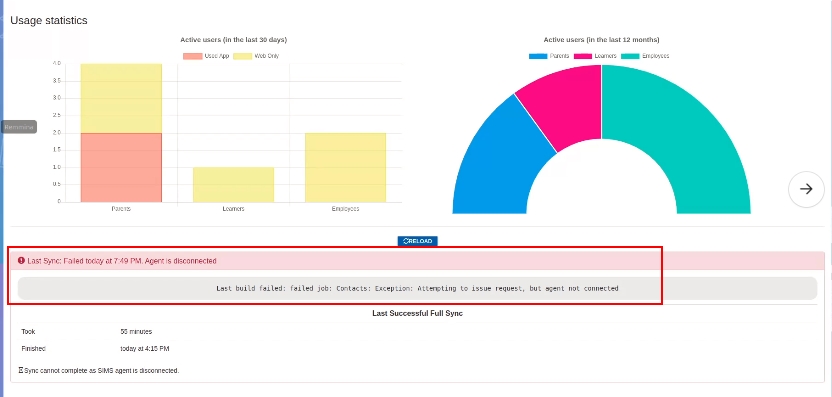
Usage Statistics: Administrators can view the statistics of different users within the last 30 days and the last 12 months. The colours represent the percentage of users that are most active on Edulink One and on which platform they access most.

Cache Status
You can also view your cache status on the Welcome page. It will show when your last full cache has taken place and how long it has taken to run.

The status will show up as green if the last cache is ‘OK’; however, if there is an error, it will turn red and will prompt you as to what the error could be.

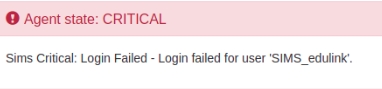
Agent Status
If your Edulink One Agent is OK, no status update will show and you can continue as normal. However, if there is an issue with the Agent, two possible Agent status prompts will appear: yellow indicates a warning and red for a critical agent state.

Running a Cache
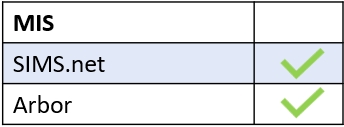
If you would like to run a cache refresh, log in to Edulink One and click on the Administration settings in the cog at the top of the screen. Then, scroll to the bottom of the Welcome screen (Setup) and select one of the following buttons: Sync All (SIMS and Arbor), Sync Documents Only, Sync Students + Applicants, Sync Contacts + Student Relationships, Sync Employees and Sync LDAP(SIMS only). Selecting one of the cache buttons will automatically begin a sync.

You will be notified if a cache is running, e.g. a documents cache by a message stating that a ‘cache sync in progress’. It will also tell you when it started and what type of cache it is.

However, if a cache is currently running and you need quick access to a specific sync, e.g. documents, you can click the sync you need to override a sync in progress. A message will appear asking if you would like to continue and interrupt the current sync; if you press ‘Yes’ this will force a cache and you will have your information much faster, usually in 15 minutes.

A ‘Documents Only‘ cache allows you to pull through reports and documents from your MIS.

For a ‘Students + Applicants‘, ‘Contacts + Relationships‘ and ‘Employees‘ cache, this will pull through data relating to the different groups, whether it be adding new students or employees or updates to information required for data collection.

Lastly, the ‘LDAP‘ cache will allow administrators to pull through information to Edulink One from their LDAP faster, for example, if you’ve added an email for a new member of staff that you need to pull through.

Additional Information
For information regarding the setup for each individual feature (tab), see the categories on the Knowledge Hub homepage.
MIS Compatibility