What is the Edulink Agent?
The Edulink Agent is a lightweight application that needs to be installed on a server at your school. This Agent acts as a connector between Edulink One and the other school servers such as your MIS, Active Directory and Cashless Catering.
What do I need for installation?
-Access to a server running SIMS.net
-A copy of the Edulink One Agent installer
-A registration code
-Access to add a user account to SIMS.net
-Access to Active Directory (optional)
-Access to your Arbor site
-A copy of the Edulink One Agent Installer
-A registration code
-A code generated by the Edulink Agent
-Access to Active Directory (optional)
How Do I Install Edulink One?
Run the Edulink Agent installer that has been supplied to you. The server requires access to the internet to be able to complete installation.
You will need to enter a Registration Code. This should have been sent to you by Overnet Data (OND). If this is not the case, please contact them to request a code.
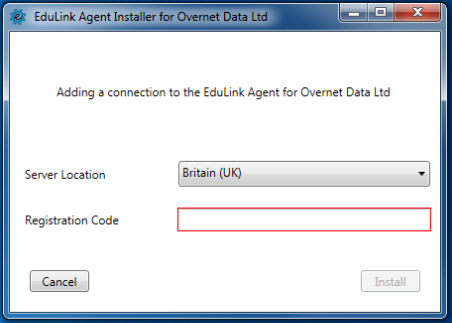
Once you have registered a valid Registration Code, click Install.
If this is a new installation of Edulink Agent, the installer will be downloaded and will run.
Alternatively, if Edulink Agent is already installed, it will add the new connection settings for the Edulink supplier.
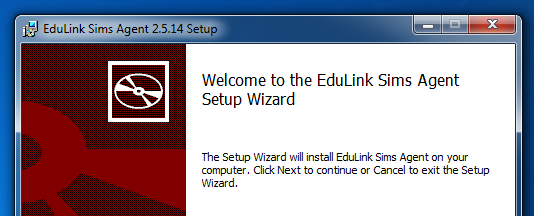
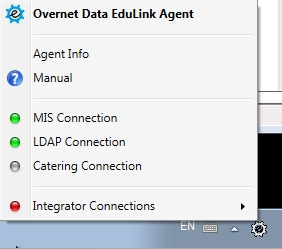
Once the installer has finished installing it will automatically start the Edulink Agent Service and Console. The Edulink Agent Console icon will appear in the system tray.

If this is a new installation rather than an additional integrator connection, two configuration windows will automatically open.
You will need to create a new user for SIMS.net account with the username “edulink”. The username must match this exactly for security reasons.
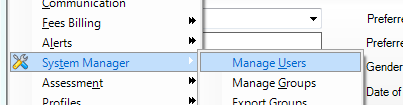
To do this log in to SIMS.net and click on Focus→ System Manager → Manage Users. Click on the New button located just below the Find User text.

Enter edulink as the surname and click continue. You will have to enter a forename for the account, make sure you take note of the password and click Save.
Run the Edulink Agent installer that has been supplied to you. The server requires access to the internet to be able to complete installation.
You will need to enter a Registration Code. This should have been sent to you by Overnet Data (OND). If this is not the case, please contact them to request a code.
Once you have registered a valid Registration Code, click Install.
If this is a new installation of Edulink Agent, the installer will be downloaded and will run.
Alternatively, if Edulink Agent is already installed, it will add the new connection settings for the Edulink supplier.
Once the installer has finished installing it will automatically start the Edulink Agent Service and Console. The Edulink Agent Console icon will appear in the system tray.
How Do I Configure the MIS?
The Agent attempts to populate the settings from your SIMS “connect.ini” file, but if this fails, this will need to be done manually.

Now enter the configuration settings to allow the Edulink SIMS Agent to connect to your SIMS installation:
Supplier: Select your supplier (ESS SIMS) from the dropdown menu. Once you have selected the supplier, this will grey out after you save your settings.
Server Address – Enter the SIMS SQL database server name and SQL server instance separated by a backslash (this may be pre-populated, but if you are unsure this information can be found in your SIMS connect.ini file).
Database Name – Enter the name of the SIMS database, e.g. SIMS.
Password – Enter the password for the “edulink” user account you created in SIMS.net.
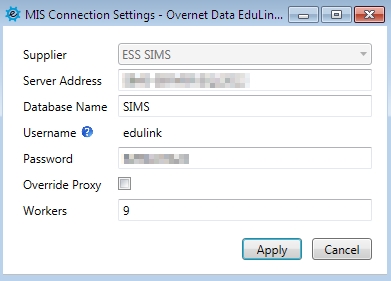
Override Proxy: Tick the override proxy field (if required) to open the address validation settings.
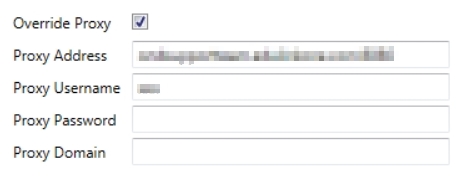 Type in your Proxy Address and your Proxy Username (if required— note add xxx to the proxy username if you don’t have one), then fill in the other fields as necessary.
 The Workers setting refers to the number of processes connecting into SIMS. This is usually prepopulated and the default is 5. It is recommended that you do not change this setting without consulting Overnet Data.
Then, click Apply.

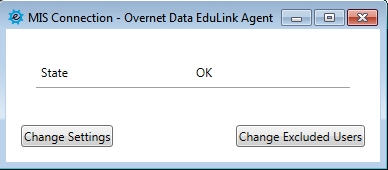
In another window that opens, you will see the Status is showing as “Requests Outstanding”. This means we are requesting data from SIMS that you have not yet given the authorisation to receive.

If the status differs from “Requests Outstanding”, please check the Network Connection status is displaying as “OK”. If this is not the case, you may need to enter proxy details. To do this click on the Connection Settings button.
Tick the Connect Via Proxy checkbox and enter the proxy settings required for your school.

If the Network Connection is still not displaying “OK”, please check your school’s filtering and firewall settings. If problems persist, and you do not manage this at your school, please contact your broadband or web filtering supplier.
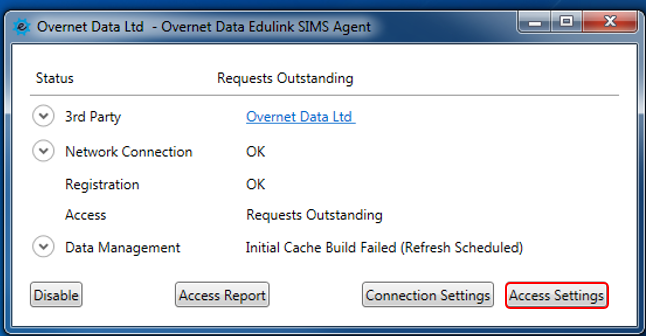
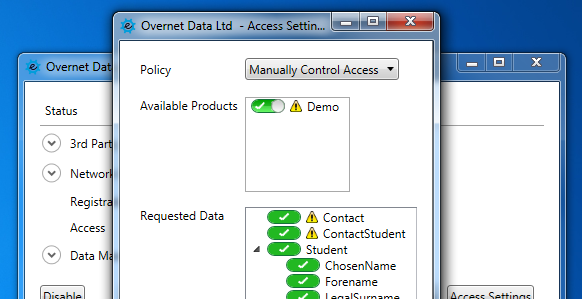
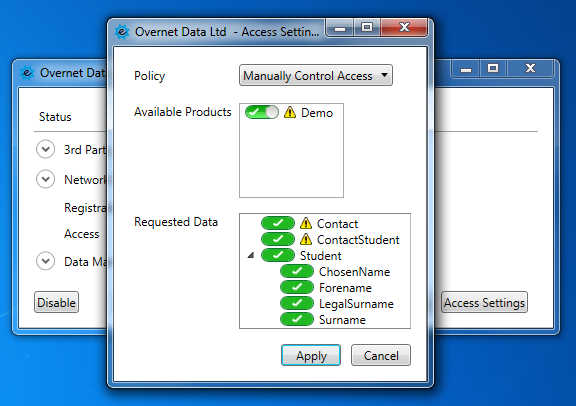
Click on the Access Settings button and this will display the information that your supplier has requested access to. From the Policy dropdown menu, you have 3 options:
Grant All Access Requested – This will allow the supplier access to any information they request now and in the future. This option should be used with great caution.
Manually Control Access(Recommended) – This shows you the data that has been requested by the supplier. You need to manually authorise access to the fields requested. If the supplier requires additional fields in the future, you will need to authorise the new fields.
Block All Access – This means the supplier has no access to your data.

If you have chosen to Manually Control Access, you need to enable the product by clicking on the product toggle switch so it changes from off to ON. This will then display the fields requested by the supplier. Any items that have a yellow warning icon next to them are items you have not previously given access to the supplier.
Once you have authorised access to the necessary fields, click Apply.
A popup will appear asking you to click Confirm. This grants the supplier access to the necessary fields before enabling any changes.
You have now configured the access settings. If the connection status is not “OK”, please contact your MIS support provider.
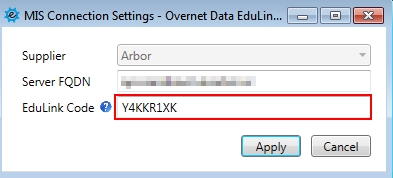
Select your Supplier (Arbor) from the dropdown menu. Once this has been done, the supplier field will grey out.
Enter the server’s fully qualified domain name (Server FQDN).

Next, copy the Edulink Code which you need to enter into the Edulink User Defined Field in Arbor.
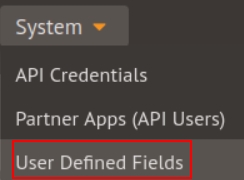
Open your Arbor MIS and click on ‘System‘ in the dropdown menu and then on User Defined Fields.
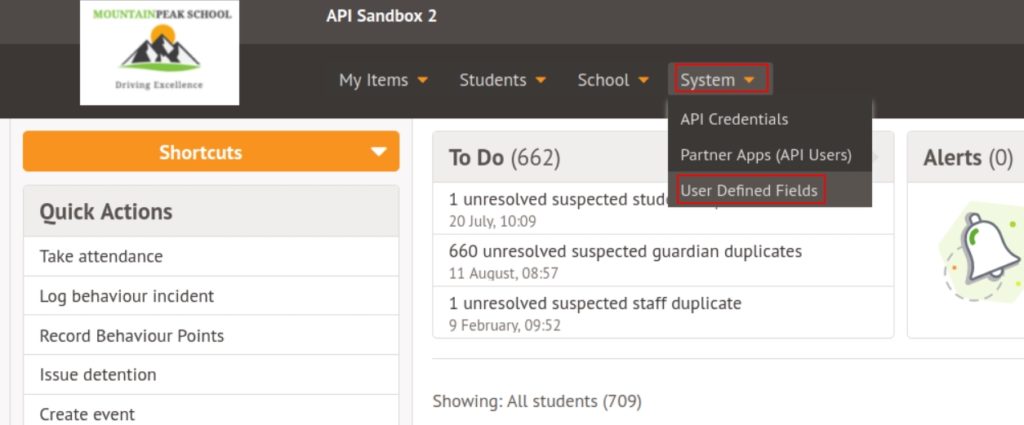
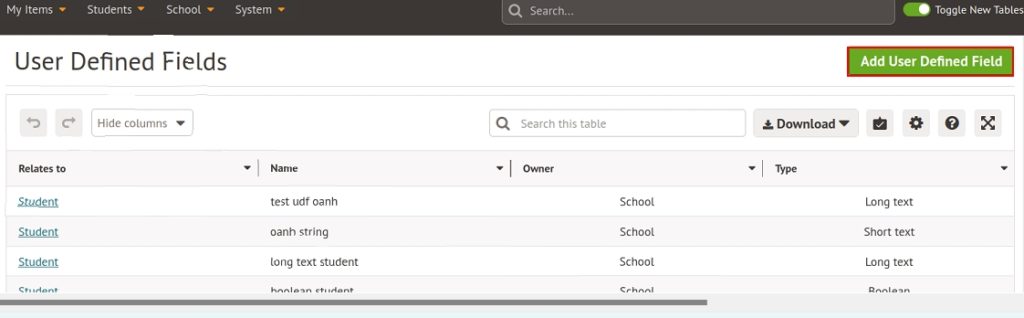
Once in the User Defined Fields screen, click the ‘Add User Defined Field‘ button.
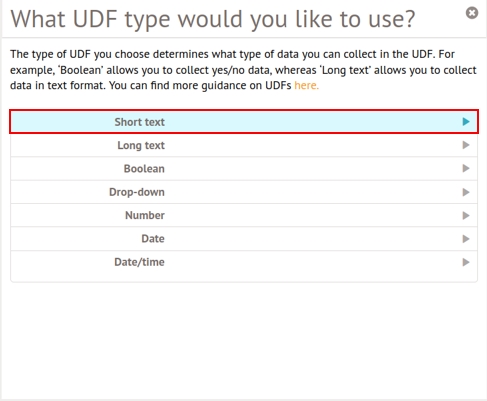
Select the ‘Short Text’ UDF format.
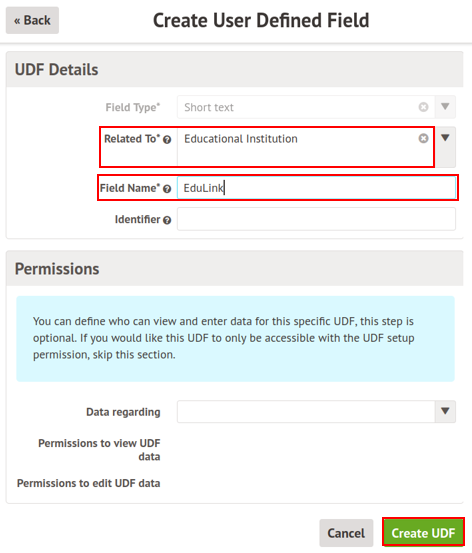
Fill in the Related To field by selecting ‘Educational Institution’ and then enter ‘Edulink’ as the field name. Lastly, click Create UDF to add this to your school details.
Once you have created your UDF, go to the School dropdown menu in Arbor and select ‘School Details’.
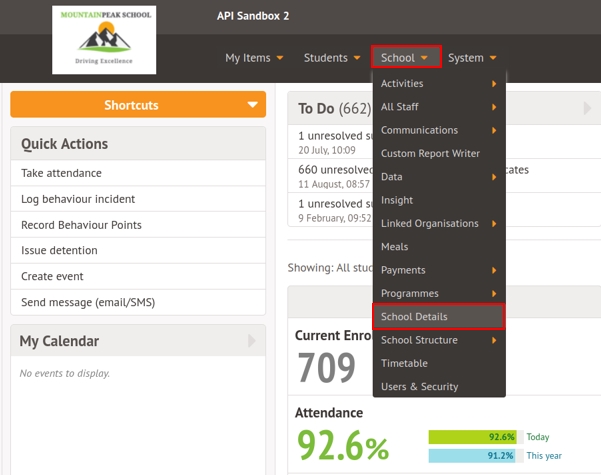
Locate the User Defined Fields section and click on the UDF called ‘Edulink’.
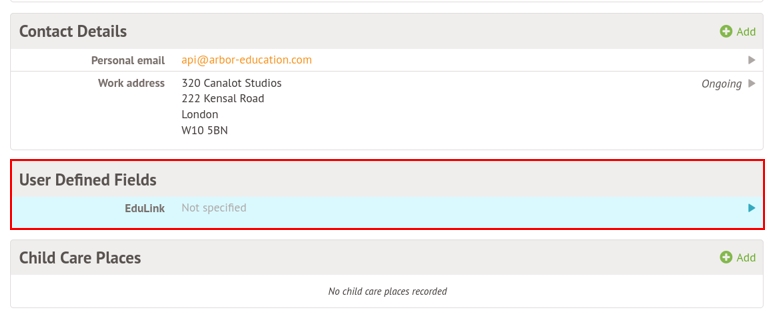
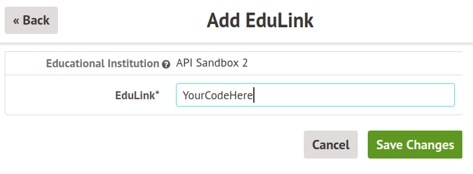
Input the code you copied from the Edulink Agent in the Edulink field and click Save Changes.
Edulink One is now connected to your Arbor MIS.
How Do I Configure LDAP Authentication?
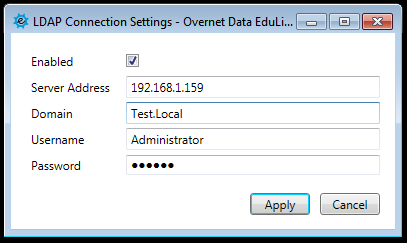
If you require LDAP authentication for your Active Directory through the Edulink One app, then select LDAP Connection in the system tray on the agent config. 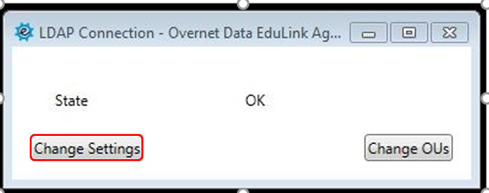
Select Change Settings and configure the LDAP server address and user settings. The user must have write back privileges to your LDAP. Click Apply.
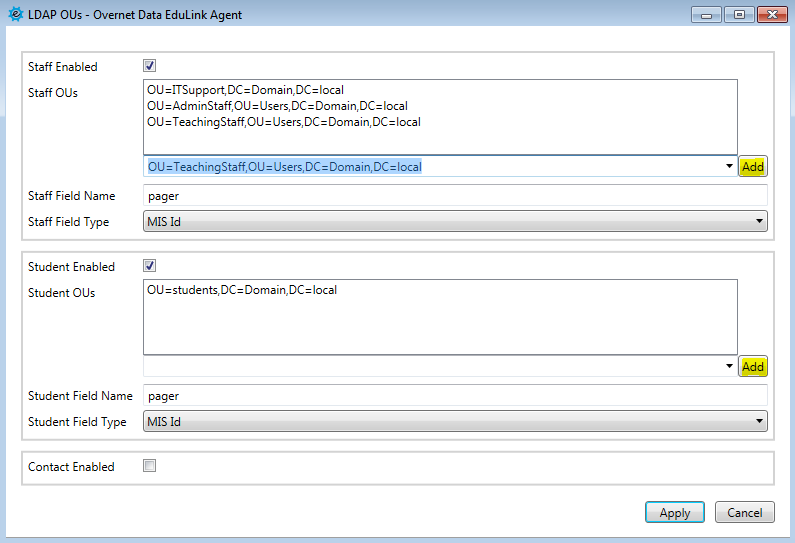
Once the LDAP connection has been established then configure the OUs.
Click on the Change OUs button.
Enable the Staff and Student tabs (also Parents if they have LDAP account) by ticking the “Enabled” boxes and select the relevant OUs where your users reside from the dropdown menu. Click on the Add button to add the OU.
Add the LDAP Field Name where the Agent will be storing the MIS ID. OND recommend using “pager” where possible. If this is in use, then you could use the “Office” field called “physicalDeliveryOfficeName” in the LDAP schema.
Note the field names are case sensitive.
This ID is used to match users in SIMS to users in LDAP. Once the match is made, we add the ID into LDAP.
Finally, select which ID will be used from SIMS. (image here would be useful)
Staff can use the “MIS Id” and “Staff Code” or students “MIS Id”, “Admission Number”, “UPN” and “ULN”. By default, we use the “MIS Id” if not already populated.
If the ID already exists in your LDAP, then select as appropriate.
Click the Apply button to save the changes.

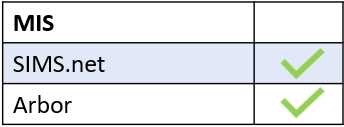
MIS Compatibility for LDAP
Using Google and Microsoft for Logins
If your school is not planning on using LDAP for the authentication method, you must ensure that you have inputted your school’s Office 365 or Google addresses as the Primary (if your MIS requires this) in your school’s MIS.
Once your Microsoft/Google email addresses have been input into your MIS, you can then follow the instructions in this link to help set up logins for these systems.
Your users can then log in following one of the methods outlined in Logging into Edulink One.
MIS Compatibility for Google and Microsoft
Your Edulink One is now installed and configured.