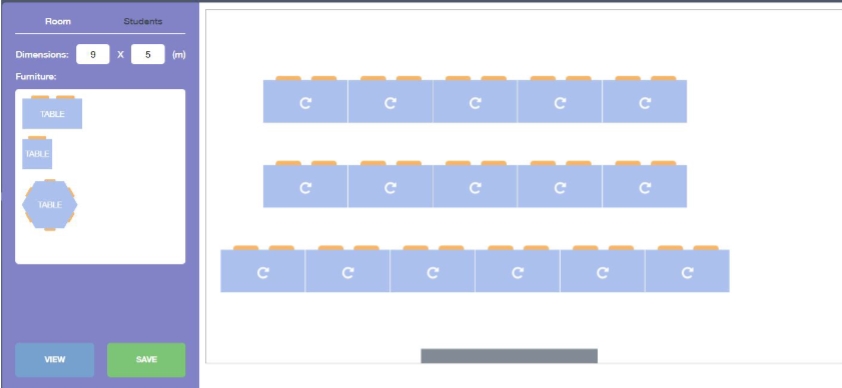
Creating seating plans in Edulink One is a relatively simple process. There are some aids built in to help make seating plans more responsive for teachers.
To elaborate, seating plans in Edulink One are displayed based on scenarios. The first scenario that matches Edulink One’s coding will determine what is displayed to the user. Moreover, the teacher is the teacher assigned to this register on SIMS.net, not the end-user, e.g. cover supervisors.
Edulink One uses this logic: shared rooms and classes are configured based on the initial Room setup, the Employee assigned to the class (Teacher, LSA, SEN Co, etc…), Group (e.g. Year 10), and Group Type ( e.g. X band/ Y Band).
The order of checking for the existence of Seating Plans is:
- Edulink One first looks to see if there is a plan for this teacher and this
teaching/form group in this room. If there is, it displays it. (If the teacher has set up their room the previous year and they are still in that room, the table layout will remain— this teacher will need to redo the layout from scratch if they plan on changing their room layout). - If there isn’t, it checks to see if there is a plan for the same teaching/form
group in this room (different teacher). If there is, it will display the plan
to include the furniture and the students which can be altered to your
liking. - If it can’t find either of the above it checks to see if this teacher has a
plan in this room with any teaching group. If they do it will display the
table layout only (because there’s not one with this group of students). - If none of these criteria is met, Edulink One checks to see if there is a table
layout. If there is, it displays it. - If there isn’t any of the above, Edulink One displays an empty room.
Shared Rooms and Classes
Edulink One will match a shared room layout for all the employees that use a room. This means that if a classroom is assigned primarily to one teacher, and they have set up the room layout, all the other teachers/ employees that use the room will have the same layout set up in their register for their class/group that use the same room. This saves time for the other employees that use the room.
Same Room, Different Class, Different Teacher
Scenario 1
Mr Jones teaches English in E3. He has set up the room and has created a seating plan for his Year 11 English class. However, Mrs Burton teaches Year 9 PE in E3 on a Tuesday, period 2 and she needs to create a seating plan. Mr Jones’ room layout will automatically appear in Mrs Burton’s Year 9 PE seating plan, all she needs to do is drag and drop her learners into the layout provided by Mr Jones.

Same Room, Same Teacher, Different Class
If only one employee primarily uses the same room, Edulink One will use the room layout you create across all of your classes that use the room, meaning you will only need to configure the furniture layout for one class and the same room layout will be used for all of your other classes that are in that room.
Scenario 2
Miss Chen teaches Year 10 Triple Science in Science Lab 1. She also teaches Year 8 Science, Year 9 Science and Year 11 Biology in the same room. When Miss Chen completes her seating plan for Year 10 Triple Science, all of her other classes will have the same room layout (furniture only) that Miss Chen created for Year 10 in Science Lab 1. All Miss Chen needs to do is drag and drop the learners from her other classes into the room layout she created.
Shared Room and Shared Class (Same Room, Same Class, Different Teacher)
If two or more employees share a class AND a room, Edulink One will use the main teacher’s seating plan to populate the seating plan of the other teacher or employee(s) that share the group, meaning all learners will remain in the same seating arrangement as the primary teacher. Furthermore, the other teacher can still customise the seating plan based on their preferences, or they can choose to keep the same layout as the teacher who created the initial seating plan for that class.
Scenario 3
Mr Sharif and Mrs Abioye share a Year 9 Maths group, 9xMa2. Mr Sharif has the class 3 times a fortnight in Mrs Abioye’s classroom, M9 and Mrs Abioye has them for 4 times a fortnight in her room. Mrs Abioye creates a seating plan for 9xMa2 in M9. When Mr Sharif clicks on the Register for 9xMa2, and then Seating Plans, he sees the room layout for M9 and the learners for 9xMa2 already in the seating plan because Mrs Abioye has already done the seating plan. This saves Mr Sharif a lot of time.

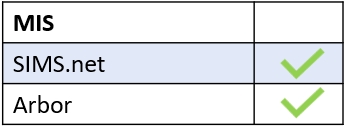
MIS Compatibility