Create seating plans to respond to the needs of your classrooms in the Registers function of Edulink One.

An Introduction to Seating Plans
To determine what seating plan to create, Edulink One selects the first scenario that matches and will use that scenario to determine what is displayed to the teacher or member of staff; for instance, if someone has already created a seating plan for that room. Moreover, the teacher is the teacher assigned to this register on SIMS.net, not the end-user, e.g. cover supervisors.
The order of checking for the existence of Seating Plans is:
- Edulink One first looks to see if there is a plan for this teacher and this
teaching group in this room. If there is, it displays it. - If there isn’t, it checks to see if there is a plan for the same teaching
group in this room (different teacher). If there is, it will display the plan
to include the furniture and the students which can be altered to your
liking. - If it can’t find either of the above it checks to see if this teacher has a
plan in this room with any teaching group. If they do it will display the
table layout only (because there’s not one with this group of students). - If none of the criteria is met, Edulink One checks to see if there is a table
layout. If there is, it displays it. - If there isn’t any of the above, Edulink One displays an empty room.
Getting Started
The first thing to do at the beginning of the school year is to create a table layout in Seating Plans as the first table layout created for your room is saved for anyone using it. It’s a good plan to do this as the layout will remain for anyone in the room, just be aware that the seating plan you create for a room can impact other teachers.
Furthermore, if there are teachers who teach the same class in the same room, it’s worth saving the entire seating plan with the students added so they benefit from the students being seated. They would be able to amend it and not affect the original plan, as any amendments you make to your seating plan after a ‘save’ will not be reflected anywhere else except for the same class/room.
Log in to Edulink One using the app or website, and locate the Registers icon on the homepage.
In the register, select the class you would like to create a seating plan for and click on it.
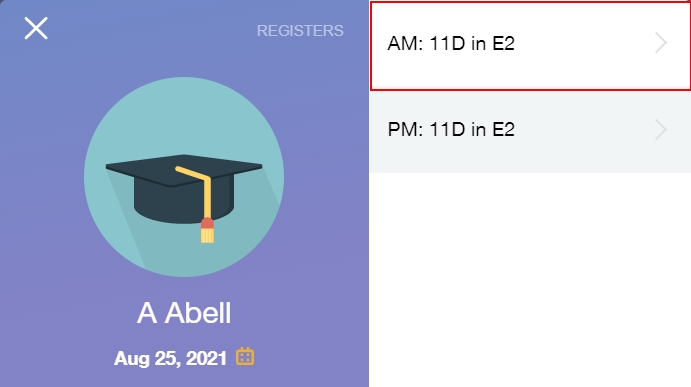
Once the register window opens, select the Seating Plan tab in the top left corner of the pane.

Adding Furniture
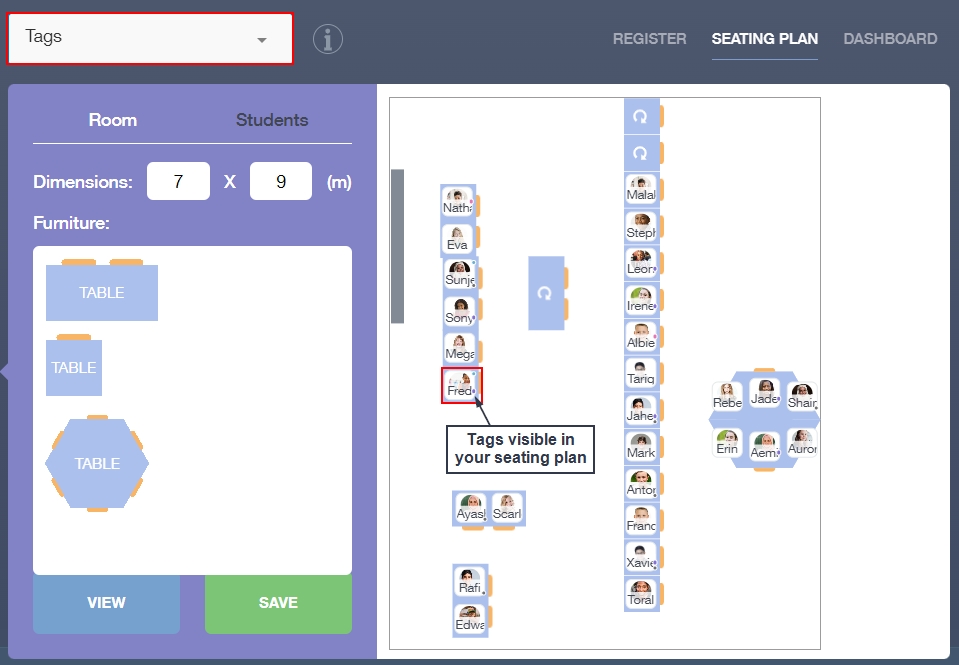
Firstly, begin with Room. Enter the dimensions of your room (meters), if you don’t know the dimensions, you may be able to ask your site team or you can estimate the measurements.
Next, drag and drop the board into the white box to the right, positioning it to where it is in the room. Then, drag and drop the table type you would like to use into the box, mirroring the layout of the room you have set up.
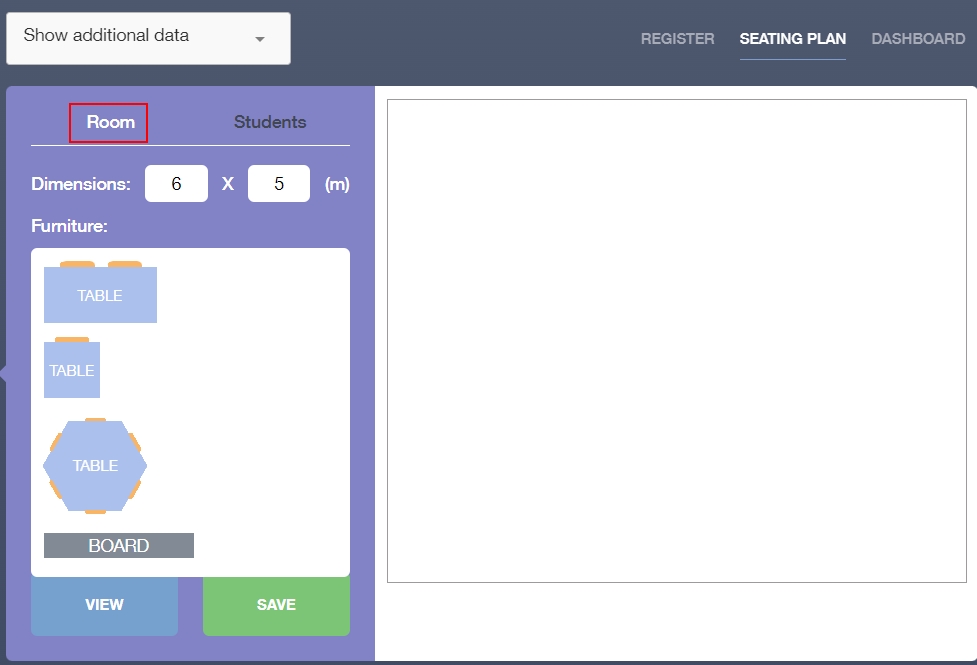
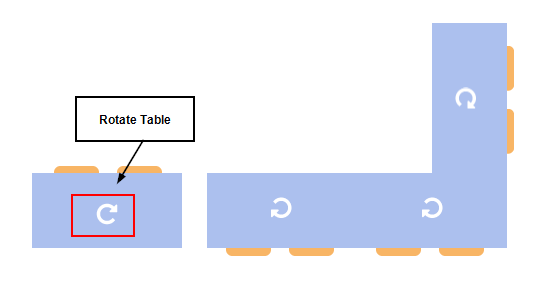
If you need to turn the desks, e.g. to create group layouts or E/L shapes, use the rotate icon in the middle of each table. Click on the rotate icon to rotate the table into the correct position.
Adding Learners
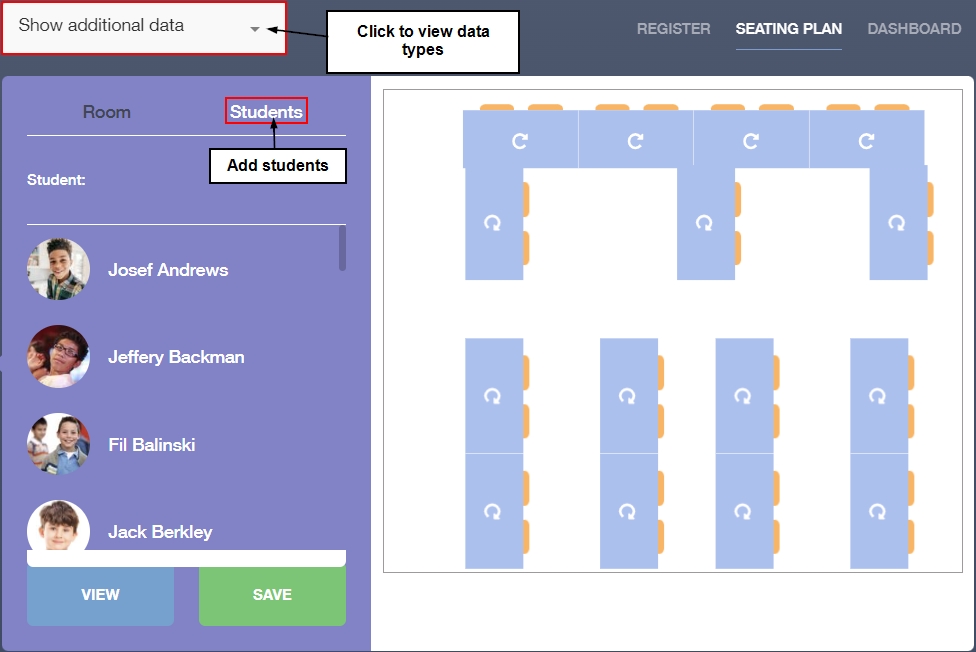
Add learners to your room once the furniture layout is complete. Click on the Students tab to add your learners to your room.
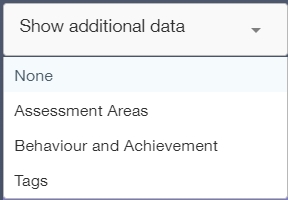
If you would like to see additional information about your learners, such as SEN data, select Additional Data from the dropdown menu at the top of the seating plan screen. You can select from Assessment Areas, Behaviour and Achievement and Tags.
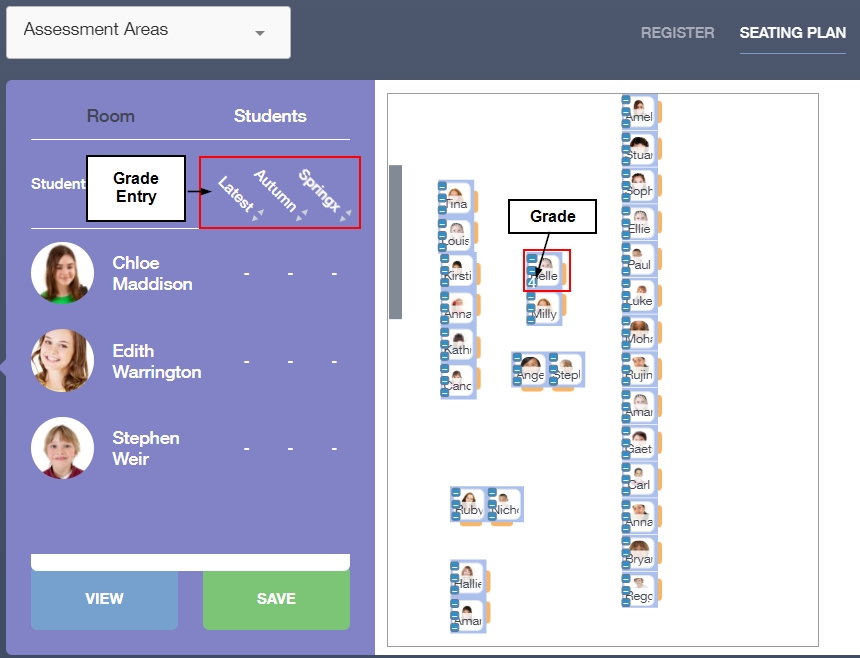
Assessment Areas are part of Additional Data and are customisable in the Seating Plans tab in the Administration Settings. However, it is limited to three sets of data due to user interface restrictions. Schools select the three areas they wish to display and the grades (or other data) will be displayed in the seating plan.
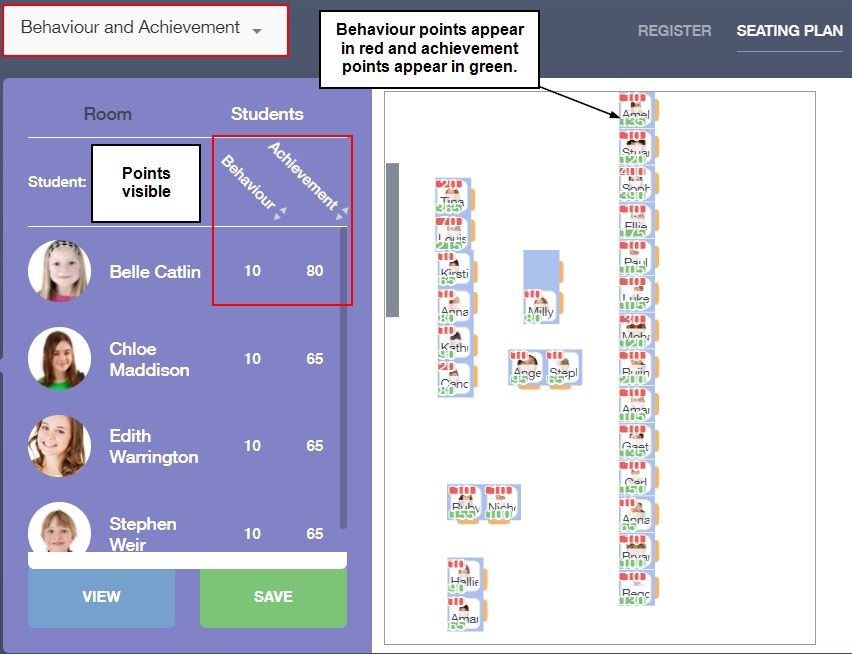
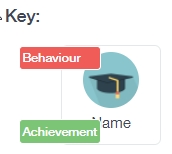
The Behaviour and Achievement option allows you to view behaviour and achievement points for pupils in your seating plan.
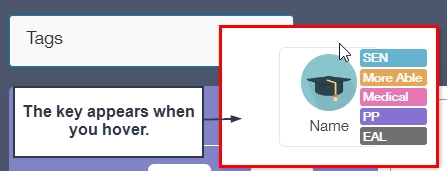
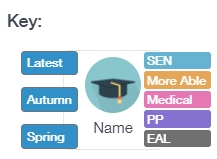
The Tags option allows you to view data regarding learners’ status, such as SEND, PP, G&T and EAL.
There is an information icon next to the dropdown menu for Tags. If you hover over the tag, then you will see a key with information regarding the different tag meanings.
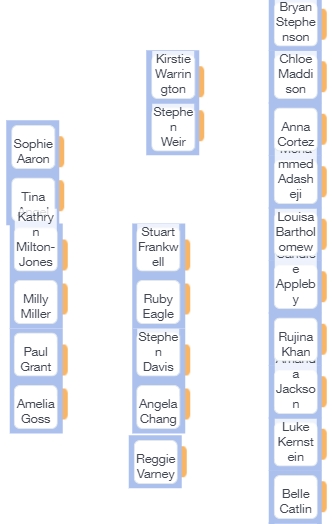
Once you have selected the data, drag and drop the learners into the seating arrangement.
Click Save when you have completed your seating plan or to save the seating plan to return to it later.
Viewing, Printing and Downloading Seating Plans
To view your seating plan and to print it, click on the View Button.

Show Additional Data: Select the data you would like to view from the Show Additional Data dropdown menu. This will show the data on the printable/downloadable version of the seating plan.
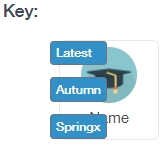
Key: The key explains the meaning of the data sets. The Assessment Area key outlines the data entry areas for the learners, the Behaviour and Attainment key outlines the behaviour and achievement points for each learner, and the Tags key holds the meaning of colour-coded data circles, for instance, Pupil Premium (PP) students appear in purple.
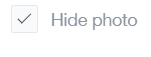
Hide Photo: Select Hide Photo if you do not want the photo of the student to be visible on a printed or downloaded version of the seating plan. Additionally, hiding a photo will make the learner’s full name visible.
Lastly, click the Print/Download button to print or download a file of the seating plan.
Downloading Seating Plans
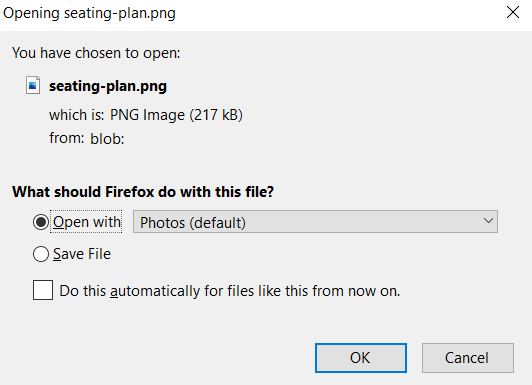
To begin with, choose to open the file by selecting Open With or save the file by selecting Save File. Depending on what application you choose to open your seating plan with, you can save or print the file in that application (e.g. Photos).
If you save your file, it will be available in Downloads.

To return to the main register, click the X in the top right-hand corner. Enter the Seating Plans tab to see if your seating plan has been saved. Your seating plan will be located in the white box and will be configured to the specifications you entered.
‘Creating Seating Plans’ Video
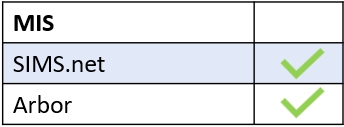
MIS Compatibility