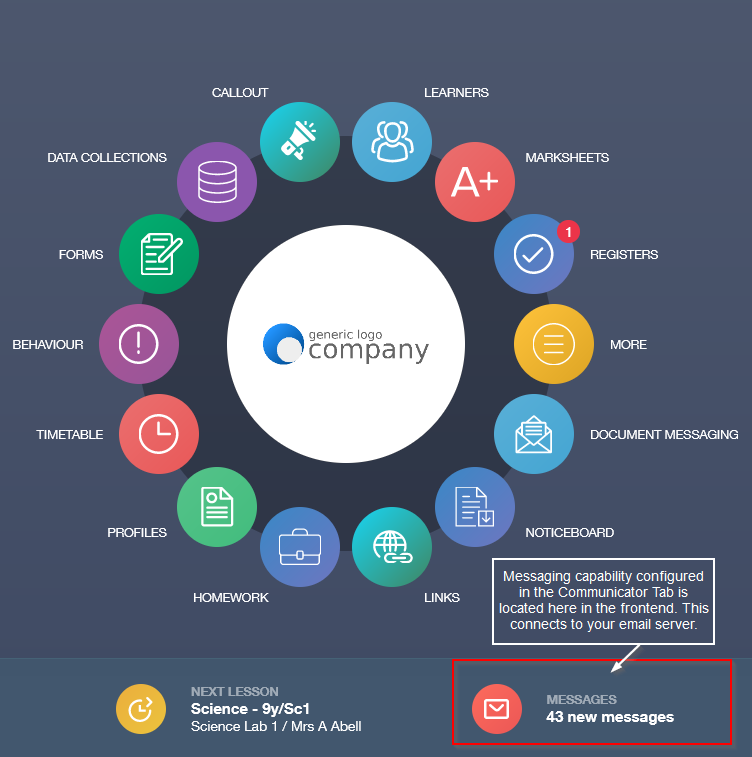
You can send messages in Edulink One by clicking the messages icon at the bottom of your screen.
To type a new message, select the New Message button above your reading pane.

User Types
Select the type of user the message is to or regarding, e.g. if your message is regarding a pupil, select the pupil and then you can choose who the message will go to (teachers, parents, form tutor, etc.) in the next step. There are four different options for administrators, but these options will be different depending on the user (employees, parents, learners) and depending on how you have configured your Communicator tab in the administration settings.
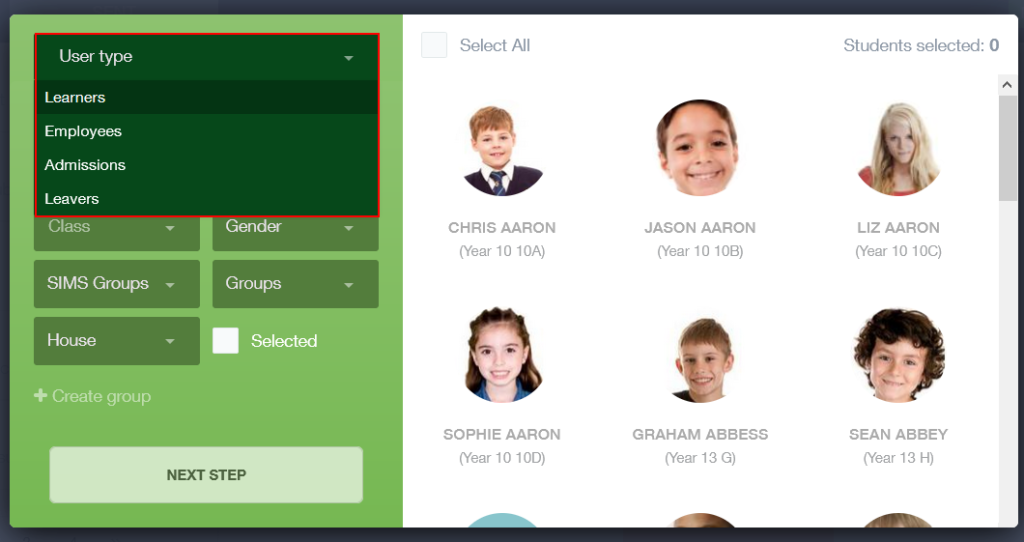
Learners
If you are planning on messaging learners, either individually or as a group, you can use the filters or search bar to help narrow your search. You can filter by Year, Form, Class, Gender, MIS Groups, Groups (clubs etc…) or House.
For sending a message to an entire Year group, Form, Class, Club etc., select the correct group and tick Select All above the images
Alternatively, if you want to send the message to a few learners, click on the images of the learners and tick the Selected box to preview them.
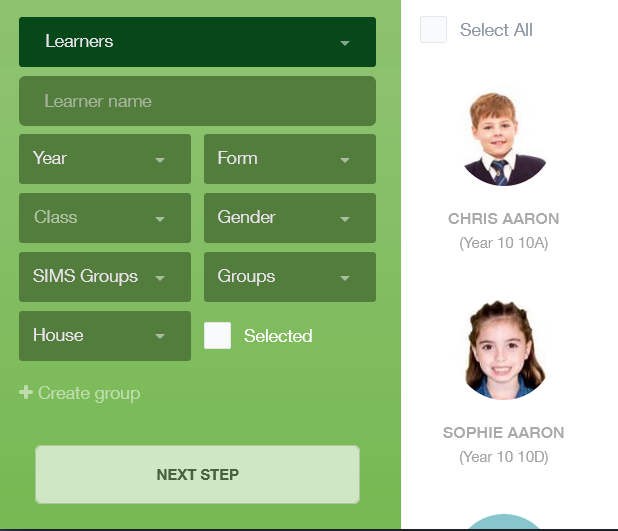
Once you have finished selecting all of the learners for your message, click Next Step.
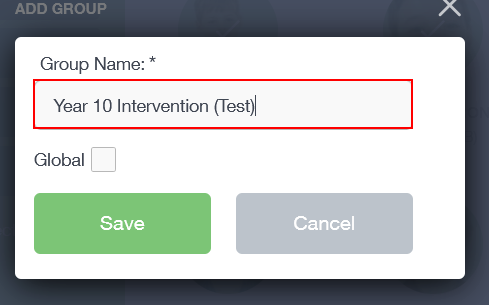
Creating Learner Groups
You can create a learner group for various activities, e.g. a club or trip. To do this select the images of the learners by clicking on them. You can also create a group if you are going to send a message to the same people frequently.

After you select your learners and tick the Selected box, click on the green + Create Group button. You need to provide your group with a name and you can choose whether to make the group Global (available to all staff). When finished, Save your group.
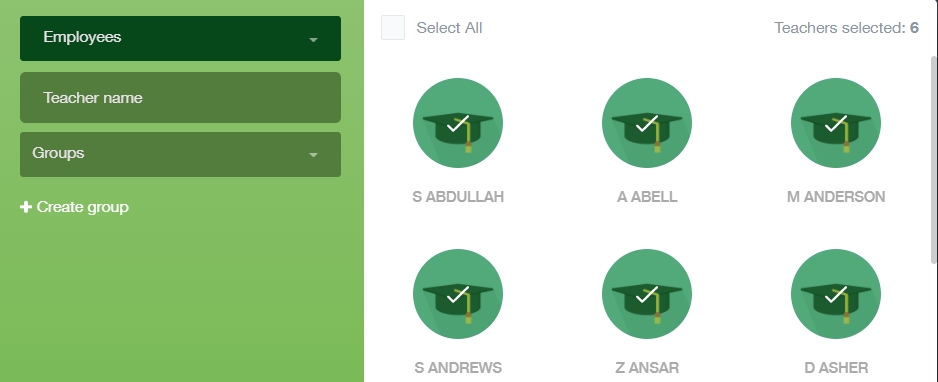
Employees
Select the employees you would like to message by ticking their images or by ticking the Select All box if you would like to send a whole staff message.
You can also send messages to teachers by searching their names.
Employee Groups
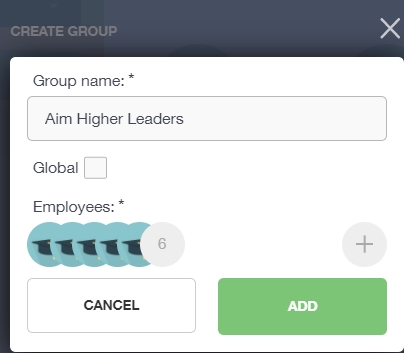
You can create Employee Groups in messages if you intend to send messages to a certain group of employees regularly, e.g. Aim Higher Leaders. First, select the images of the employees you would like in the group, then click the + Create Group button.

Next, type in the name of the Group and select whether you would like the group to be Global, meaning other employees will have access to it. You can also choose to add more employees to the group by pressing the + button.
Finally, click the Add button to create your employee group. You can also add and manage your groups in the Manage Groups settings.
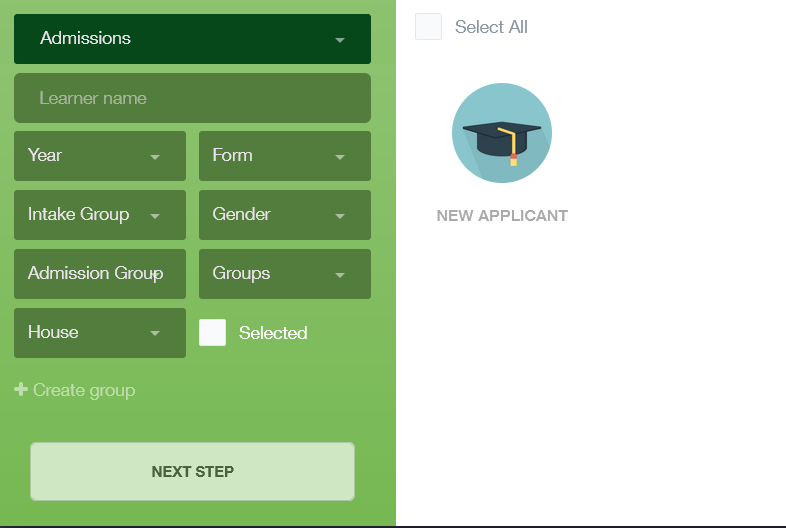
Admissions
Admissions user types are useful for your admin staff or teachers who wish to view the new intake.
You can search for new admissions in the same way you search for learners, by Year, Form, Intake Group, Admission Group, House etc…
Select an individual admission by ticking their name/ image on the right and then tick Selected to preview. To select all the admissions, tick the Select All box above the admissions’ images (they are unlikely to have images at this point until they have them taken in school).
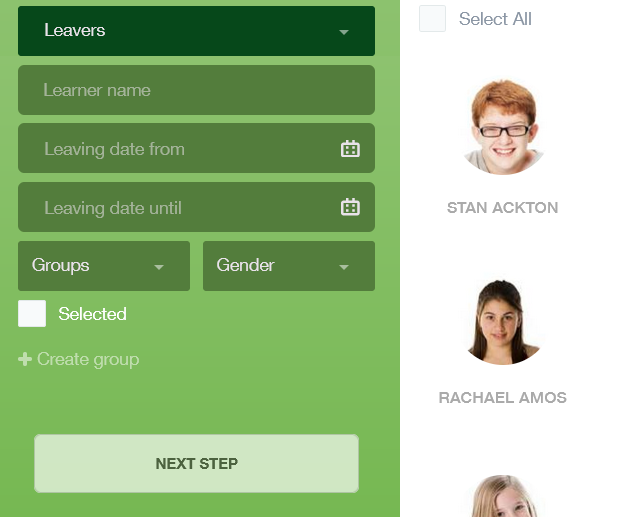
Leavers
‘Leavers’ user types are available for a short period between leaving and exam results. Edulink One embargos exam results in line with the Exams Regulator so that the pupils receive their results on Exam Results Day. If you need to configure your Leavers, please see the Login Tab and set the dates allowing leavers access to Edulink One.
Search leavers by Learner Name, Leaving Date, Leaving Date Until (the last day of Edulink One access), Groups or Gender.
Select individual students or a small group of students and preview by ticking ‘Selected‘. Alternatively, click the Select All box to message the entire Leavers cohort.
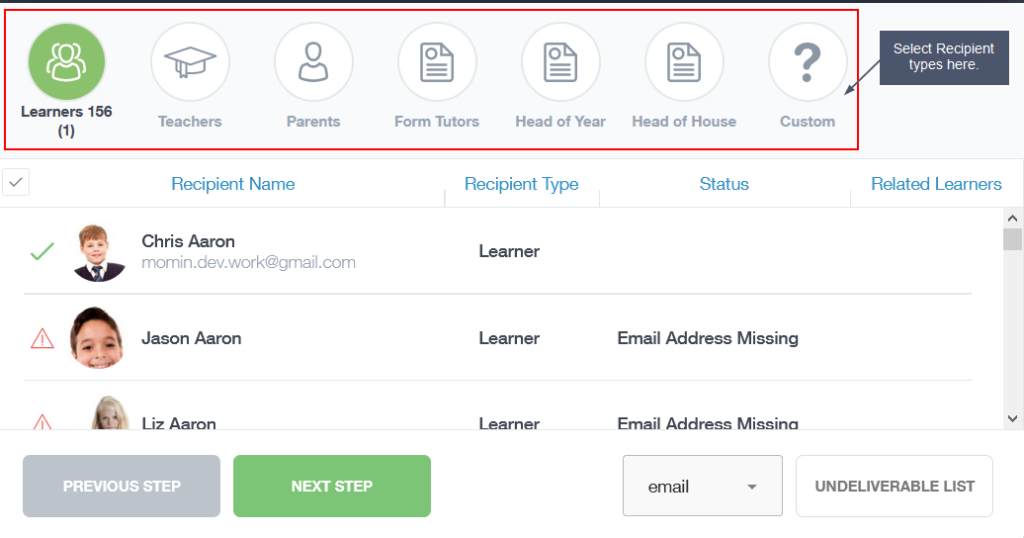
Select Recipients
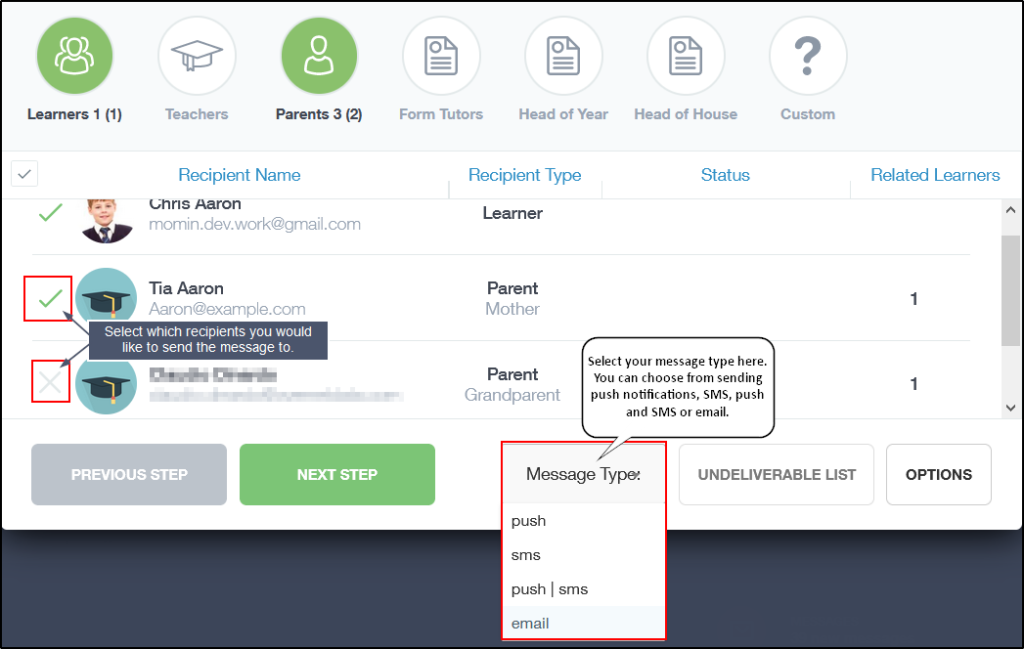
Select the recipient type you want to message by clicking on the icon(s) available. You should have selected the user type the message pertains to in the User Type window before selecting Recipients. You can select more than one recipient type from the list above, e.g. you can message learners and their parents about a significant date or a revision session.
The recipient types will automatically be selected to message, indicated by a green checkmark on the left side of the table. To deselect a recipient, click on the green check to change it to a grey X. The message will not be sent to this person.
Similarly, a red exclamation in a triangle indicates a messaging error, such as a missing email.
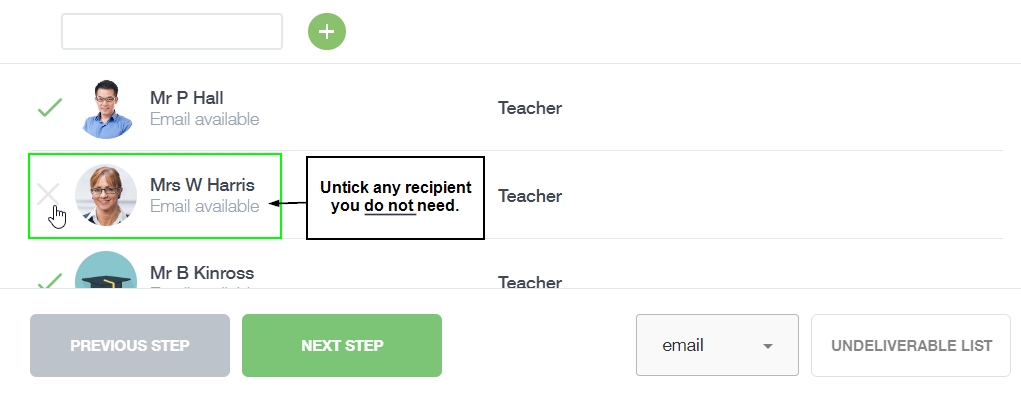
Custom Recipient Groups
You can email a custom group of individuals by selecting ‘Custom‘.
To select multiple recipients, select all the recipient types needed in addition to the custom button.

Once you have all the recipients in ‘Custom’, deselect any recipients you do not need to message.
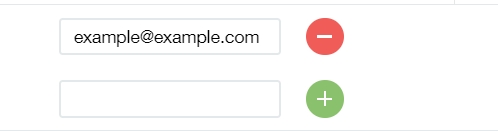
If you would like to add recipients to the custom list that are not linked to the user(s) selected (e.g. a social worker for a particular learner), you can type in their email address and then click the green + button to add them to the recipients.
To remove an email from the list, click the red – button.
When you have finished creating your custom group, click ‘Next Step’ or continue to customise your message types and options.
‘Other’ Recipient Types (Communicator Groups)
You can create custom communicator groups in User Groups. This is only available for ’employee’ group types. To do this, administrators can go to the User Groups tab in the administration settings and create a new group.

Select the employee group type to create the group for Communicator.

Fill in the name of the group and select the members. You can create groups with only one person in it, e.g. the SEND Co.

Then select who you would like to be able to see this group as a recipient choice. You can choose multiple user groups such as parents, learners, employees and teachers, as well as fixed user groups such as SLT.

Save your group for it to be visible in messaging.

When you select recipients, the group you created will appear in ‘Other’ in New Message.
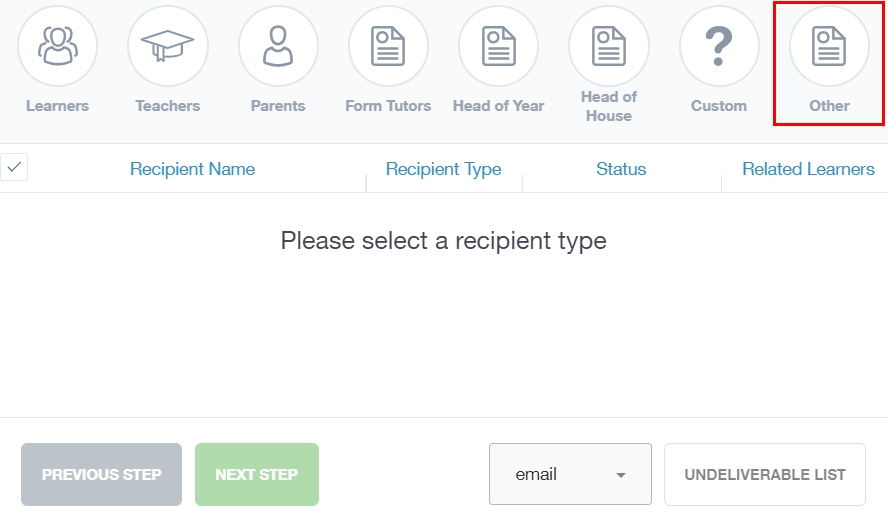
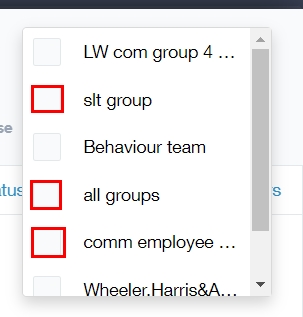
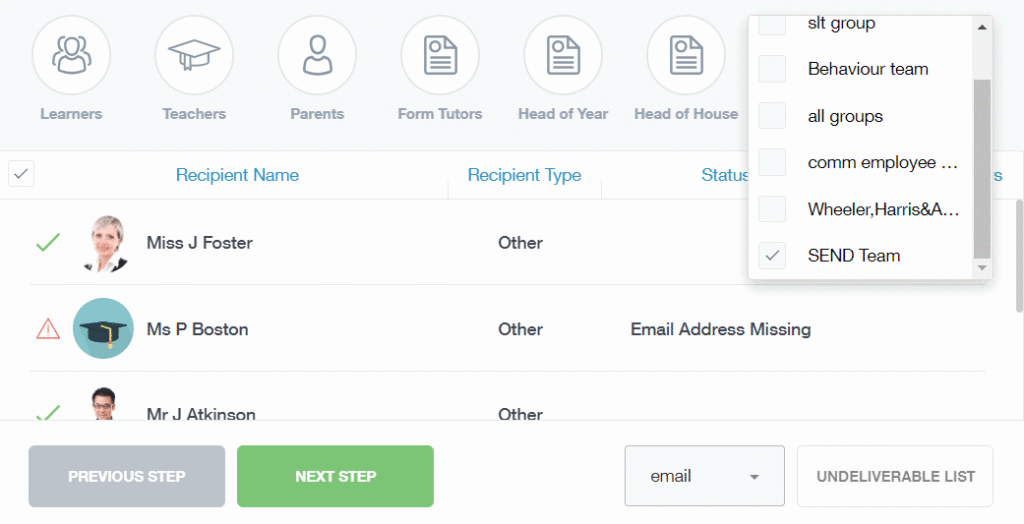
Click on ‘Other’ and you will see a multi-select dropdown menu of the communicator groups. This will vary between users, depending on who has been permitted to use the group(s) as recipients. As this is multi-select, you can tick more than one group.
You can customise the group(s) further in the usual way once you have selected them, i.e. removing some members from the email (click on the checkmark), exporting an undeliverable list, etc…
When you are ready, click Next Step to compose your message.
Message Type
Message Type: Select your message type from the Message Type list. The menu includes the option to send a push notification, SMS, push | SMS and email.
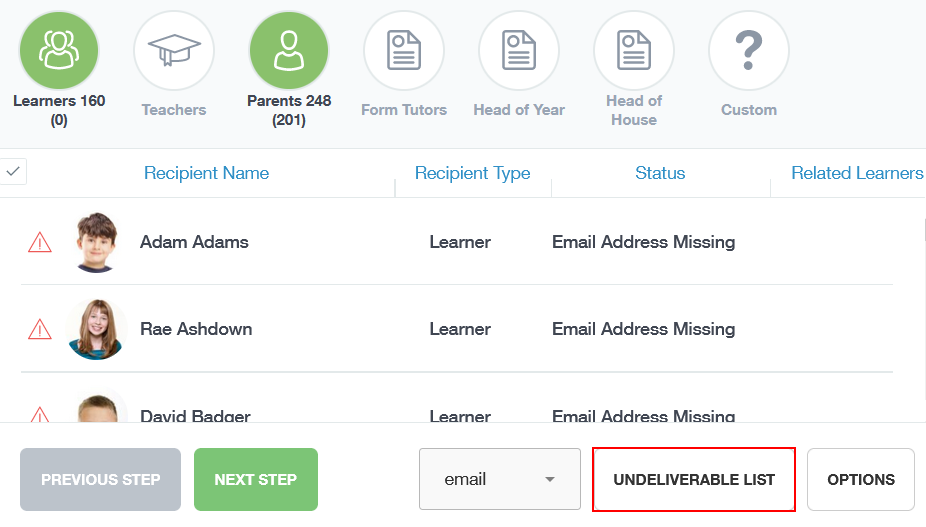
Missing Email Addresses
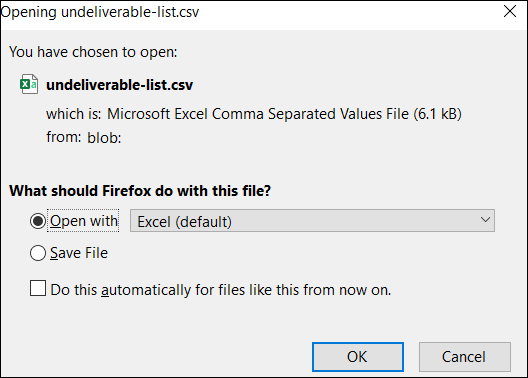
For users with Email Address Missing in their status, you have the option to select ‘Undeliverable List‘ which will create a .csv of users you can’t message.
This will produce an Excel document you can either Open or Save with the personal details of users in the undeliverable list.
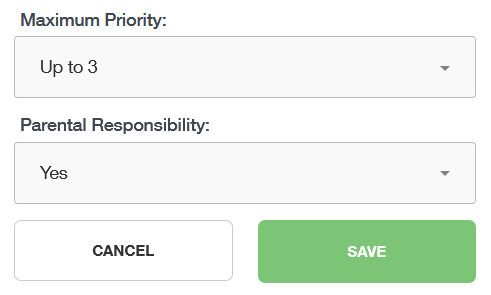
Options
If this has been made available to the staff member, it will customise sending messages to parents. The Priority of Parental Responsibility will be configured in the Communicator Tab before creating messages. Please carefully consider before changing these options.

Once you are finished customising your recipients, select Next Step.
Creating Messages
The message window contains an area to customise information regarding your message and a pane to write your message or to create a template.
Message Subject: Write the subject of your message here.
Options:
Record in SIMS Communication Log: Tick this box if you would like the contents of your message to be logged in SIMS.
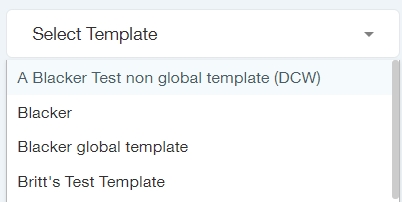
Select Template: Choose a template you have created or a global template to send your message.
Send on Date/Time: Schedule your messages in advance to send to learners, parents or employees.
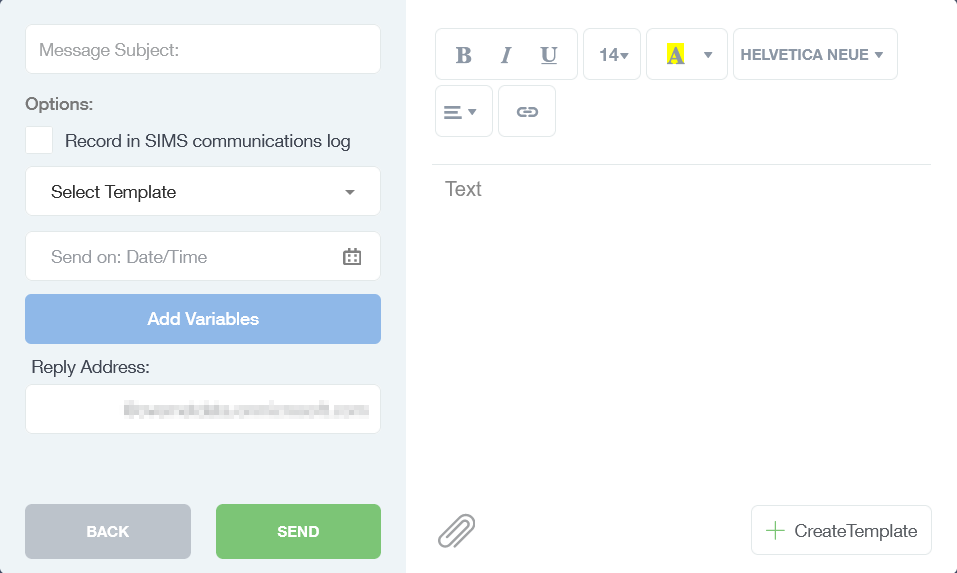
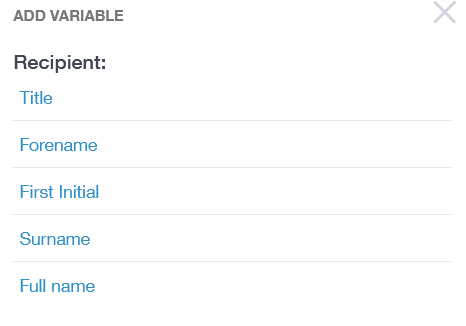
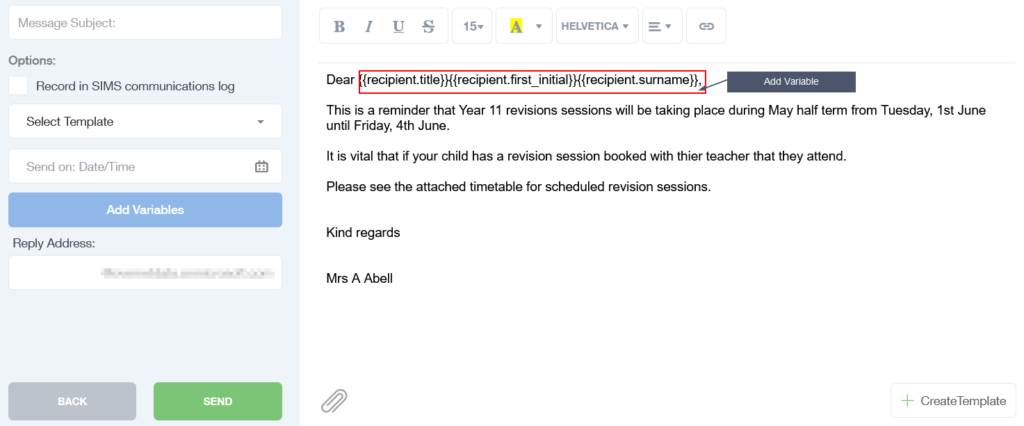
Add Variable: Add variables to your message to automate filling in recipient details.
Reply Address: Reply address automatically uses your school email address. You can modify the reply address to a specific email, e.g. a school club email or no-reply.
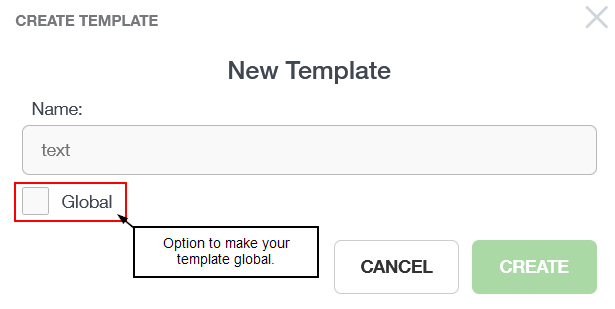
Create Template
You can select a global template that is available to all staff here, a template previously created or you can create a new template if you will be sending out a message frequently. You can do this by selecting +CreateTemplate in the bottom left corner of the message pane.
If you choose to create a new template, name your template and select if you would like the template to be Global, meaning all staff would have access to this template.
Editing a Template
Once you have created your new template, you can write and edit the template. First, select the template from the Select Template dropdown menu and edit the template in the writing pane.
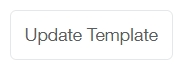
Then, press Update Template once you are ready to save your template. The signature that has been configured in the Communicator tab will be at the bottom of your messages.
Toolbar: You can customise your replies by using the toolbar to select font size and family, bold, italic, underline, strikethrough, background and foreground colour, alignment and links (hyperlink).

Attachments: Select the Attachments button at the bottom of the message pane to attach documents, images etc., to your message.
Select the document you wish to upload and press Open to attach.

Send
Select Send to send the message to the intended recipient(s) or select Back to return to the Select Recipient page for amendments.

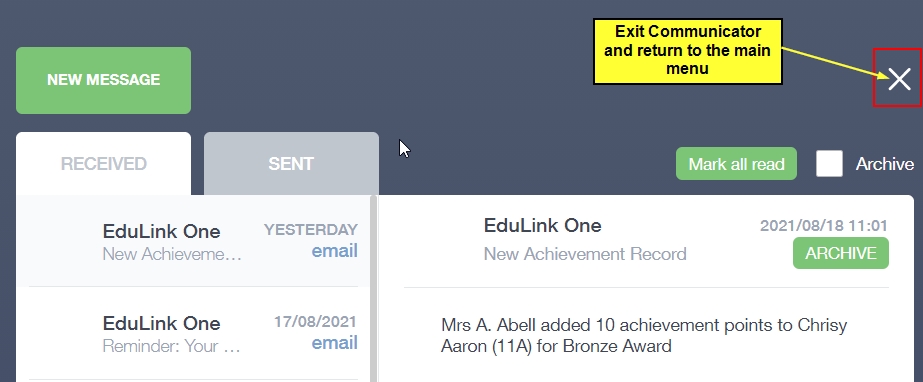
To return to the main menu, click the X in the upper right-hand corner of the Communicator screen.
How to Create and Send Messages Video
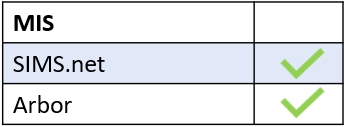
MIS Compatibility