Once your Communicator tab has been configured with your school’s SMS/SMTP details, you can create and receive messages in the user interface of Edulink One. To view your received and sent messages, you must first configure your Communicator tab, please see the following article on Configuring The Communicator Tab.
Login to Edulink One in the app or on the website, using your credentials to get started. Alternatively, if your school uses Microsoft or Google accounts, you can log in using your Microsoft or Google credentials by clicking the Microsoft or Google buttons.
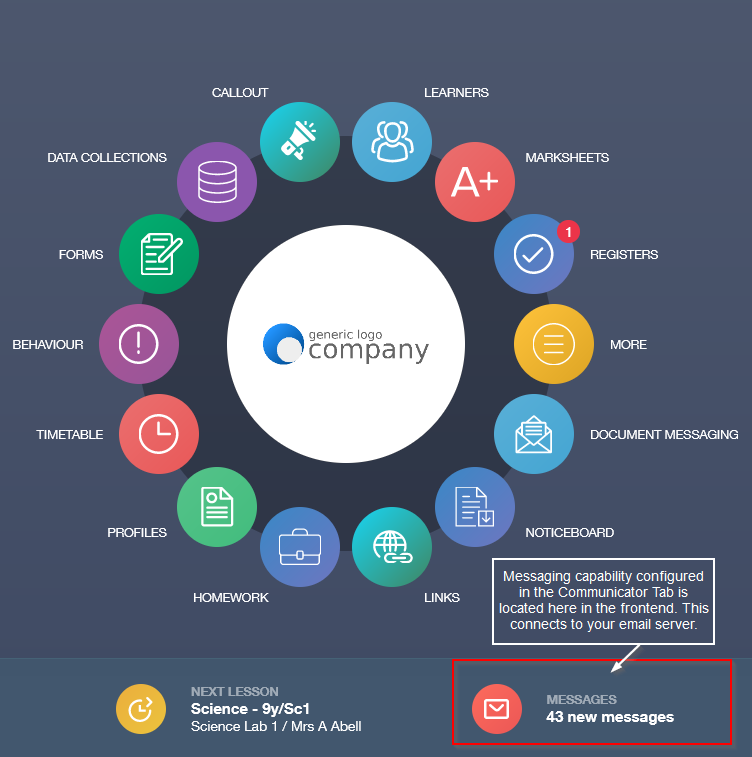
At the bottom of the home screen, you will see a Messages icon that holds all messages sent and received in Edulink One. Furthermore, it alerts users to new messages that they have not read. Clicking this icon opens the page for messages.
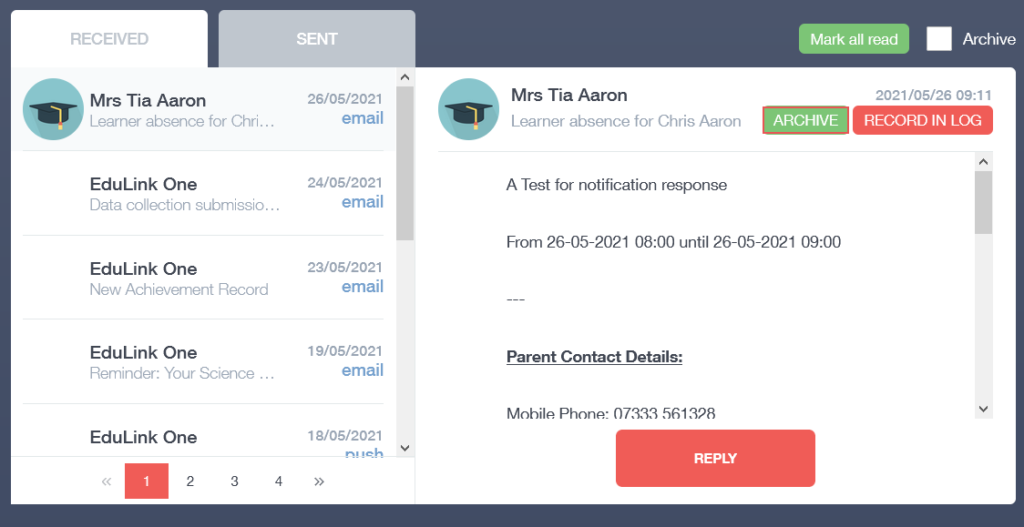
On the Communicator page, you will see two tabs on the left-hand side labelled Received and Sent which corresponds to emails or push notifications received from other users or the Edulink One app, as well as any messages sent by the user.
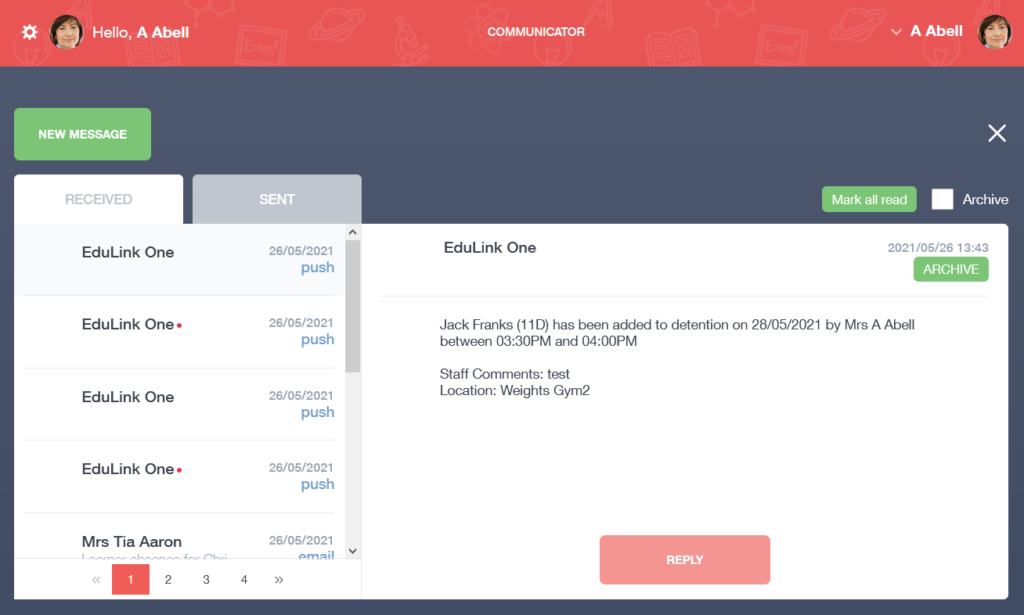
Received Messages
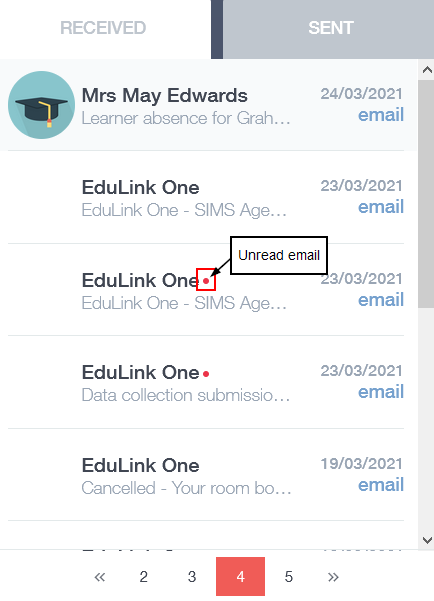
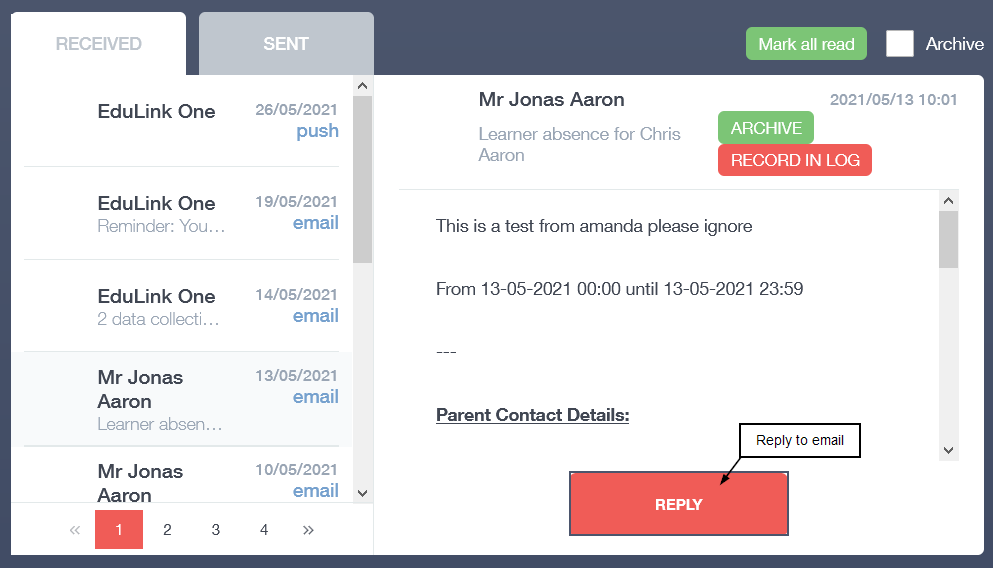
When you open the Messages icon, Edulink One opens to Received messages by default. Users can read any new messages in the reading pane; it is configured by date and time and opens to the latest message automatically. To view older received messages, users can scroll up or down or they can select page numbers at the bottom. All messages are dated and time-stamped.
Moreover, unread messages in your received messages are indicated by a red dot beside the name of the user messaging you.
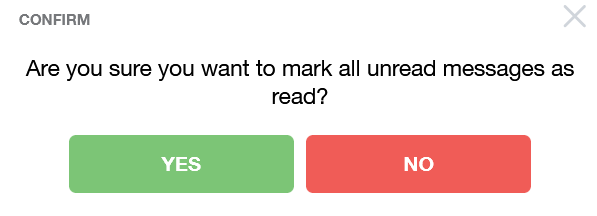
If you want to mark all your messages as read, you can select the ‘Mark all read‘ button above your reading pane. You need to confirm this action by clicking ‘Yes’ or ‘No’ to proceed.
Viewing Copied Staff
You can view other members of staff copied into messages sent by parents. To view copied staff, there is a button in the reading pane next to the sender’s name with three people on a blue background.
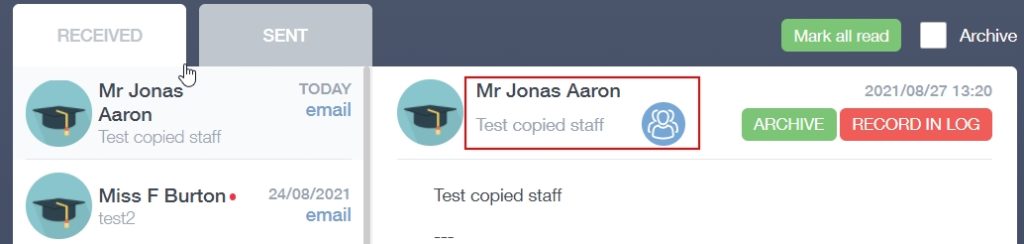
Press on the Copied Staff button to view the other members of staff copied in on the message.

A Sent To window opens with a list of all the employees copied into the message. If the employee has a red X next to their name, it indicates they have not read the message yet but have received it. The eye icon indicates that an employee has read a message and the reply icon indicates that an employee has responded to an email.
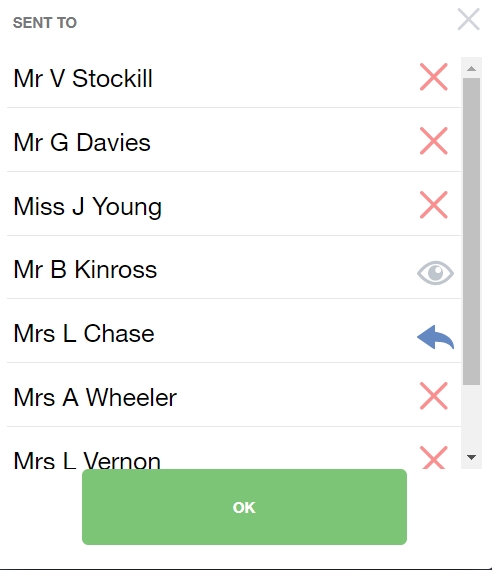
To exit the Sent To window and return to Messages, click the OK button.

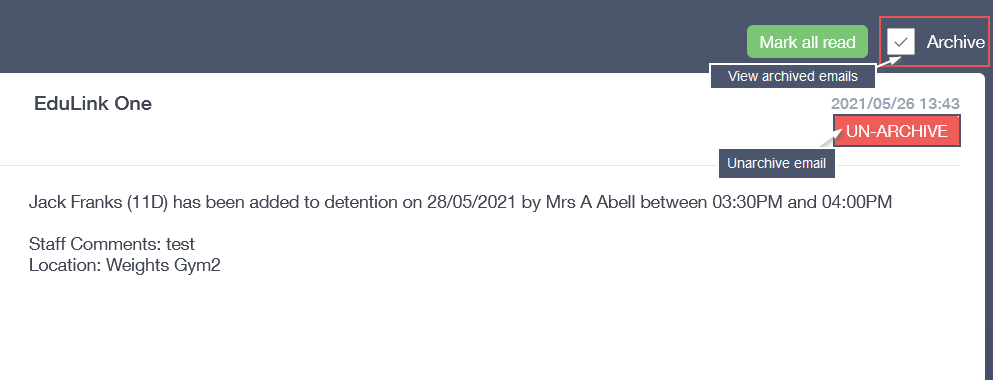
Archiving Messages
You can archive individual messages by clicking on the Archive button. You can also view your archived messages by ticking the Archive Box above the main reading pane.
You can un-archive individual emails by pressing the Un-Archive button, returning them to your received messages.
Replying to Received Messages
You can reply to messages from employees, learners and parents with the reply function in the reading pane.
Click the reply button if you would like to reply to a message received.
You have several features that you can use in response to a received message.
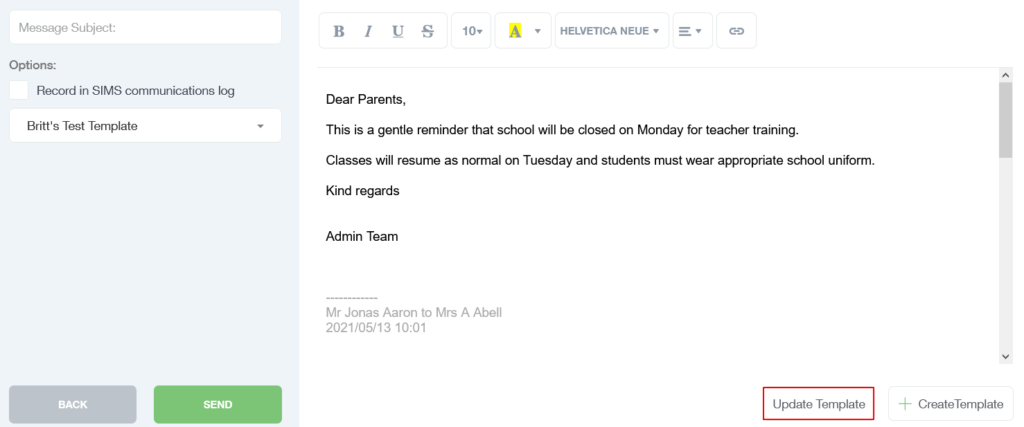
Message Subject: You can include the subject of your message here.
Record in SIMS communications log: If you select this option, a duplicate message will be logged in SIMS.
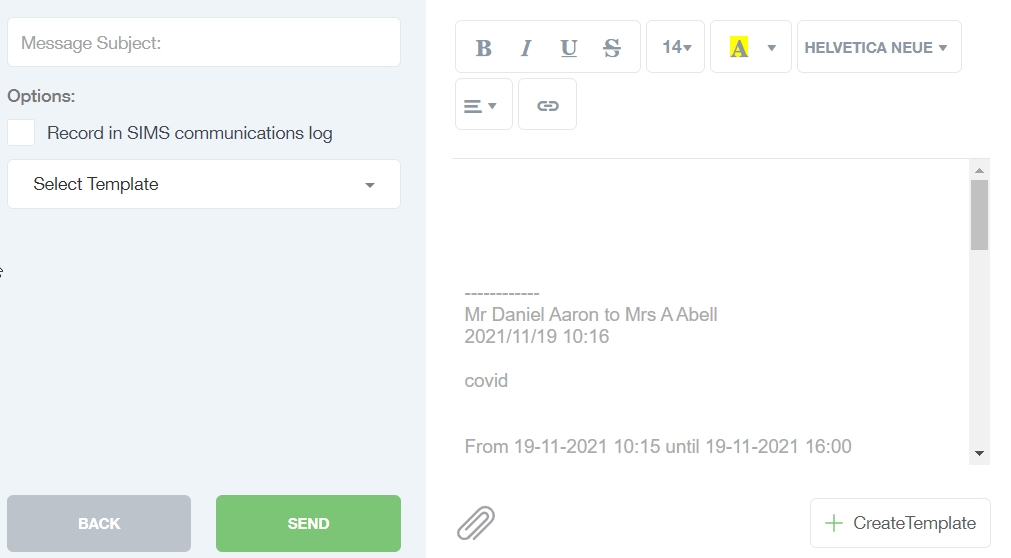
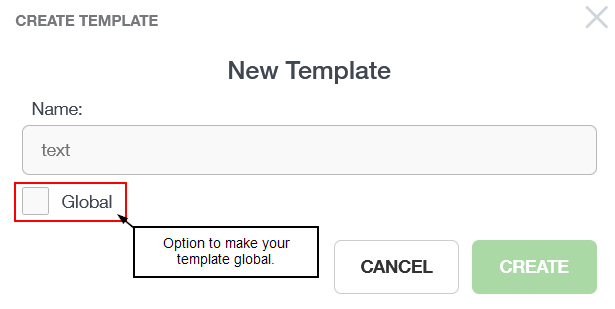
Select Template: You can select a global template that is available to all staff here, a template previously created or you can create a new template if you will be sending out this message frequently. You can do this by selecting +CreateTemplate in the bottom left corner of the message pane once you have written the template message.

If you choose to create a new template, you can name your template and select if you would like the template to be Global, meaning all staff would have access to this template.
Once you have created your new template, you can write and edit the template. Press Update Template once you are ready to save your template. The signature that has been configured in the Communicator Tab will be at the bottom of your messages.
For more information about configuring Email/SMTP for Communicator, see the following article How do I configure Email/STMP for Edulink One?
Toolbar: You can customise your replies by using the toolbar to select font size and family, bold, italic, underline, strikethrough, background and foreground colour, alignment and links (hyperlink).

Attachments: You can add attachments to replies by using the attachment icon and selecting the document or image you wish to attach. All users can now add attachments in replies.

When you are finished composing your reply, select Send to reply to the original sender or select Back to return to your received messages.

Sent Messages
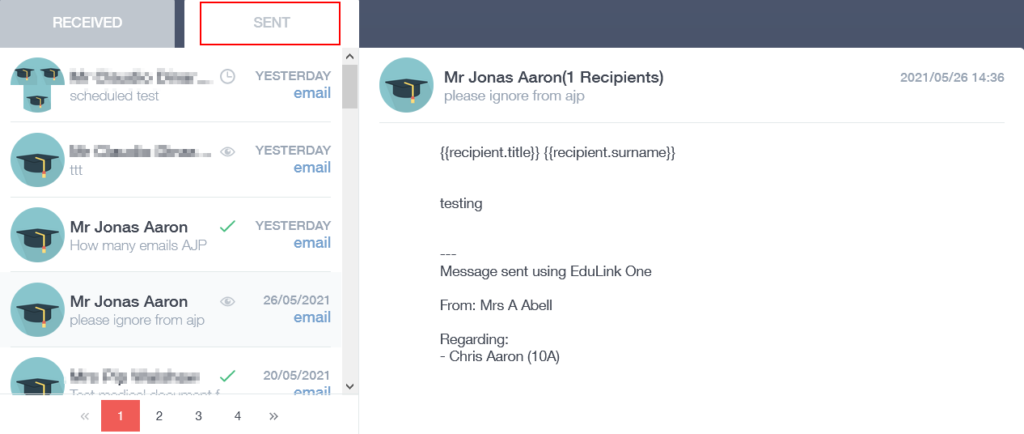
You can view your sent messages in the Sent tab of Communicator. To see the messages you have sent, click on the Sent tab.
You can scroll through your sent messages and select older messages using the page numbers at the bottom of the tab.
The latest sent message will be the first to appear in your sent tab. Clicking on the messages will allow you to read the content in the reading pane to the right. All messages are dated and time-stamped.
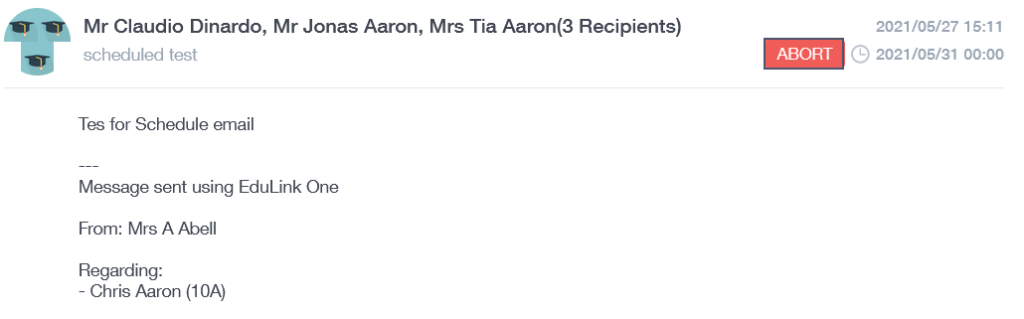
Abort Message: There is an option to abort a sent message a few seconds after sending your message. This is helpful if you need to revise a message or if the message is no longer relevant.
Message Icons
Green check: The green check means that a message has been sent, but it is unread by the recipient.

Eye Icon: The eye icon indicates that the recipient has read your message.

Closed Eye Icon: One or more recipients have not read the message— this icon is used when there are multiple recipients.

Red Warning Icon: Indicates a failure to send to at least one person. To view the recipient(s) that have failed to receive the message, click on the recipients at the top of your sent message. The app tries 3 times to send the message.
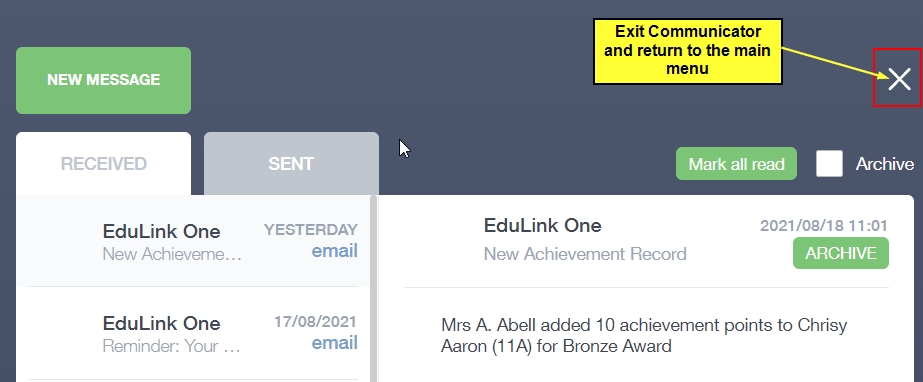
Exiting Communicator
To exit Communicator, click the X in the right corner of the Communicator window. This returns you to the main Edulink One menu.
Messages in Communicator Video
MIS Compatibility