Depending on which Edulink One function you are using, you can attach a document in a similar way—the steps just might appear differently. Usually, when a teacher is looking to attach or upload documents, it is either for homework or for messages.
Attaching Document to Messages
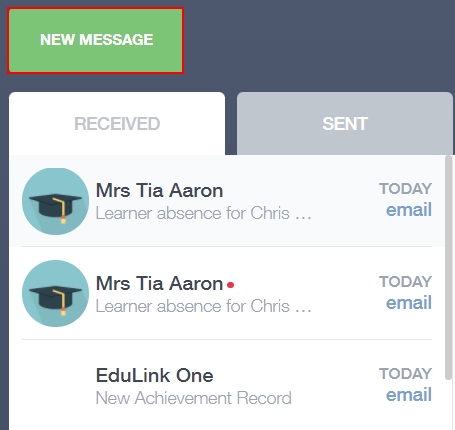
Log in to Edulink One using the app or website. If you plan on sending a message and want to attach a document, go to Messages at the bottom of the screen and click it.
The messages window will open; to continue, you need to click on the New Message button.
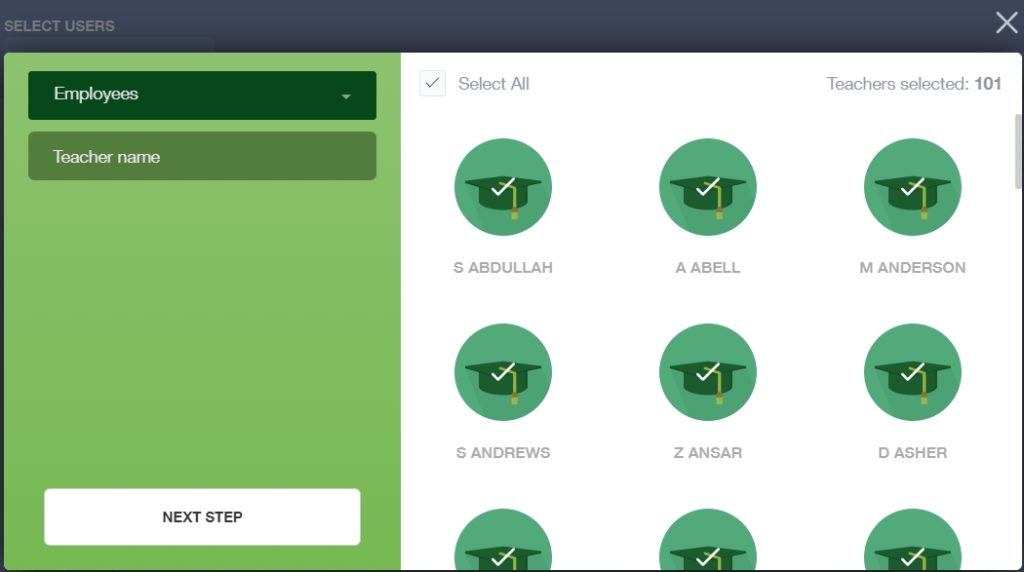
Next, select the users you plan on sending the message and attachment to. There are four user groups to choose from, learners, employees, admissions and leavers. Select the appropriate group, tick the Select All box if you would like all of them, and click Next Step. If you only plan to select certain users, you need to click on their images and tick the Selected box.
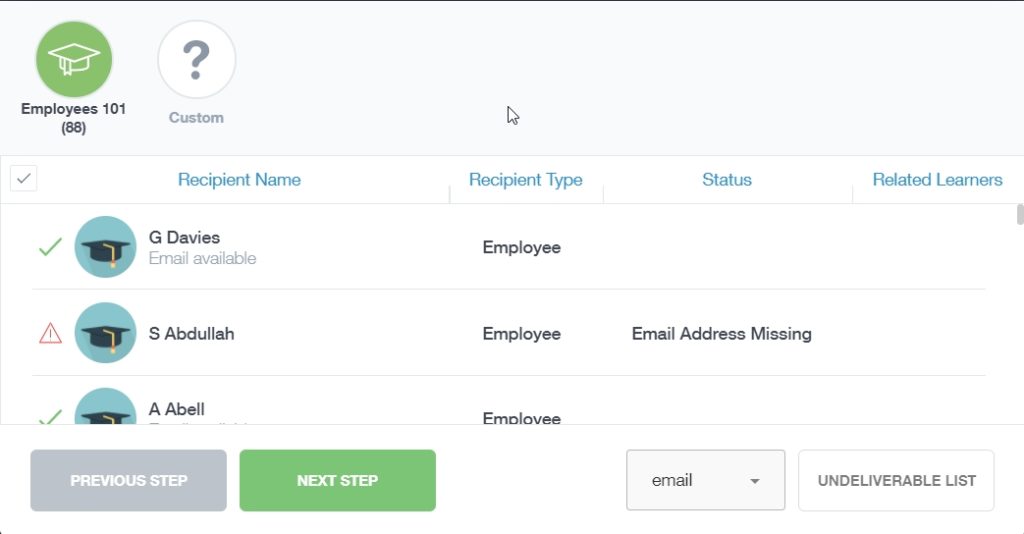
Then, check and add the recipients you would like to send your message to. For learners, you can add parents at this stage.
Any recipients with ‘Email Address Missing’ next to their name, means they do not have an email address in SIMS. Click on the Undeliverable List to export a list of recipients without email addresses.
Once you are satisfied, click Next Step.
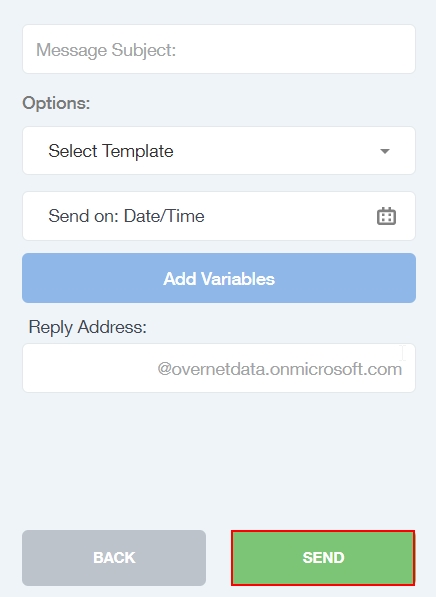
Next, compose your message by filling in the fields. You have the option to use a template if you wish or add variables.
To attach a document, click on the paperclip icon in the writing pane.
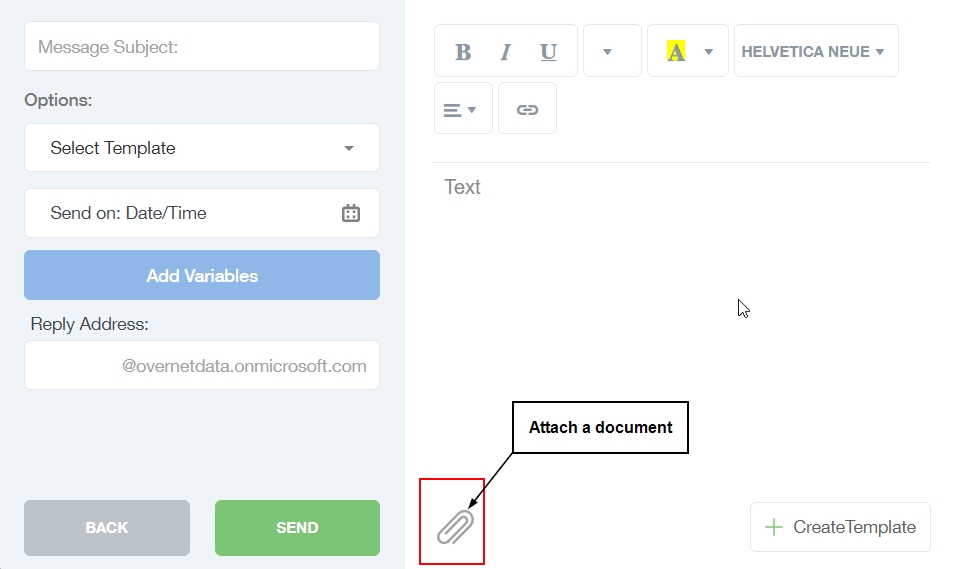
Click on your file to select the document and click Open.

Now, the document is attached to your message.

Lastly, when you are ready, click the send button which will send your message and attachments to the recipients.
Attaching Homework
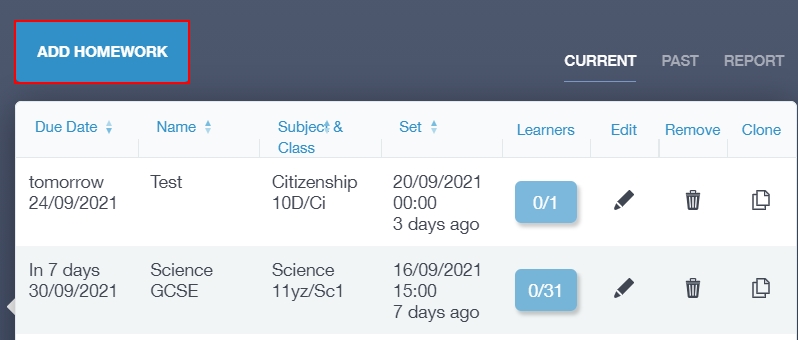
If you need to upload a homework file, you need to log in to Edulink One and click on the Homework icon.
Then, click on the Add Homework button to attach new homework.
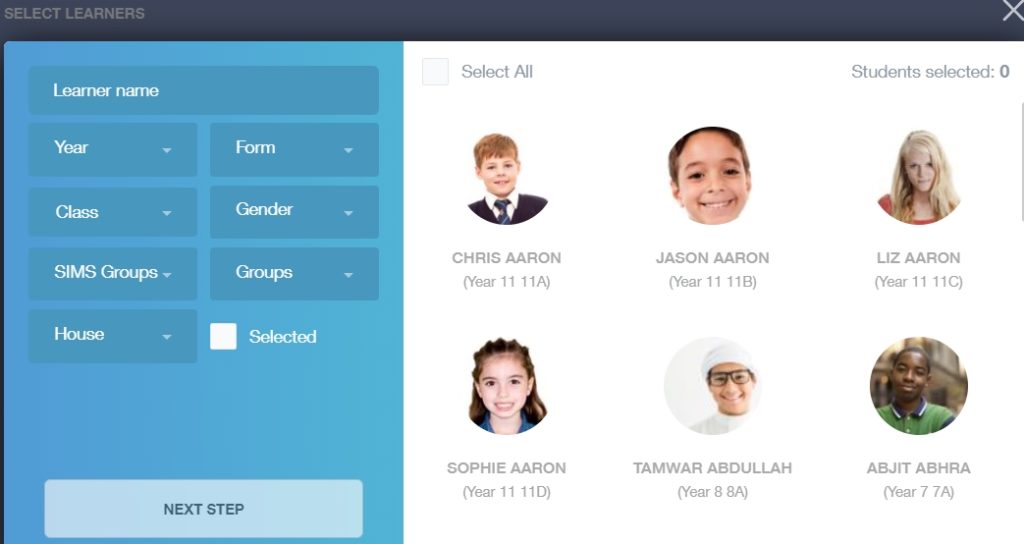
Next, select the learners you would like to add to the homework. You can filter this by Year, Class etc., to make things easier.
Once you have selected the class or learners, then click Next Step.
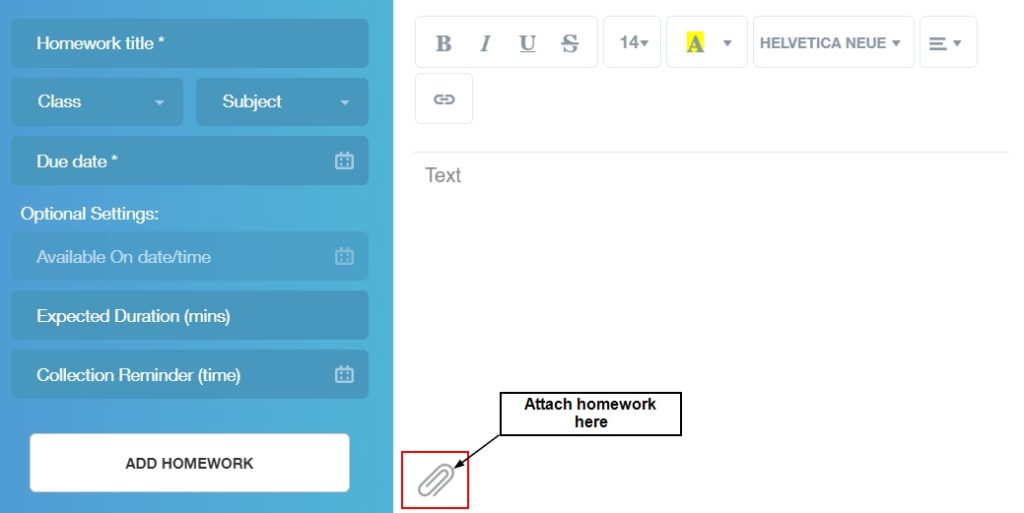
Add your homework title, subject, class and the due date etc…
Then you can type a description in the writing pane. Once you have added the fields, you can add your attachment by clicking on the paperclip icon.
Select your homework file and click open to attach it to your message.

Lastly, click the Add Homework button when you are ready to set the work.

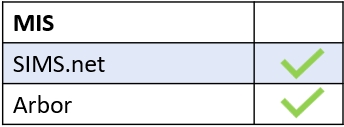
MIS Compatibility