You can send documents, such as reports, using Document Messaging in Edulink One. However, it is important to note that only certain authorised employees have access to Document Messaging. Those employees with access can send documents to both learners and their parents.
Firstly, log in to Edulink One and click on the Document Messaging icon. Depending on the level of access granted to the authorised employees, this may be located in the More icon of Edulink One.

Select Your Learner(s)
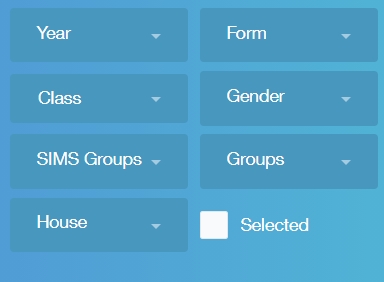
The Document Messaging window will open, where you can select learners using their image or by the Learner name. Additionally, you can use the fields available to filter your learners. The fields include Year, Form, Class, Gender, SIMS Groups, Groups or House.
Next, select individual learners, a small group of learners or an entire cohort of learners using the images or filters. The filters will help you narrow down the learner search even further.
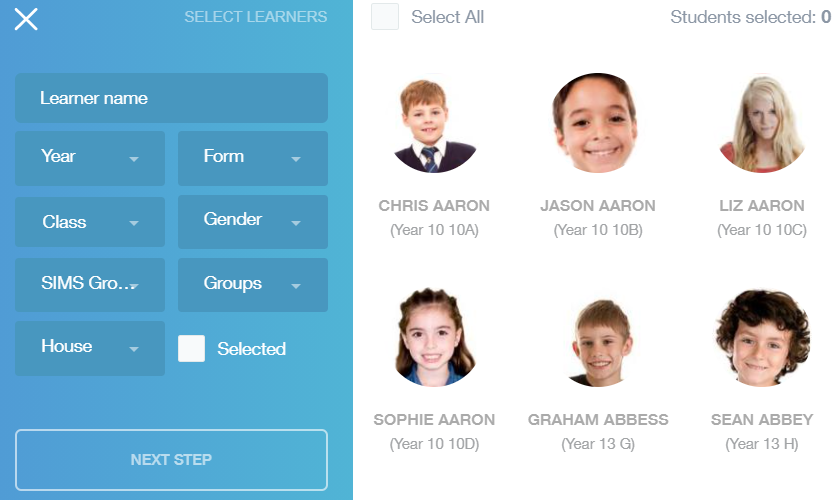
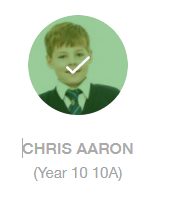
To choose an individual learner, either click on the picture of a learner (which will superimpose a green checkmark over the top of their image) or type the learner’s name in the Learner name field.
Alternatively, you can select a small group or entire class/ year of students by using the filters. You can filter by Year, Form, Class, Gender, SIMS Groups, Groups or house. Furthermore, you can either select all the learners in a particular filter by ticking the Select All box or you can simply select individuals by clicking their image and ticking the Selected box.
Click Next Step when finished.

Selecting Documents
After selecting your learner(s), you need to select the type of document you would like to send using document messaging.
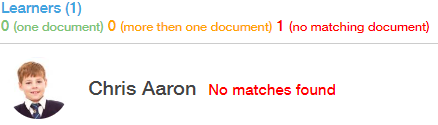
The right pane shows the learner to whom you are about to send a document. In the example below, this learner has multiple documents associated with him. You can tell this is the case because the number 1 is in orange which indicates ‘more than one document’.
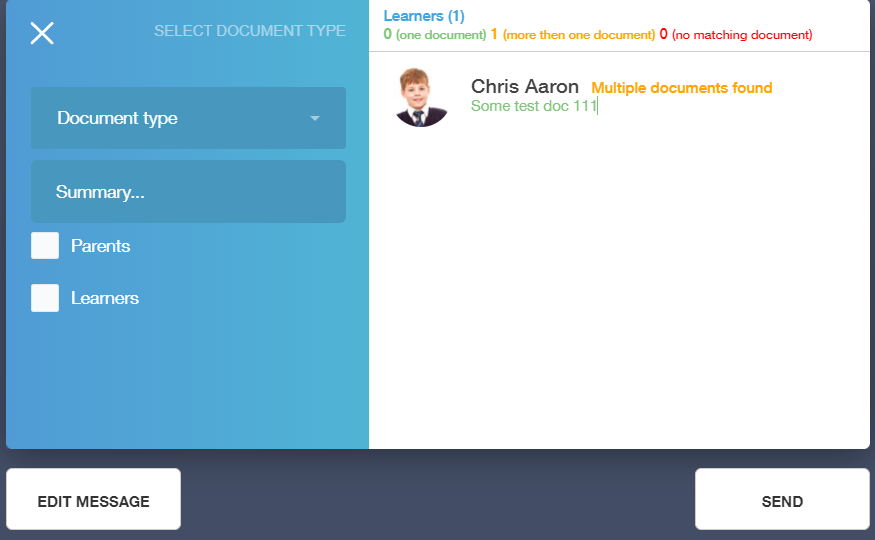
Traffic Light System for Matching Documents
The traffic light system at the top of the right pane indicates whether a document has been matched to the learner.
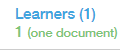
The green writing signifies the document that you intend to send; if it reads 0, you must select a document to send. Likewise, the amber writing signifies that the learner has more than one document associated with them, and the red writing indicates that there is no document match to that learner.

In the event there is a number in amber writing, signalling more than one document associated with a learner, you must narrow down the documents using the fields in the left pane. The fields include the Document Type and the Summary of the document.
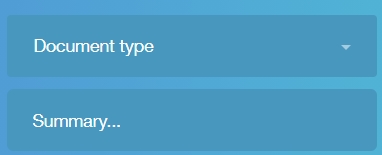
Filtering Your Document Type
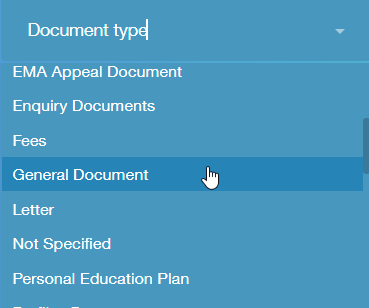
Next, select the document type that you are sending to the learner(s).
After a document type has been selected, you will likely need to write information in the Summary field to narrow down the search for the correct document, e.g. Document Type: General Document; Summary: July 2021 Progress Report.

Once a document is matched, the match will appear in green and no longer in amber. If a match has not been made, a number appears beside the red ‘no matches found’ message at the top of the pane.
Document Recipients
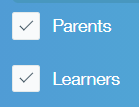
When a document has been matched, you can send the document to two recipient types: the learner and the parent.
Tick the box of the recipient or tick boxes of both the parents and learners to send the information to both.
Edit Message
If you would like to edit the message you send to parents regarding the document, select the Edit Message button.
You can modify the message content as well as the subject and the variables to customise the message to the learner(s) or subject of the document. The default message contains the variables {{recipient.forename}} and {{recipient.surname}}.
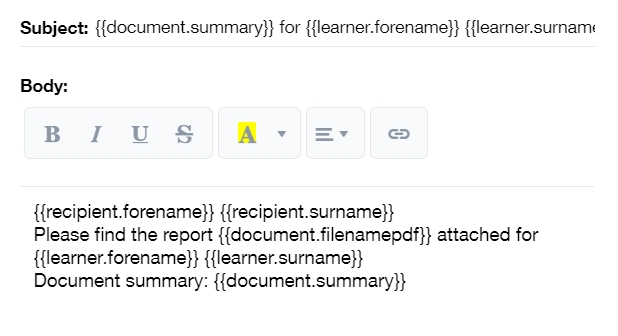
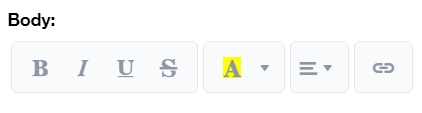
Furthermore, you can customise the font type and font size, paragraph alignment, background/foreground colour, in addition to bold, italics, underline and strikethrough. Moreover, you can add hyperlinks to your document message if necessary.
Click the Save button to save your changes.

Send Your Document Message
After all documents have been selected, click the Send button to send the message to the learner(s) or/and their parents.
A preview window will open, allowing you to read the document message to ensure it is correct. If there are errors, you can click the Cancel button to return to the Documents window to make changes.
Furthermore, you can schedule the date and time you wish to send the document using the calendar at the bottom of the preview pane.
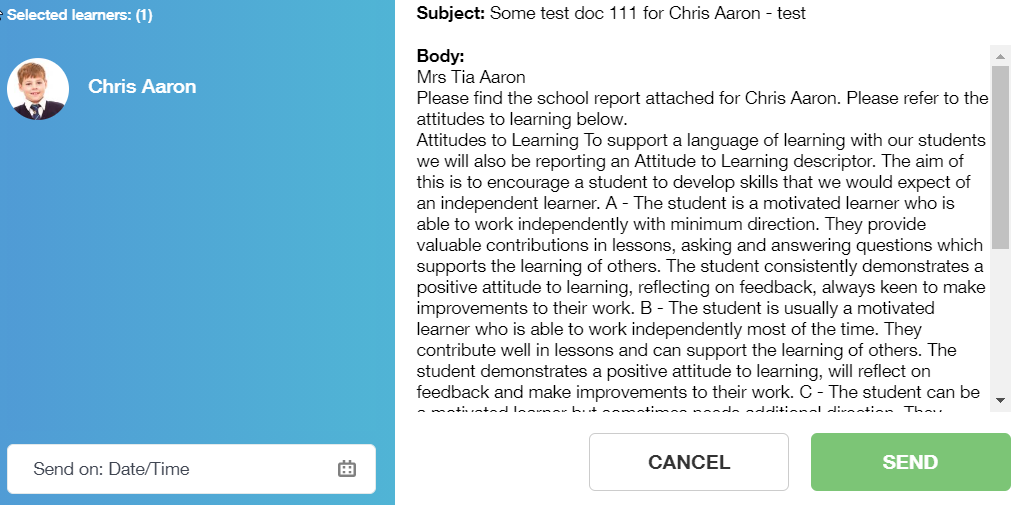
When you are finished previewing the message, click the green Send button to send the document message.

Viewing the Sent Document Message
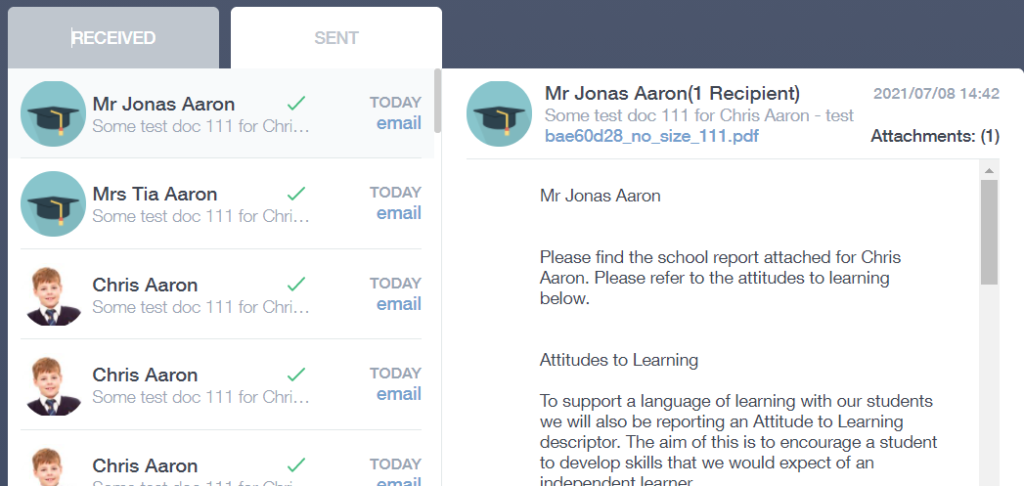
To ensure a document message has been sent, Edulink One always sends an email to the employee who is sending the document message. They can view the confirmation email in their Sent messages tab.
Click Messages to see your messages.
After opening your messages, click the Sent tab. The new document message email will appear at the top of the left pane, confirming that it has been sent.
Parents and/or learners will see the document message in their Received messages.
Moreover, parents and learners can view the documents sent in their Documents icon in Edulink One. They need to click on Documents and then the document they would like to download. The download appears as a PDF.
In summary, employees can send documents using document messaging to save time and resources normally allocated paper copies.
Run a Cache for Document Messaging
You can run a cache to send a document quickly, for example, a school bulletin. To do this, you must first go to the administration settings.
On the main welcome page of the administration settings, there is an option to run a cache refresh for a full sync (SIMS and Arbor) or documents only, students +applicants, contacts + student relationships, Employees and LDAP (SIMS only).

Firstly, select a cache refresh for Sync Documents Only.


If a cache is currently running and you need quick access to documents, you can click the ‘Sync Documents Only’ button and then click ‘Yes’ when the confirmation message appears. It should take 5-10 minutes to force this cache, depending on the number of documents.

This gives you access to the documents needed for document messaging faster than a traditional cache.
Document Messaging and Documents Video
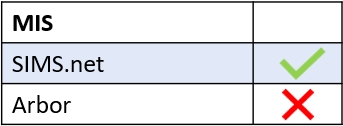
MIS Compatibility