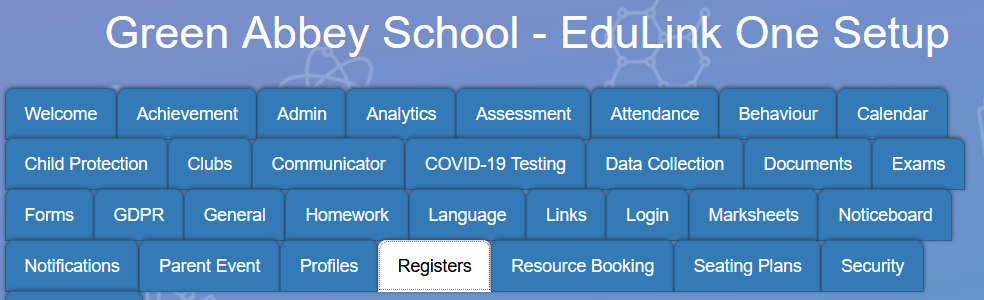
To begin, log in to Edulink One and locate Administration by clicking the cog at the top of the homepage.

Select the Registers tab to enable taking registers in Edulink One.
Statutory Registers
Enable Statutory (AM/PM) register taking: Enables statutory register taking for employees only. The Register icon will appear on employee screens so they can take statutory registers.


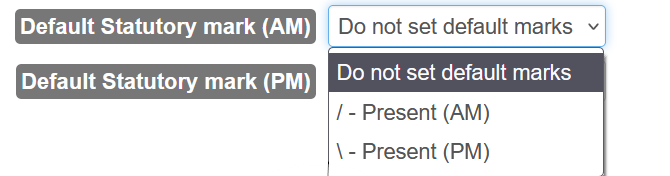
Default Statutory mark (AM and PM): Select specific default marks for Present AM ( / ) or Present PM ( \ ), which students will be given automatically when opening the register. This will not overwrite pre-entered marks. This is set to ‘Do not set default marks‘ by default.
Generate missing statutory registers (for primary schools ONLY): Allows employees to take the morning statutory register and will automatically generate the marks for the afternoon statutory register.

Lesson Registers
Enable Lesson register taking: Enables lesson registers within the Register icon for all employees. Registers will be displayed and employees will be able to complete them. Switch ON to use this function.

Default Lesson mark: This allows you to set default marks for lesson registers which students will be given automatically when opening the register. This will not overwrite pre-entered marks. This is set to ‘Do not set default marks‘ by default.

Separate linked periods: Allows employees to access registers for double/ triple lessons, rather than just the first period. The first and second (or third) periods will fill in automatically as usual. However, this setting allows staff to change the marks for the second or third lesson if the pupil arrives in the second period, or to change a mark in the first lesson if necessary. Set this to ON if you would like to enable this capability.

Mark Codes Settings
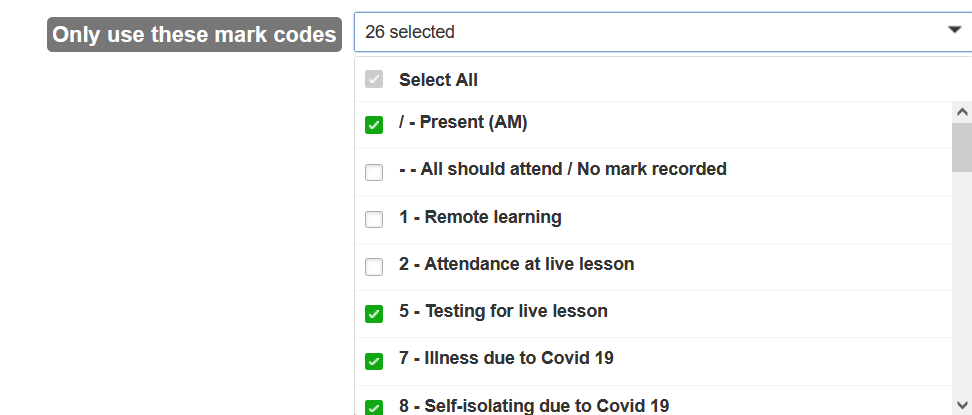
Only use these mark codes: This setting limits the codes staff can select when completing registers; the codes are taken from SIMS. Select the codes your school would like to use and leave the codes you would like to restrict blank. Select all to use all mark codes.
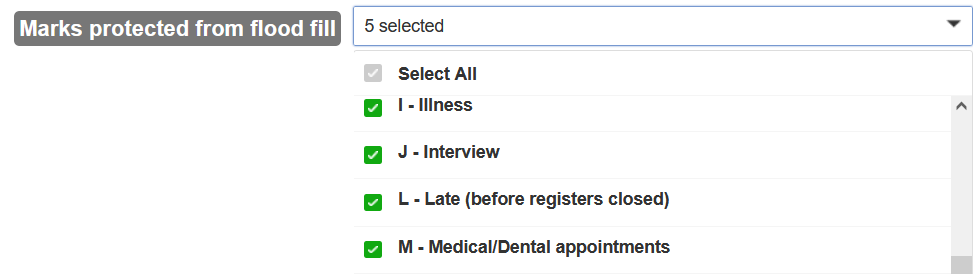
Marks protected from flood fill: Prevents any of the marks selected from changing if present when a register is flood filled.
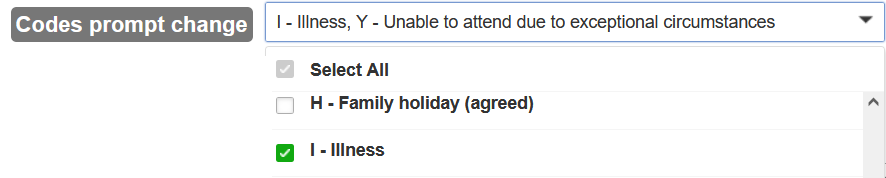
Codes prompt change: Prompts the user for confirmation when changing these mark codes.
Register Tags Settings
Enable Register Tags: Enable register tags to allow teachers additional information about the learners. This includes the following tags; SEN (Special Educational Need), EAL (English as an Additional Language), PP (Pupil Premium), M (Medical Condition), G&T (Gifted and Talented), as well as the number of behaviour points and the number of achievement points accumulated that day.
Auto hide tags: Hides tags including potentially sensitive information from a potential GDPR breach when opening the register.
Selected Tags: Select the tags that you wish to display on registers.

Other Fields: Comments, Boarder Identification, Parental Consent, Exclude from SEN Tags
Hide Comments: Hide the comment option when employees open registers.

Boarder Identification: Select all boarding types to identify if a student is a boarder. As these can be specified/changed within SIMS.net, you need to select all values which show that this learner IS a boarder if you would like to use the boarder tag on registers.

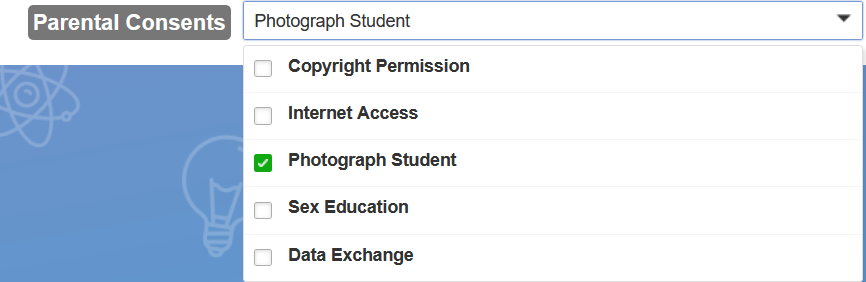
Parental Consents: The parental consents to check for when the ‘missing parental consent‘ register tag is enabled.
Exclude Code from SEN tag: This allows you to select the SEN tags you do not want to be displayed on the register for learners.

When you have finished configuring the register settings, click Save at the bottom of the page to save your configuration.

Your teachers can now start using registers in the user interface.
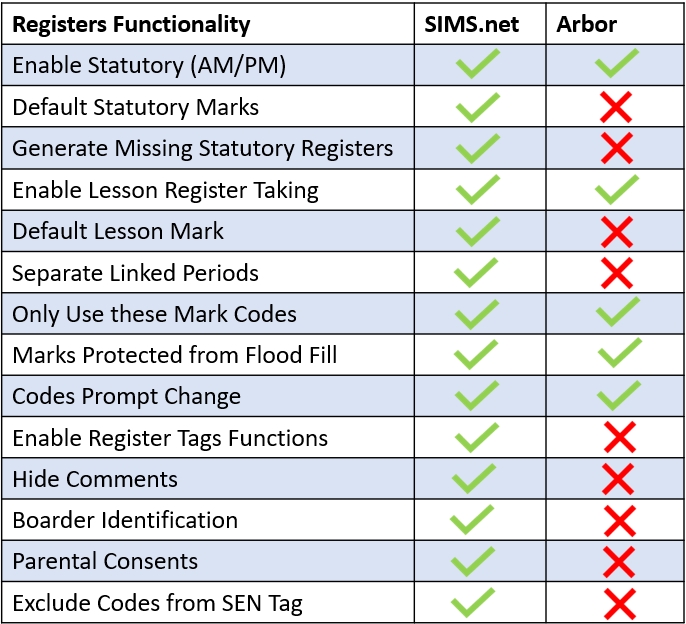
MIS Compatibility