To view your calendar in Edulink One, log in to the Edulink One app or website. Locate the Calendar icon which may be located in the More icon of the Edulink One menu, depending on the level of access you have.
Click on the Calendar icon to view your calendar.
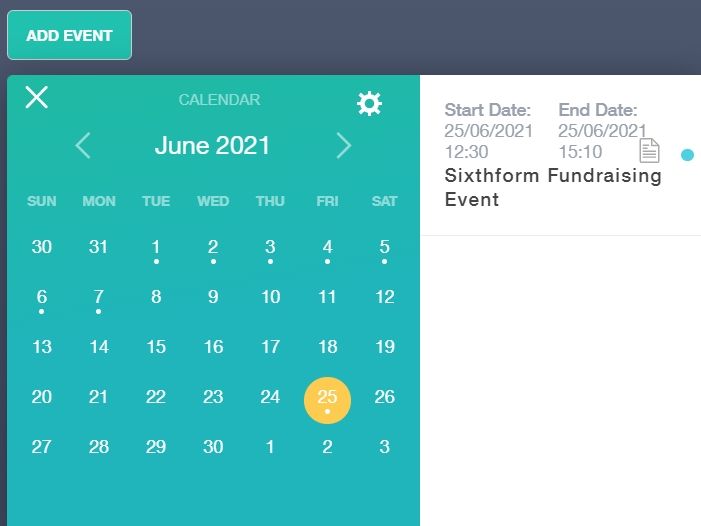
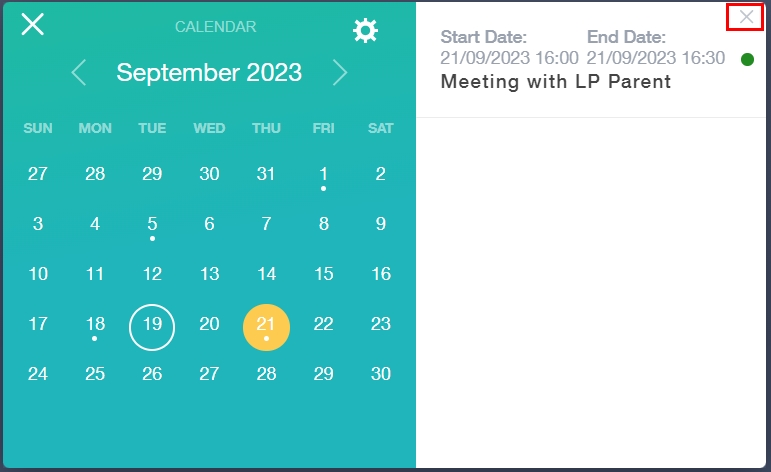
On the left side of the calendar window, a calendar is displayed along with a source cog (if not hidden in the Calendar tab). Scheduled events in the calendar appear with a dot (.) underneath the date. To view details for an event on a particular date, click on the date and the details of the event will appear adjacent to the calendar in the right pane. You can move the calendar to the next month or the previous month using the arrows.
In the example below, the owner has clicked on the 25th of June in the calendar to view the event. There is a Sixth Form Fundraising event on the 25th of June, 2021 that begins at 12:30 and ends the same day at 15:10.
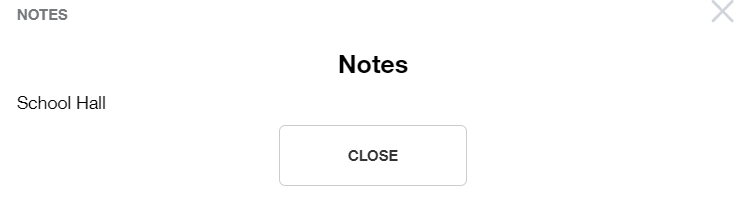
Additionally, if there is a Note attached to the event, it is signified by the paper with writing and a blue dot in the event details to the right.
If the owner of the calendar clicks on the event, the note appears. In this case, the note provides a location for the fundraiser, the School Hall.
Close the Notes window to return to the calendar.
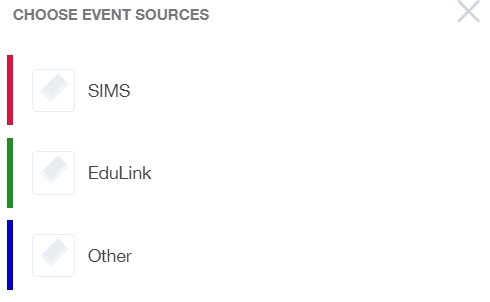
Also, users can choose where they source events for their calendar in the cog above the monthly calendar, but only if the Hide source cog is not enabled for specific user groups. The options are SIMS, Edulink One and Other.
Adding an Event
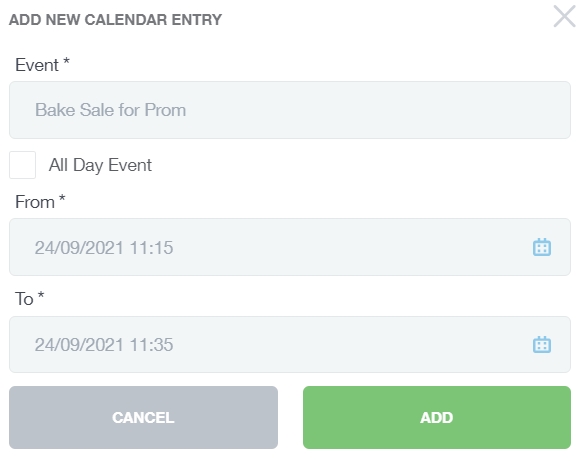
Additionally, you can create your own event in the calendar function. Press the Event button to add an event.

After you click the Add Event button, enter the details for your new calendar entry in the window. Furthermore, you should include the title or details of the event, and you should select a From and To date and time.
However, if an event takes place all day, simply select the date. After selecting the date, tick the All Day Event box.
Press the Add button to add the event to your calendar.
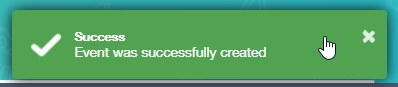
After the creation of an event, a success message appears and the event is populated in your calendar.
Deleting an Event Create in Edulink One
To delete an event you created in the Edulink One calendar, click the small X on the event. The event will be deleted instantly.
Lastly, to return to the Edulink Menu, click the back arrow on the Calendar icon.
How Do I View and Manage My Calendar? Video
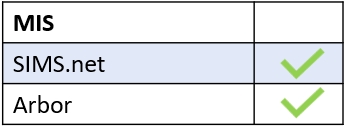
MIS Compatibility