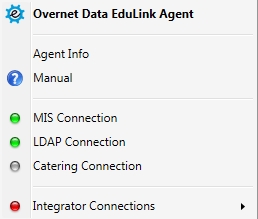
To set up Edulink One to work with your Live Register Catering supplier, administrators need to click on the Edulink SIMS Agent at the bottom of your screen.

Once you click on the Agent, a new window opens with different options. Select Catering Connection.
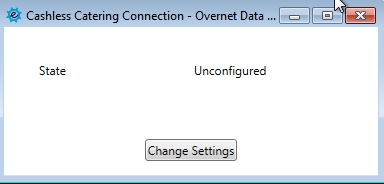
Next, click Change Settings to configure your Cashless Catering.
Select your supplier from the dropdown list provided.

Select Live Register Catering if this is the catering supplier you are using.
You will need to get the following details from Live Register: Server, Database, Username, Password and the Key Fields your school uses.
You will also need to ask Live Register to install the database views that Edulink One needs to communicate with on the Live Register server.
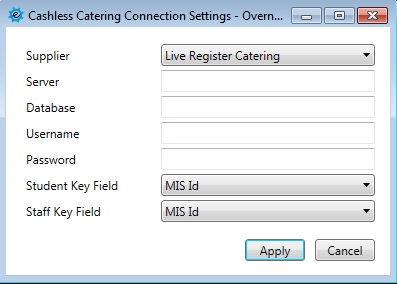
Once the information has been input into the settings, you will be able to update the Edulink Agent with these details. To do so, click Apply and logout of the server.
Proceed to the General tab to enable your catering on the Edulink One user interface.