Marksheets in Edulink One use a live call to SIMS and are not cached. When a teacher makes changes to their marksheets, updates are written live.
To access marksheets, teachers need to log in to Edulink One and click on the Marksheets icon.
Then, the marksheets window opens with a detailed list of the teacher’s marksheets.
The right-hand side of the window displays the teacher. There is also an option to Change Teacher to help fill in another employee’s marksheets.
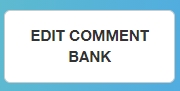
Unlike other teachers, marksheet administrators have an Edit Comment Bank button. In this function, they can create, edit and delete comment banks on marksheets.
There is also a function that allows you to change the view of your marksheets to single students or multiple students.
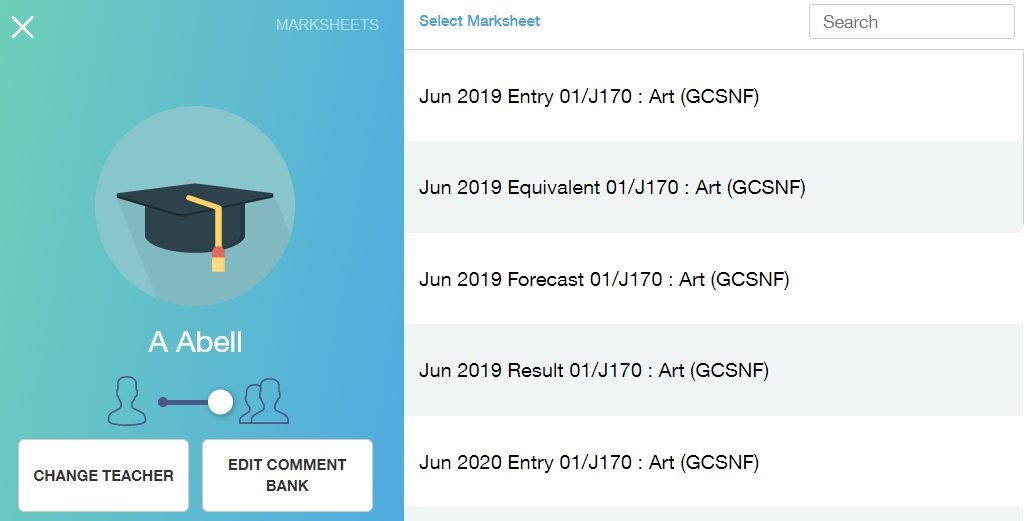
Change Teacher
To change from one teacher to another, click the Change Teacher button.
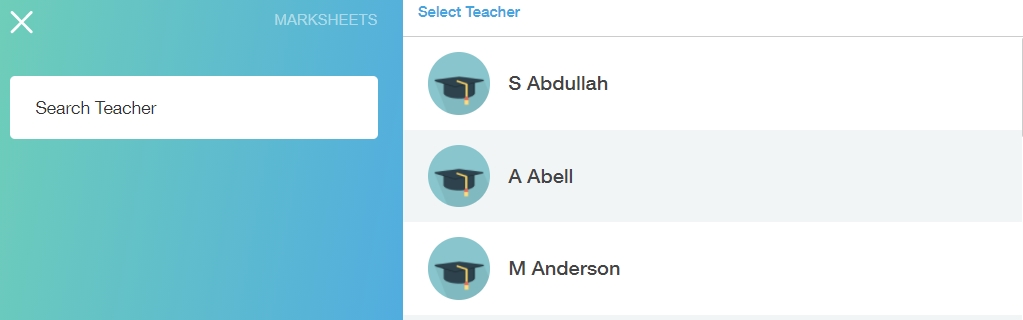
Teachers can use the search bar to search for another teacher, or they can use the list adjacent to scroll and search for a member of the teaching staff.
Clicking on a teacher brings up their marksheets window, exactly as above, unique to their classes.
Edit Comment Bank (Admin Only)
The Edit Comment Bank button can only be accessed by marksheet administrators set up in the Marksheets tab.
.
Click the button to create, edit and delete marksheets.

To begin, comment banks for marksheets must be set up for each Year Group individually. Select the Year Group you would like to include a comment bank for in their marksheet.
Next, select the Subject for which you would like to include a comment bank— comment banks must be added to each subject individually.
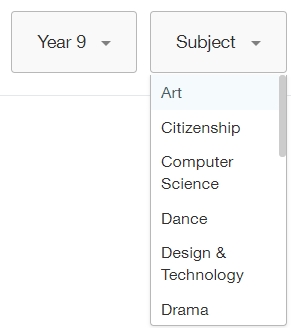
After selecting the Year and Subject, select the Area that the comment bank pertains to.
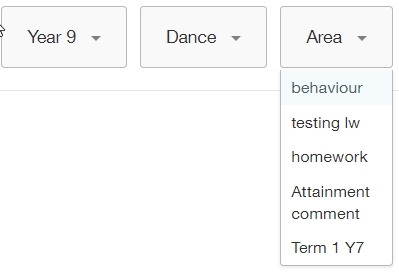
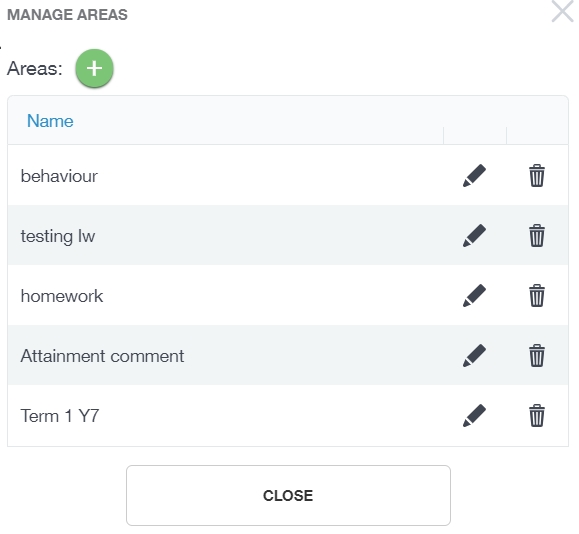
If you need to create an Area for a comment bank, click the Manage Areas button.

To add a new area, click the + button. To edit existing areas, click the pen icon (you will only be able to edit the name). To delete an area, click the bin icon.
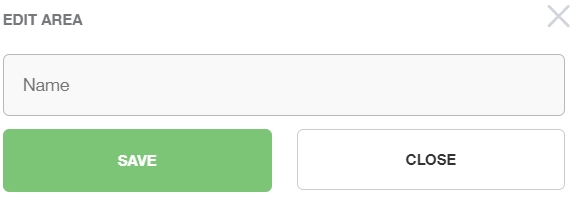
Add a new area to your comment bank, giving the area a name. Press Save when complete and you will return to the Comment Bank Window.
Then, after you select the area, you can add a new comment, and click the Add New Comment button.

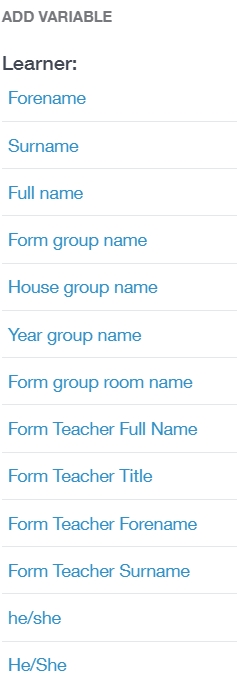
As an administrator, you can type a brief comment or add learner variables to the new comment. To add a variable, click Add variables.
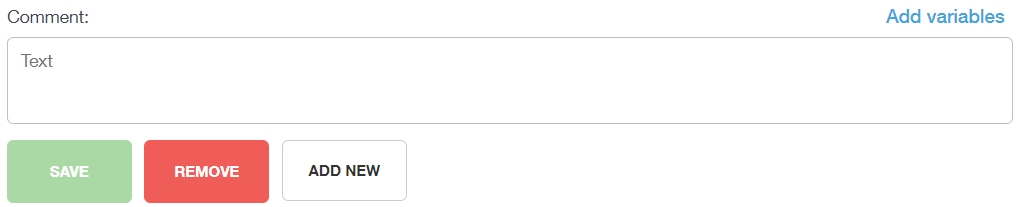
After, select one or more of the learner variables to include in the comment if you choose.
Once you add your variables, click the Save button. A green success message states ‘Added’ if you successfully added your comment.
Comment Bank in Marksheets
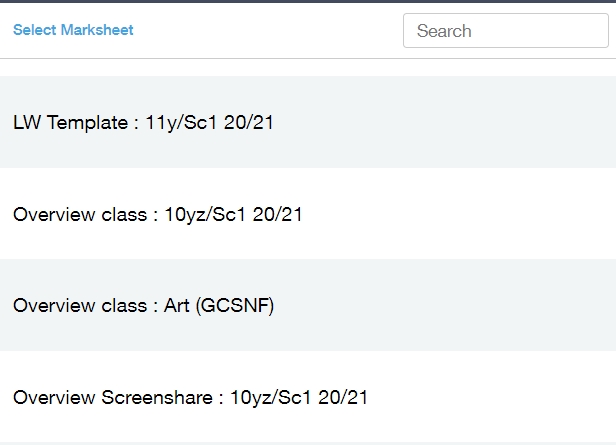
Comment banks can be written by individual subject teachers. To do this, teachers must locate the correct marksheet in the marksheets window and click on it to enter.
You can search for the appropriate marksheet using the search bar, or scroll to locate the marksheet and click on it.
Next, you must scroll through the marksheet to locate the comment bank. To find the comment bank, navigate horizontally and to select a student, navigate vertically.
Teachers can type comments in the text box in the Comment Bank column.

Also, there is a Comment Bank button that will fill in a comment created by the administrator when you select the year, subject and area.
Simply select the comment that applies to the learner and click the confirm button. The comment bank in the main marksheet will populate with the comment. Variables included in the comment bank created by the administrator show up as the learner’s name, teacher’s name, Year Group etc…

Lastly, save your comments by selecting the Save button at the bottom of the marksheet.

Marksheets in Edulink One
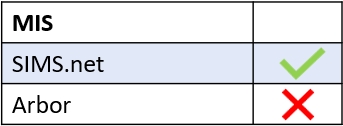
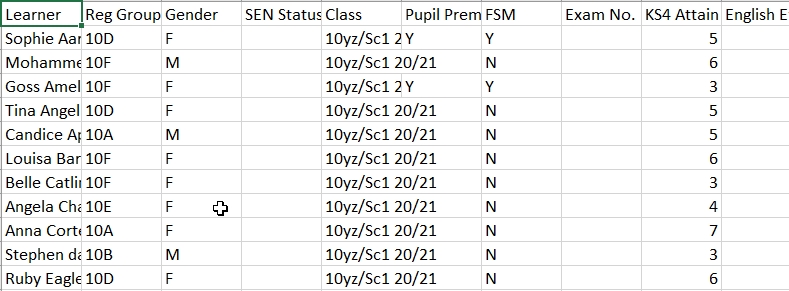
Your school’s marksheets are pulled from SIMS and, therefore, will be identical to the ones created there.
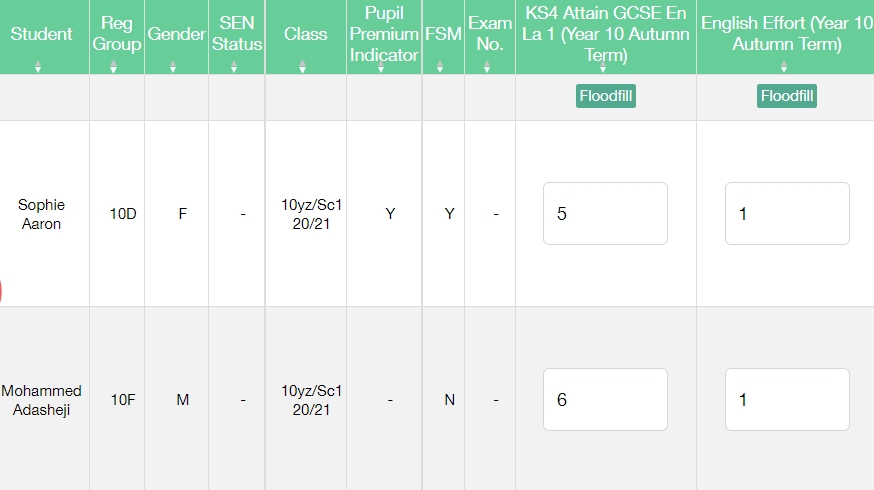
The learners are located at the far left of the marksheet. To view your learners, you need to navigate vertically using the arrow. However, to view pupil information such as SEN Status, PP, FSM and attainment/effort grades, you must navigate horizontally using the arrow.
Moreover, individual teachers can input grades or select flood fill. Comment banks are available to individual teachers to complete, as above.
Saving and Exporting Marksheets
You can save or export your marksheets by scrolling to the bottom of the marksheet and selecting either the Save button, which will save your marksheet, or you can export the marksheet to a .csv file using the Export button.
Moreover, once your marksheet is complete, you can tick the Marksheet Completed box and save it.

If you choose to export, your marksheet will convert into a .csv file, where you can modify and print your marksheet as required.
Save any changes before exiting the Marksheets icon.
Marksheets Video
MIS Compatibility