The Noticeboard function is managed in the user interface in Edulink One. The Noticeboard tab must be configured first before the Noticeboard Manager can create and manage documents and snippets.
Log in to Edulink One and locate the Noticeboard icon to begin.
Click on Noticeboard to open the noticeboard window.
The noticeboard home is the first tab at the top of the noticeboard window. This is where all of the notices and snippets are located. Also, the noticeboard home is what the majority of users will see, including employees, parents and learners.
Documents and information included in the noticeboard will vary depending on the intended recipient. For example, Year 9 Options Evening Presentation would not be relevant to Years 7, 10 and 11, therefore you can select the appropriate group(s) for your notice.
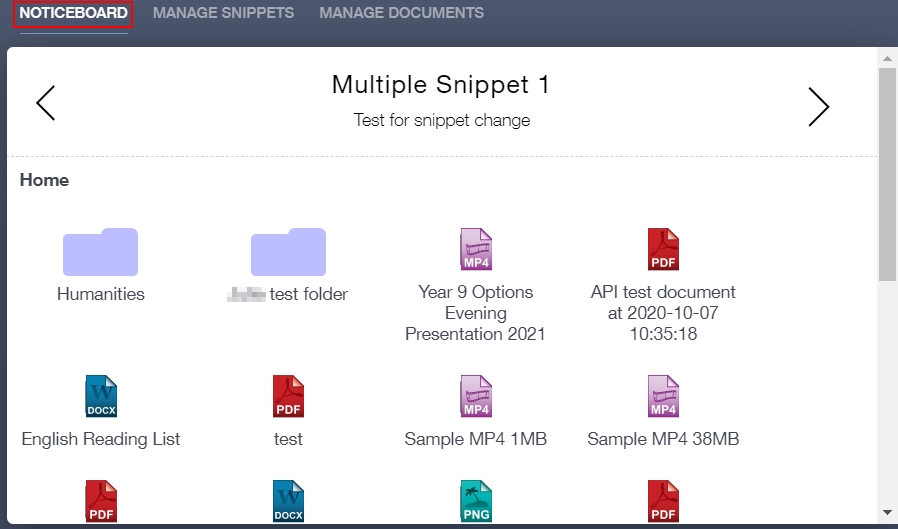
To open a notice, double click on the file to download it.
At the top of the noticeboard, there are rolling snippets of notices which are managed in the Manage Snippets tab.
Manage Snippets
To manage snippets, select the Manage Snippets tab at the top of the noticeboard window.

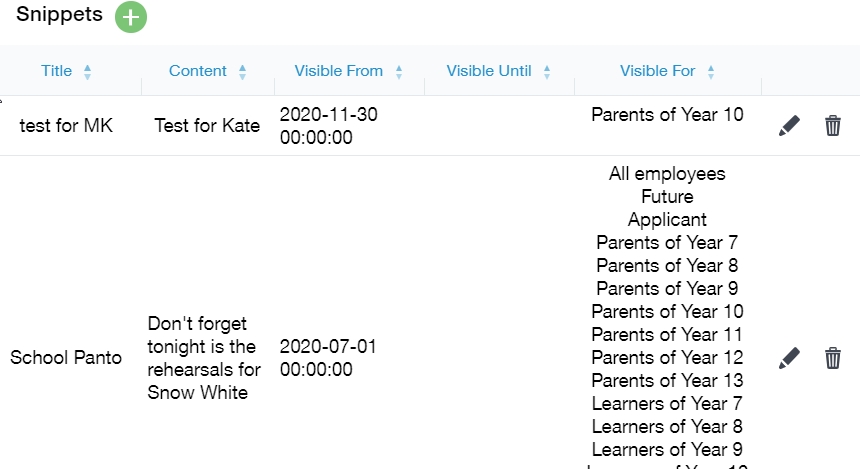
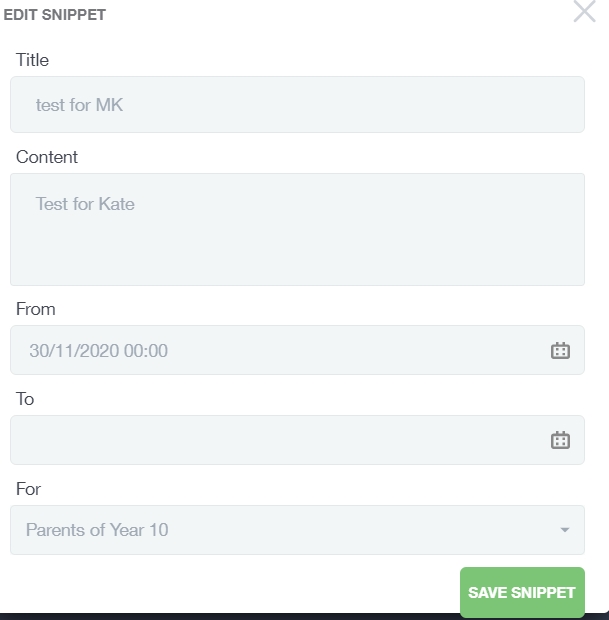
The snippets window contains a list of the snippets created. The features contained in the window include the Title and Content of the snippet, the Visible From and Visible Until dates and the Visible For, which informs the manager of the intended audience for the notice.
You can edit snippets in this window by selecting the pen icon, or you can delete snippets by selecting the bin icon. Type the new information into the current snippet, or select new dates and times from the calendars and click Save Snippet when complete.
To create a new snippet, click the Snippet + button at the top of the window.
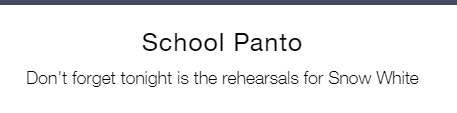
In the New Snippet window, give your snippet a Title, e.g. School Panto, and provide details of the notice in the Content text box. Then, select a From date and time to display your snippet, you do not have to select an end date and time, but to do so you need to use the To calendar.
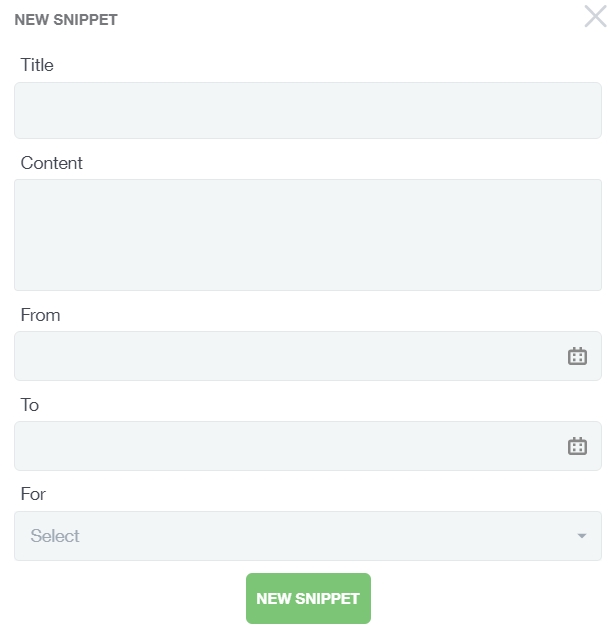
Once complete, click the New Snippet button to save your snippet. This will appear in the snippet table which can be viewed in the snippet window.

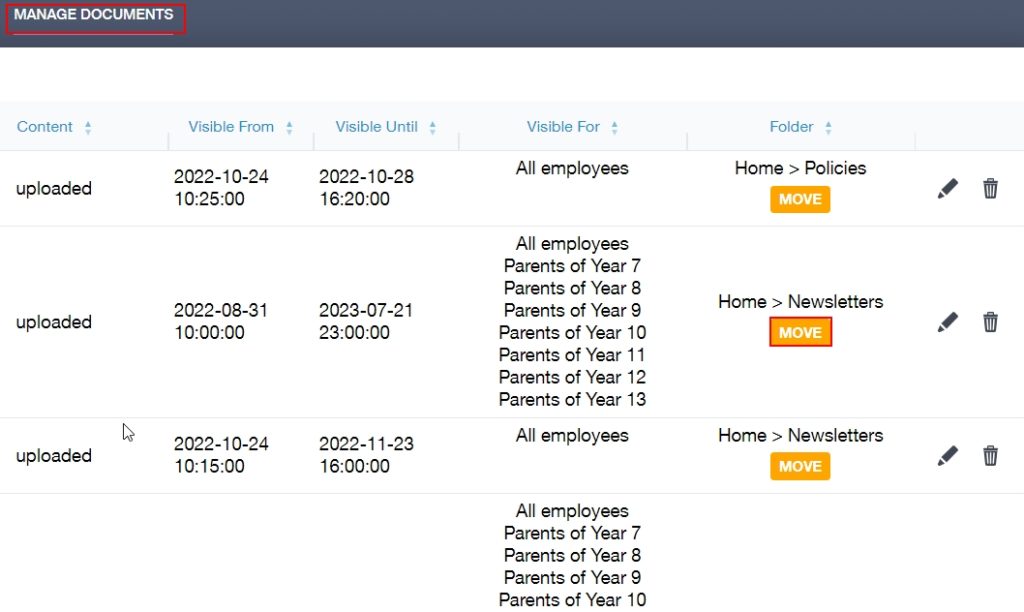
Manage Documents
To manage documents in your noticeboard, select the Manage Documents tab at the top of the noticeboard.

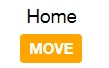
Once you have entered the Manage Documents area, a window appears where you can manage your documents, including move (move button), which pertains to folders, edit (pen icon) and delete (bin icon) them.
In the table, the Name of the document appears, as well as the Content (uploaded), the Visible From date and time and the Visible Until date and time if it is set. Also, under the Visible For column, it indicates whom the notice involves, whether it be employees, parents, or learners.
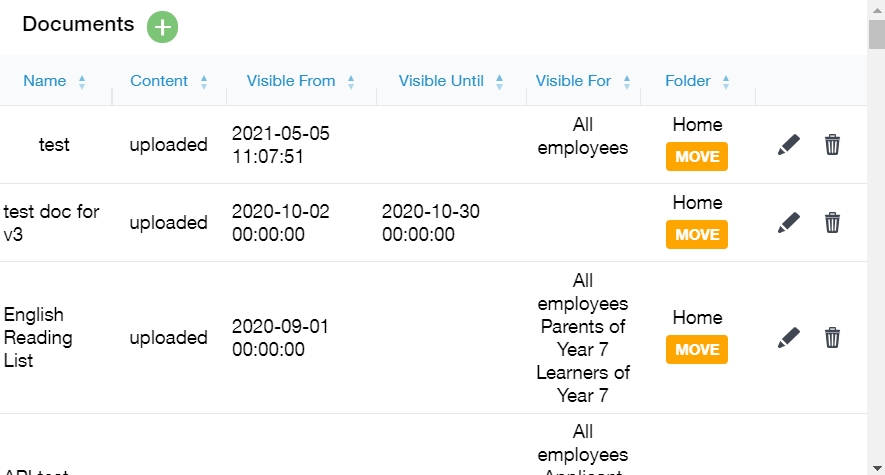
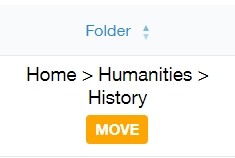
The folders column allows you to create folders for your notices. Select the Move button to create a new folder.
To add a new document to the noticeboard, click on the Documents + button.
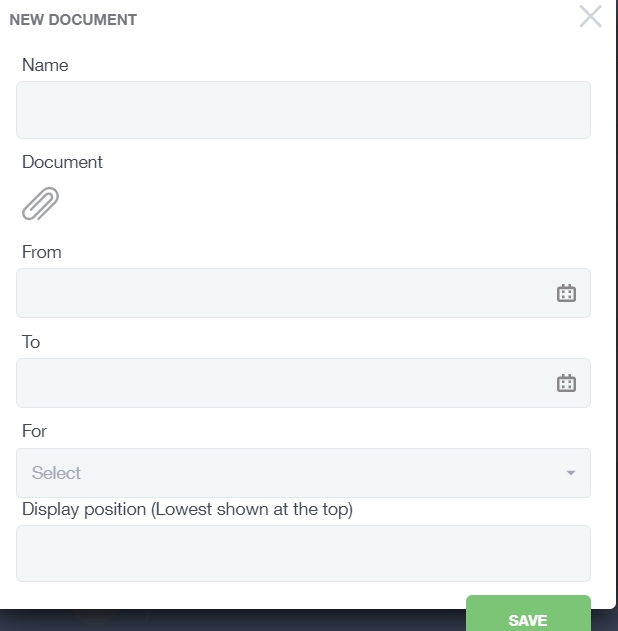
Name: Give your document a title, e.g. Peru Trip 2023.

Document: Upload a document attachment to the New Document window. A variety of document types, including Word, PowerPoint, Excel, PDF, PNG and MP4 documents can be uploaded using this method.
From: Select a ‘from’ date and time your document will be visible.

To: Using the calendar, select a date and time your document will be visible until.

For: The intended recipient(s) of the documents. Select the recipients from the dropdown menu.

Display position: Select a position where you would like your document notice displayed in the Noticeboard home. The lowest number selected is shown at the top, whereas the higher numbers selected are shown lower down.

Once complete, press the Save button at the bottom of the window to save your document. The document will now be visible in the Manage Documents table and the Noticeboard.

To edit a document, select the pen icon and proceed in the same way as adding a new document.
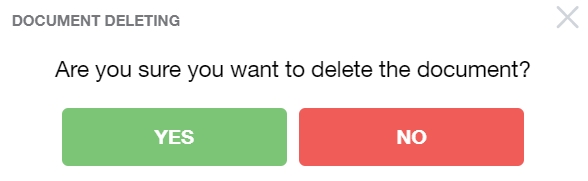
To delete a document, select the bin icon. You will be asked to confirm this action.

Creating a Folder in Manage Documents
In addition, you can also create folders, as well as move documents into them, in the Manage Documents window. Click on the Move button in the Manage Documents table under the Folders column.
You can manage folders by clicking on them.
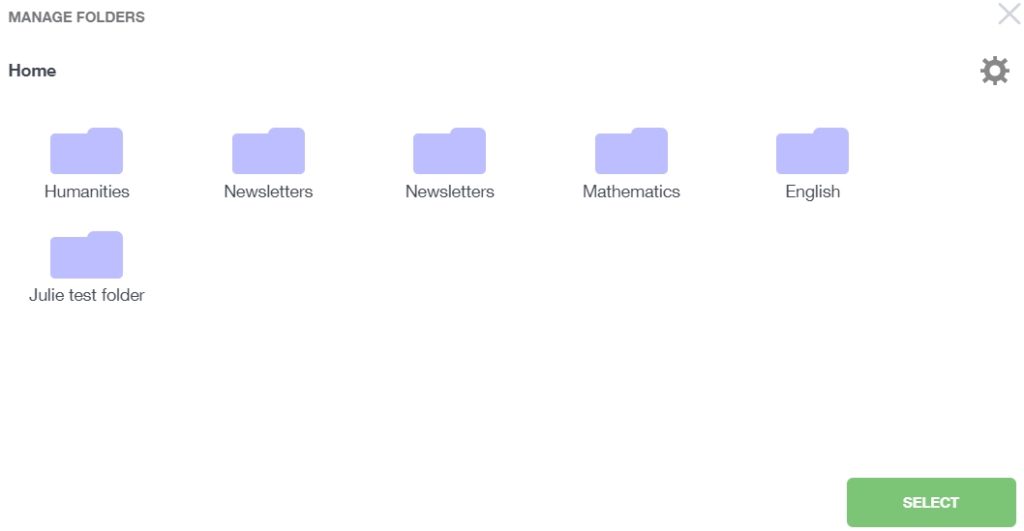
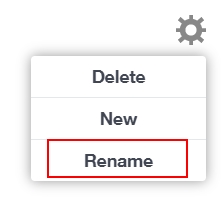
To add a new folder, click the cog in the top right corner of the Manage Folders window.
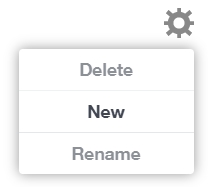
Click on the New button. You can also delete and rename folders using their respective buttons.
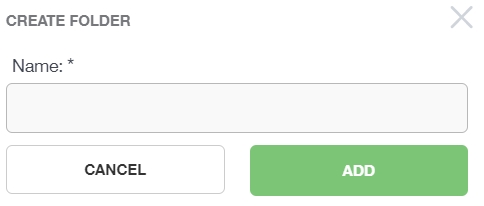
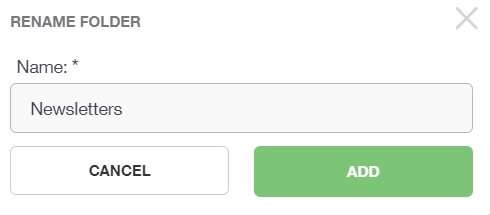
Create a name for your folder and click Add.

Press Select in the Manage Folders window to add a folder to the Manage Documents table.

Organising Your Folders
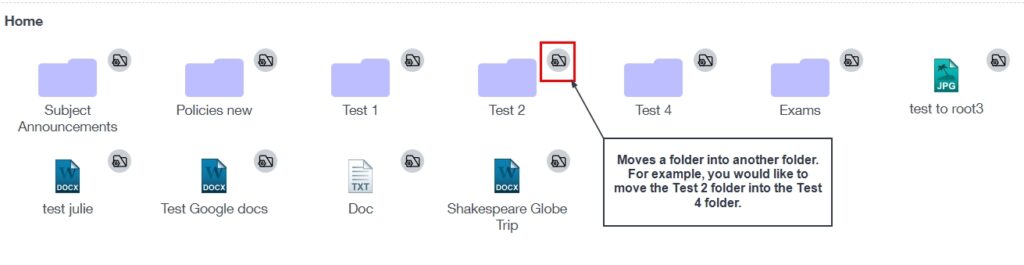
You can organise folders in the Noticeboard by ticking the Organise box at the bottom of the window.
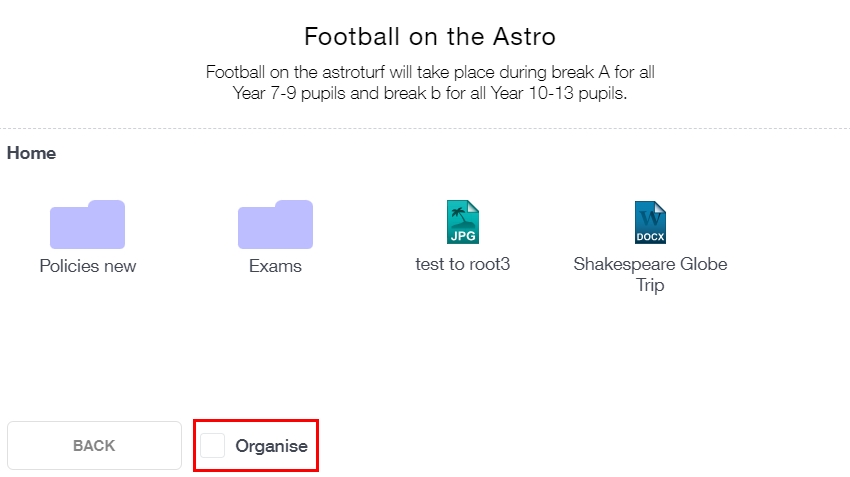
Once ticked, a ‘move folder into’ icon will appear beside the folder. This indicates to you that you would like to move a folder into another folder. Click on the icon of the file you would like to move.

The folder will turn opaque and you will need to select the folder you would like to move the file into.
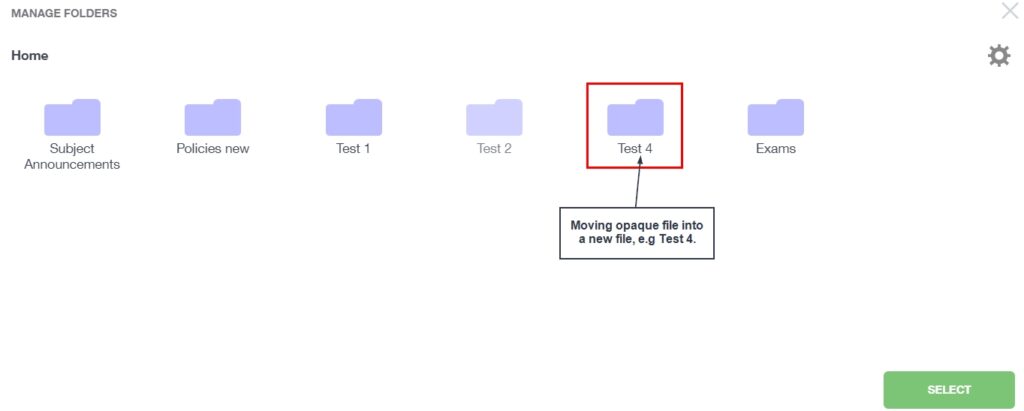
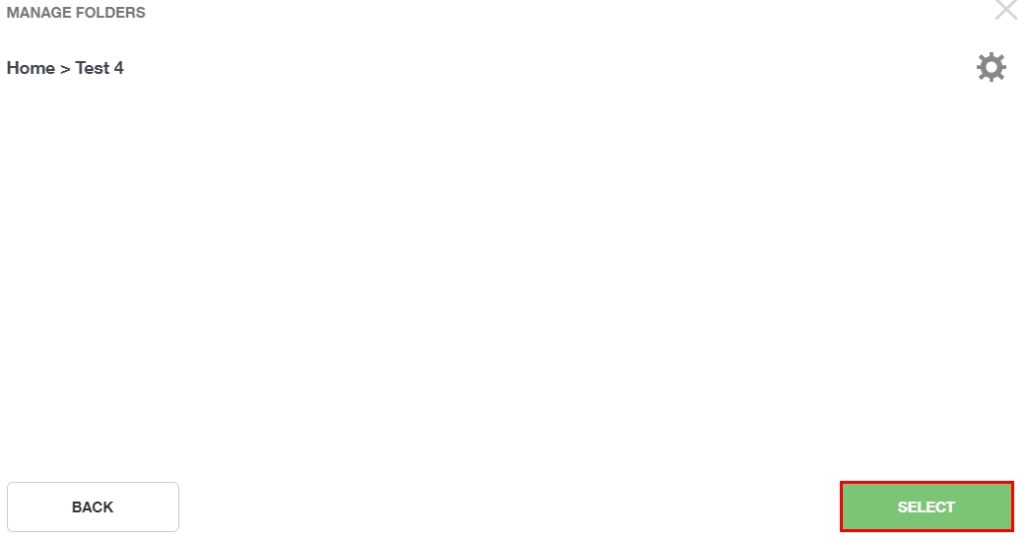
Once inside the folder, you would like to move your document or file to, click ‘Select’.
The file will now appear inside the other folder.
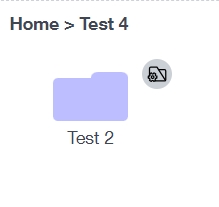
Repeat the process until you have the folders in your desired locations.
Renaming Folders
To rename folders you must select Manage Documents and Click ‘Move’ on a document linked to the folder.
Once in the Move window, select the cog and you will have the option to rename your folder.
Rename the folder and click ‘Add’.
If you need to rename a subfolder within a folder, simply click into the subfolder and follow the same process as above to rename it.
Deleting a Folder
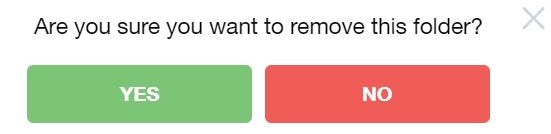
You can also delete a folder. Follow the same process as above, selecting Move in Manage Documents and selecting ‘Delete’ when you press on the cog.
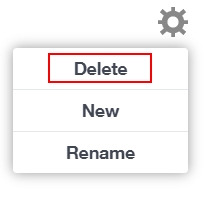
Confirm that you would like to delete the folder and then the folder will be deleted.
MIS Compatibility