Members of staff can view, add and manage detentions by clicking the Detentions icon on the Edulink One homepage.

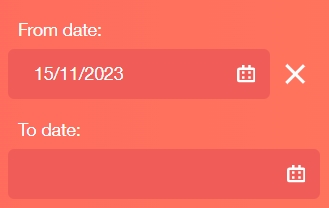
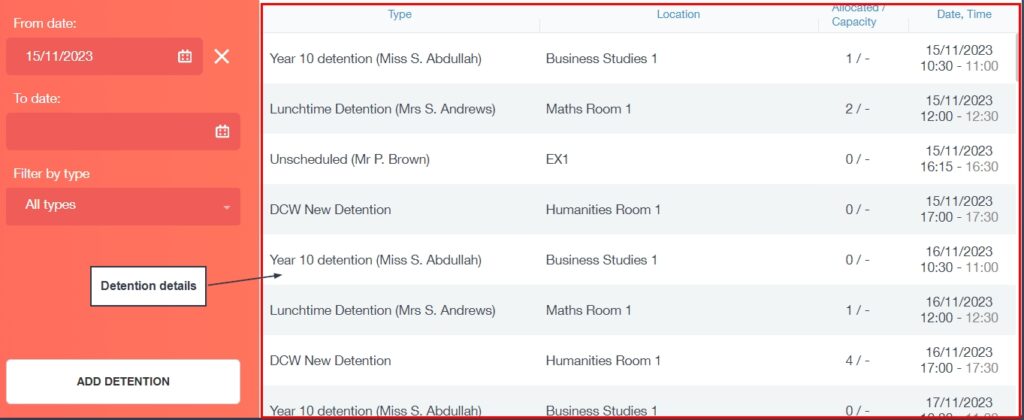
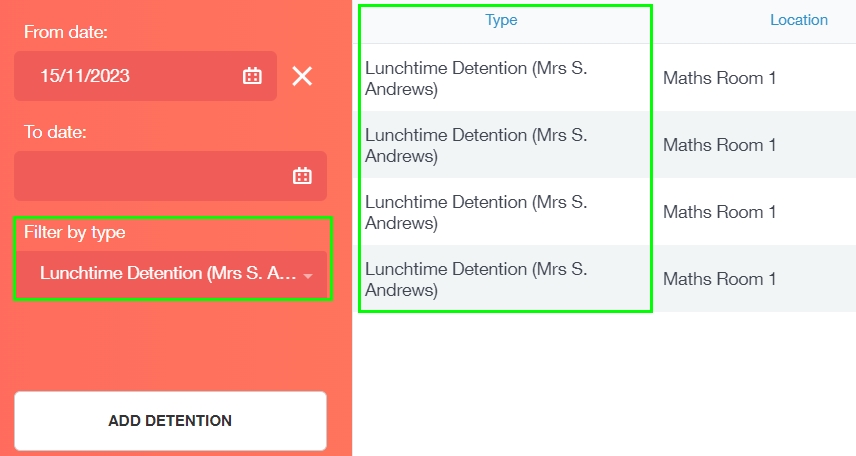
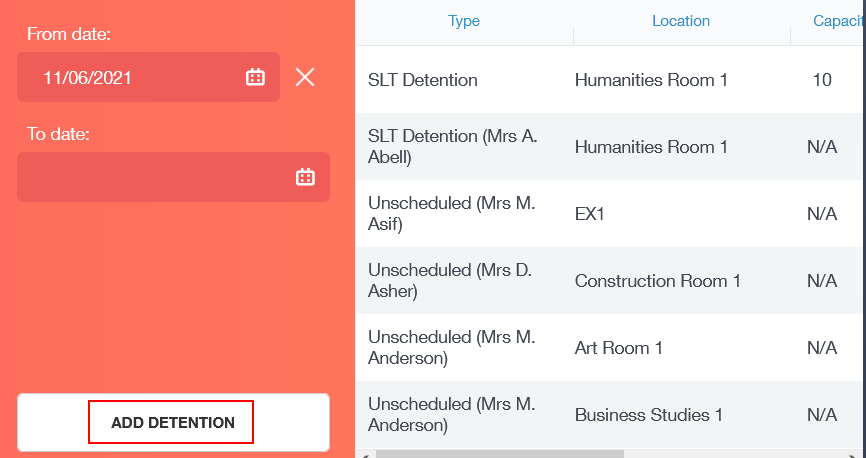
Once clicked, the detentions screen will open where you can see the detentions to/ from dates. Furthermore, details of the detentions appear adjacent to the calendars.
The window outlines the type of detention, including the teacher assigned, the location of the detention, the capacity of the detention (which must be set in SIMS), the number of learners allocated to the detention and the date and time of the detention.
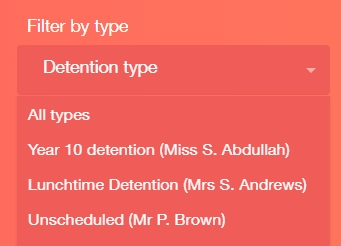
You can also filter by detention type. Select the type of detention you would like to filter by and they will appear in the window adjacent.
You need to click on a detention to view the learners allocated to it.
View of Learners in Detentions
The view of learners in ‘Detentions’ is outlined in the table columns.
Full Name: This allows you to see the full name of the learner.
Form: The learner’s form, for example, 10 A.
Type: The type of behaviour incident that was recorded by the teacher, defiance, for instance.
Date: The date the behaviour was recorded.
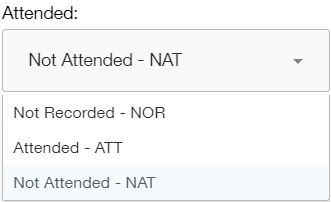
Attended: You can register detention attendance in the ‘attended’ column and change the detention session, if missed, by clicking the pen icon. You can mark learners as NOR (not recorded), ATT (attended) and NAT (not attended).
Employee Name: The name of the employee that set the detention.
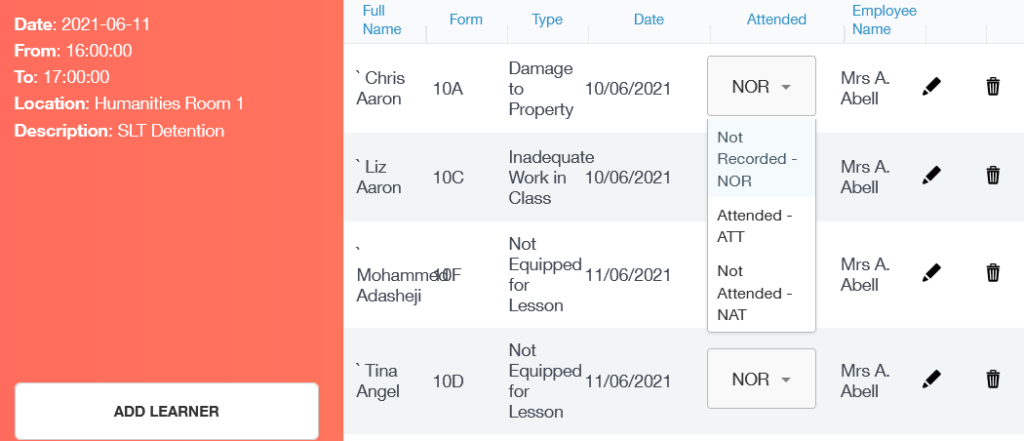
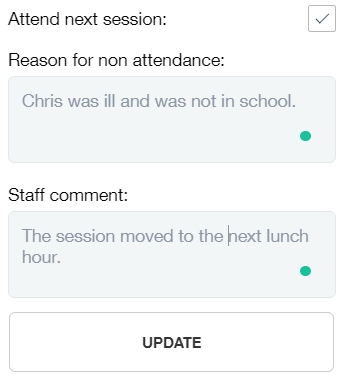
Pen Icon: To edit learner attendance, move the learner to a new detention and add comments regarding the detention, click the pen icon.

You will be asked whether the learner has attended the detention. If the learner has not attended, you can move the learner to the next available detention.
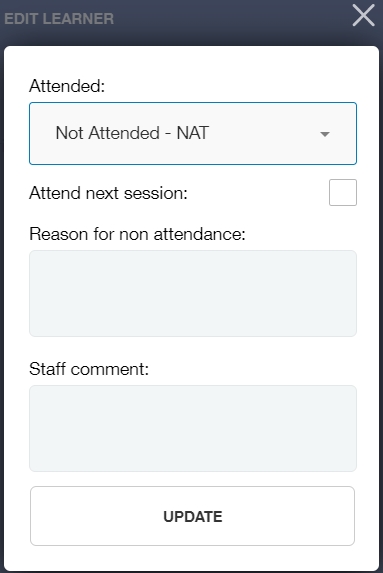
Type comments regarding non-attendance and other comments in the boxes provided.
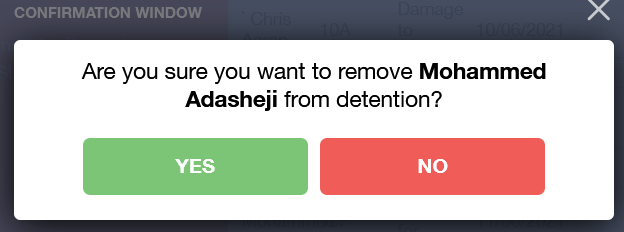
Bin Icon: Remove a learner from detention. You will be asked to confirm this action.

Manage Detentions: Add a Learner to an Existing Detention
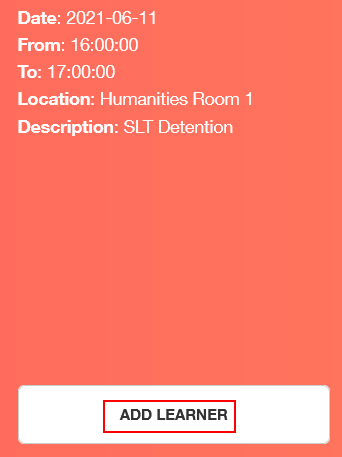
Click on the Detention Icon and then click on an existing detention to add a learner.
Next, click the Add Learner button after selecting a detention to view.
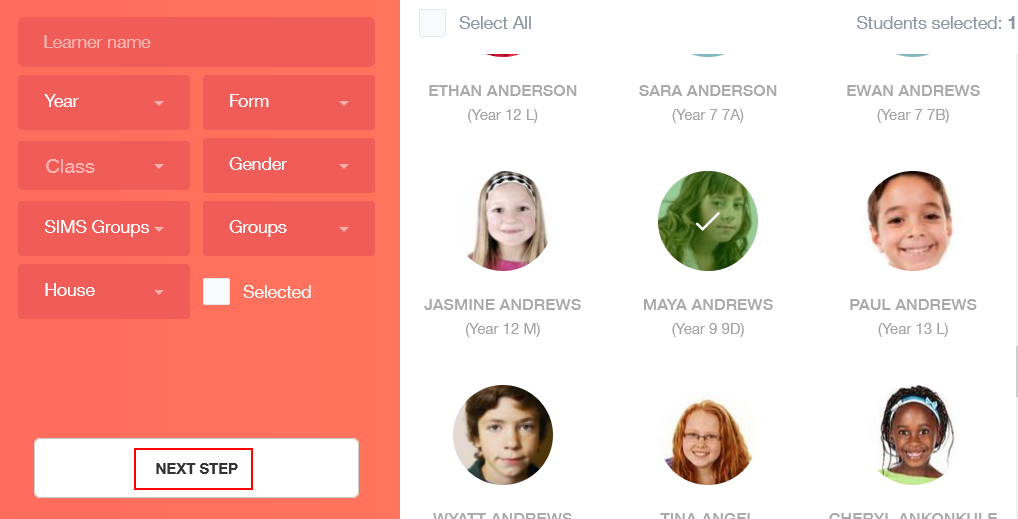
Select the learner you would like to add to the detention by clicking on their image. Additionally, you can filter by Year, Form, Class, Gender, SIMS Groups, Groups or House. Click Next when you have selected the learner.
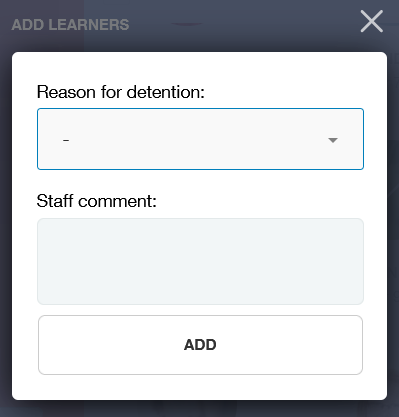
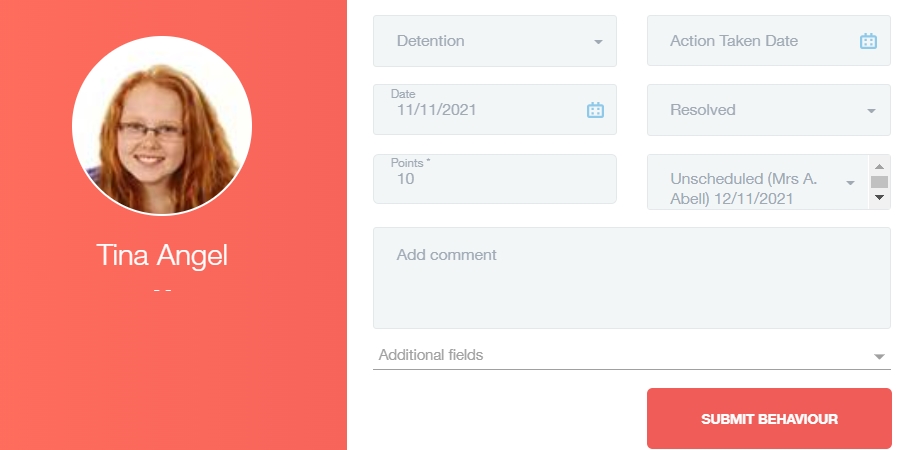
A window will open asking you to provide the reason and comment for adding a learner to the detention. The reason for detention coincides with behaviour types from the behaviour icon.
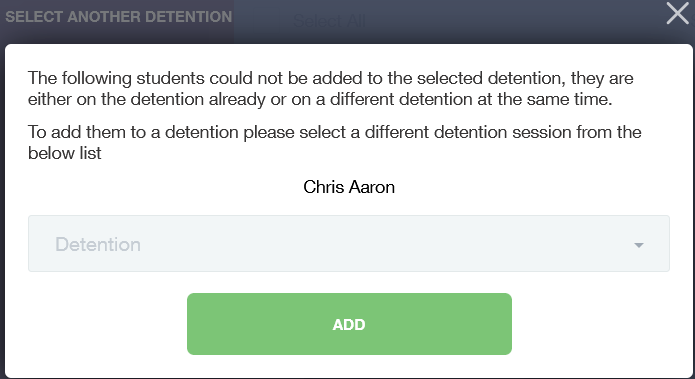
After submitting a reason and a comment, a message will appear in green stating ‘changes submitted successfully’ or a window will appear alerting you that the learner is already in a detention.
Select another detention from the list and click the Add button. The message ‘changes submitted successfully’ will appear in green if you are successful.
Detention at Capacity
Detention capacity must be set in the MIS and not in Edulink One. If a detention has reached its full capacity, a message will appear stating that the detention is full if you try to add a learner.
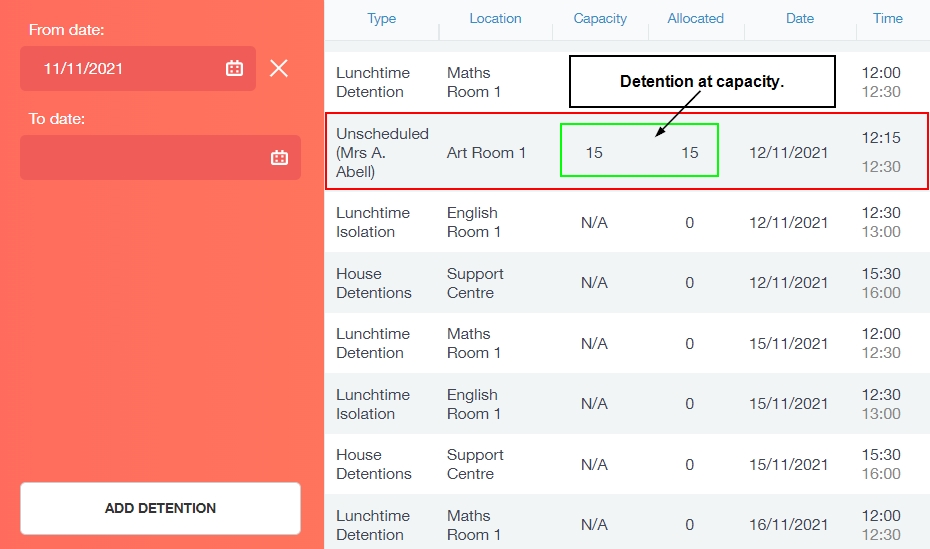
If the detention is full, you can select a new detention from the dropdown menu and add the learner to a new one.
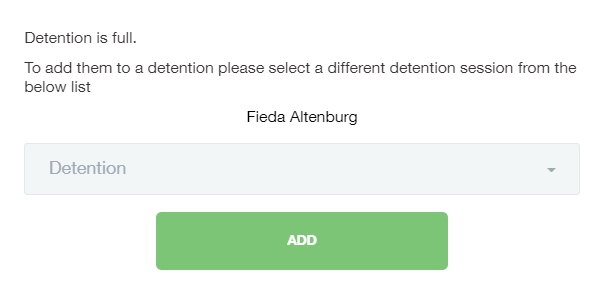
This also applies when adding a detention to a behaviour incident in the register. If you select a detention and it is at capacity a message will appear stating it is full.
Then, you can select another detention from the dropdown menu and add the learner to it.

Adding a Detention
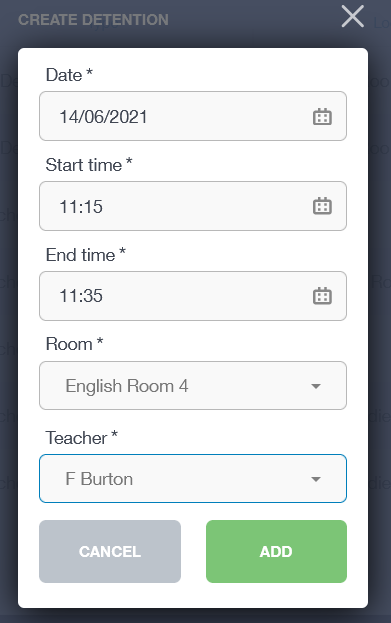
To add a detention, click on the Detention Icon and the Add Detention button.
The create detention window will open. Include the Date of the detention, Start Time of the detention, End Time of the detention, Room where the detention is located and the Teacher who is overseeing the detention.
Then, click Add to add the detention to the rota. A green message stating ‘Success’ will appear once the detention has been added.
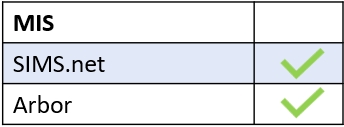
MIS Compatibility