To prepare for the end of the academic year, there are several areas of Edulink One that you may wish to be aware of and their use.
Exam Results
Edulink One statically enters two embargo dates for your A-level and GCSE results. This is done automatically as a safety net to prevent results from being released to pupils early, in case the embargo date has not been set in the MIS. The embargo takes place from midnight to 8:00 am or 8:30 am, depending on the time set for release by the Joint Council for Qualifications (JCQ), on the ‘Exam Download Day’, where schools are able to download the results from the exam boards to be distributed the following morning on ‘Results Day’. The release time changes depending on the decision of the JCQ and Edulink One’s static embargo time changes to reflect their guidance.
However, it is essential not to rely on this safety net and to set the embargo settings in your MIS and Edulink One prior to these dates.
It is also important to note that when an embargo has been activated, it applies to ALL exam results in Edulink One. So for the period of the embargo, no results, including previous results, for example, if your A-level results are already released, will be viewable nor can you send the Statement of Results in Document Messaging.
Exams Settings Procedure
To do this, log in to Edulink One and enter the administration settings. Click on the Exams tab to begin.

Ensure the ‘Use SIMS embargo dates‘ setting is ON. Edulink One honours the SIMS embargo or the embargo from your MIS provider.

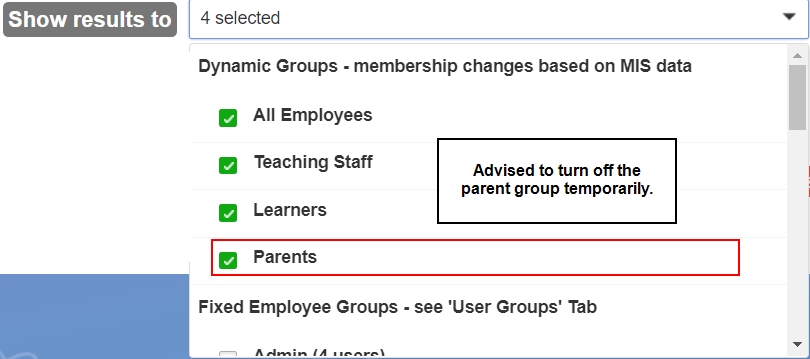
Additionally, Overnet Data advises schools that results are owned by the pupils. Therefore, it is advisable to ensure that only those who need access to the results, i.e. learners and teachers, are able to view these, at least temporarily. If a school desires, they may wish to open the ability to view results to parents (or other groups) later on Results Day or even the following day, to prevent parents from seeing/informing children of their results before they can see them. However, this is up to each individual school.
Please see our article on exam settings for further information.
‘How Do I View Exam Information?’ Video
Leavers
When a student is taken “off-roll”, they will no longer appear in any groups created in Edulink One and their accounts will be disabled.
If you need students to still have access, for exam results, for instance, then you can enable the ‘Leaver Login enabled‘ setting in the Login tab in the administration settings by turning it ON.

Then, set the number of days after leaving you would like to grant the leavers access to Edulink One.

Please make sure the student LDAP accounts have not been disabled. These settings will re-enable student and parent logins for the specified period.
You can still contact leavers in Communicator regardless of this setting.
Roll Forward Functionality (Timetable)
If the ‘Enable Roll forward‘ switch is ON (found in the General tab in the administration settings), then if a new calendar and a new timetable are in place, Edulink One will set an effective date for the new academic year (September). This is regardless of the current date, so the new timetable will now be visible.

This will also allow access to seating plans in registers.
If you do not want the timetable to be visible, then you can remove access through the settings in the General tab. One way to accomplish this is to disable the timetable screen for the groups that do not need access to the timetable, i.e. learners and parents.

You can switch off the ‘Enable Roll Forward‘ functionality, which will ensure the timetable will not be visible until the start of the new academic year. However, it is important to note that simply switching OFF the roll forward function, will affect logins, data views for students, resources etc., which may be inconvenient for your school.

Admissions
When your new admissions (applicants) have been given the status of “accepted” in your MIS, parents’ accounts are created in Edulink One so parents can log in and update their details through the Update Information screen.
In the Login tab, parent accounts are automatically created in manual accounts by using parent email addresses rather than information stored in LDAP. You can view applicants in the Load User Accounts table by filtering User Type > Children > Last Login. Type ‘Parent’ in the User Type field, ‘Applicant’ in the Children field and ‘Never’ in the Last Login field to generate a list of all applicant parents and their details to create accounts. For more on the process of setting up Edulink One for new applicants/admissions, please see the following article.

Furthermore, you can message new admissions/applicants in Communicator. If you wish to send a new message to applicant user types, select ‘Admissions’ and click ‘Next Step’ to select Parent recipients. Then, compose your message.

What Might Be Impacting My Cache Times?
You might find that your cache is running slower than usual because you have dates enabled in behaviour, achievement and detention for the past academic year. It would mean that you are pulling through a year’s worth of data that you may no longer require.


If you change the relevant dates in these settings to the current academic year, you will find that this can sometimes speed up your cache.
Exporting Club Data
At the beginning of the academic year, many schools would like to start fresh by deleting their old clubs and recreating them for the new academic year.
Before deleting clubs yourself or contacting Overnet Data to delete clubs in bulk, it is advisable to run a club attendance overview analytics report for each year group.
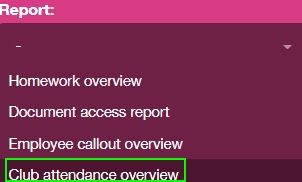
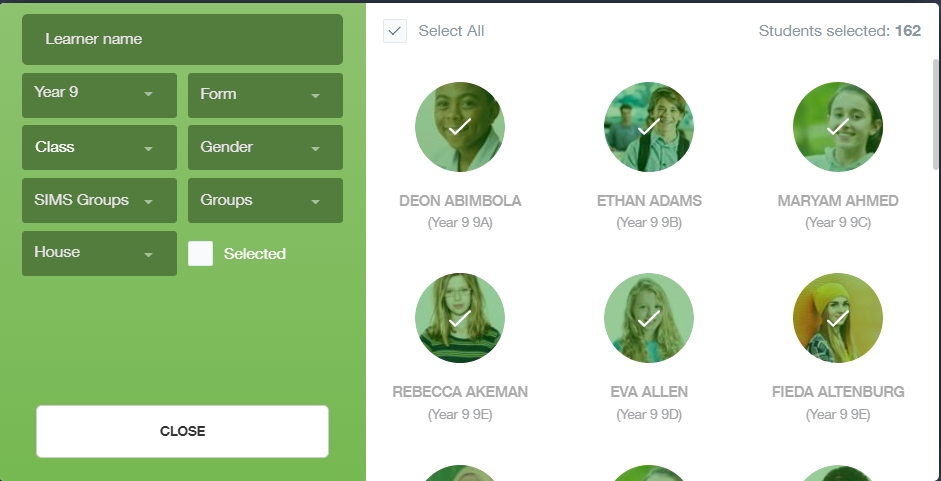
Click on the Analytics icon and select the ‘Clubs Attendance Overview’ report.
Next, use the filters to refine your data by inputting a learner’s name, a year group, a form group, a class, a gender, a SIMS group, a group created in Edulink One or a House. Click ‘Select All’ to select all pupils filtered or select the images of those you need. You can click ‘Selected’ to review a smaller selection of students before running the report.
Then select the dates you would like to run the report for.
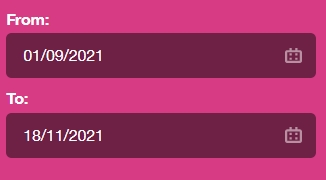
Once you have finished selecting the dates, click ‘Update’ to view the data for the selected students.

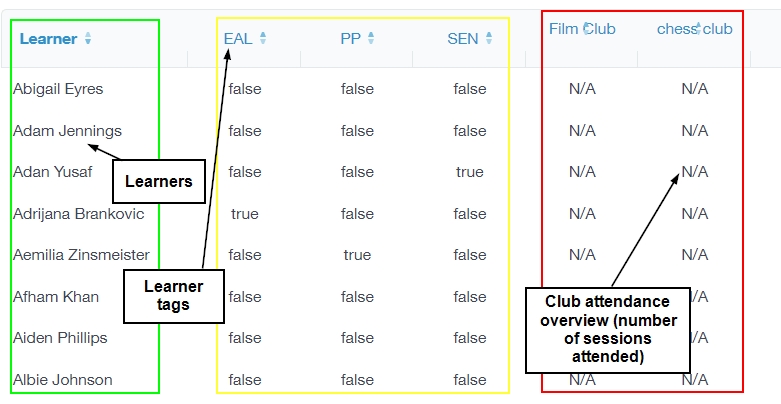
The data is broken down into the learners, the learners’ tags and the clubs and sessions they attended the club.