To manage iCal (Calendar), log in to Edulink One’s app or website. This function is available for all user types, so parents, learners and staff can manage their calendars as well if this has been enabled.
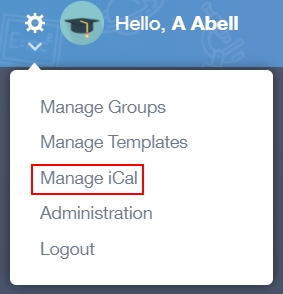
Click the cog at the top left of their screen to begin. At this point, a list appears with a variety of functions. Click on Manage iCal to get started.

iCal Exports
The iCal window opens where you can manage the exports and imports for your school’s calendar.
With exports, administrators and employees have the option to ‘turn on’ the Calendar and the Timetable within Edulink One. To do this, they need to click on the Toggle which appears green when enabled.
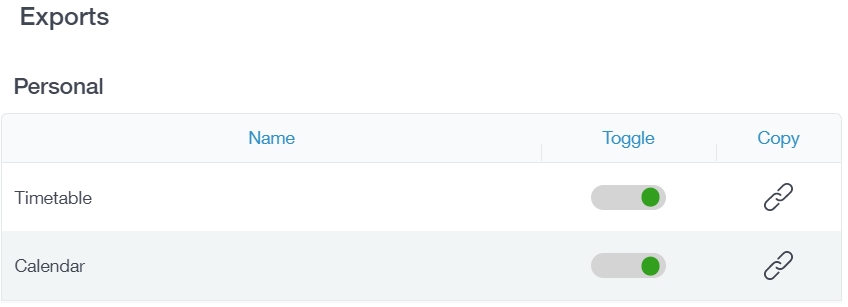
The copy function within the export table copies the URL for the Edulink One Calendar so you can import it into your school’s calendar, or your personal calendar in Outlook or Google. To perform this function, press the Copy link icon, open your Outlook or Google calendar and locate the settings. Once in your settings, paste the URL link into the appropriate place and press import.

For example, to add a timetable to your calendar, turn on the toggle and select the ‘copy’ link.

Then, click the + Add button to import your timetable into your calendar.

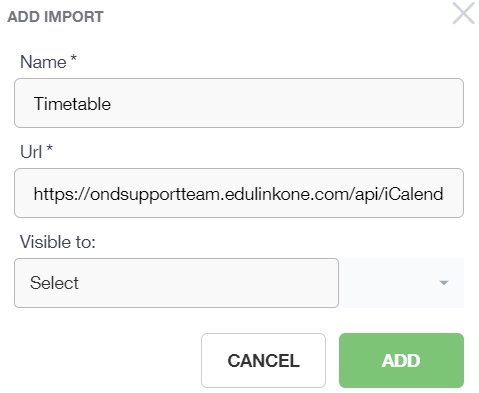
Write a name for the import and paste the copied URL into the URL field. Click the green ‘Add’ button
This will then be added to your calendar.
Imports (Adding Your School Calendar to Edulink One)
Below exports, you can configure your imports, which allows you to import your school’s calendar from Outlook (Microsoft 365, for example) or Google, to Edulink One’s calendar.
The Imports table includes the Name of the import, the Type of import, to whom the import is Available To, the Last Sync of the import as well as the bin icon to delete an import.

To import a new calendar using iCal imports, click the Add+ button.

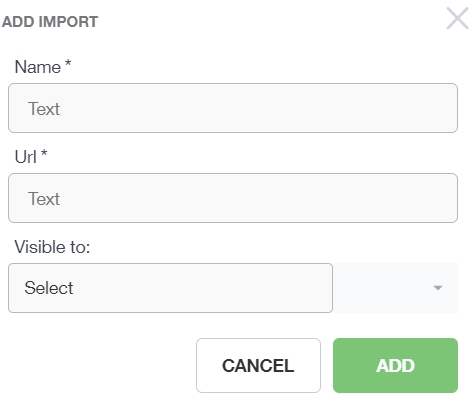
The Add Import window opens. Provide a Name for the calendar you are importing, copy and paste the URL into the URL text box and select which users the calendar will be Visible to, using the dropdown menu. Select the users by ticking the boxes beside staff, students or parents.
Click Add to add the imported calendar to your Edulink One calendar.
When you have finished managing your calendar, click the Close button to return to the Edulink One homepage.

You can return to add or remove imports within the Manage iCal function by following the steps above.
To view the calendar, and any changes made in Manage iCal, users must click the Calendar icon on the Edulink One homepage. This might be located in the More icon in the user interface, depending on the level of user access and functionality enabled.

How Do I View and Manage My Calendar? Video
MIS Compatibility
