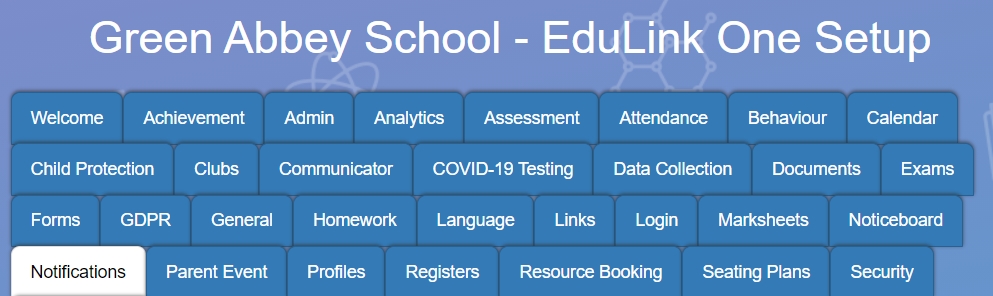
To create new behaviour notifications, log in to Edulink One and go to the Notifications tab. This is in the administration settings. Click on the Notifications tab to begin.
If a behaviour notification has not been set up in notifications, you need to scroll to the bottom of the table and press the + Create New Notification Rule button. However, if a behaviour notification exists, you can edit the message by clicking the pen icon under the Actions column.
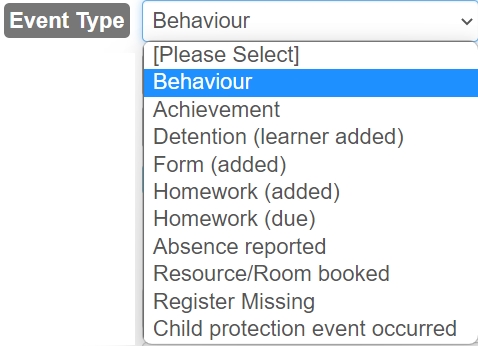
Select the ‘behaviour’ Event Type.
You can add a rule name, which is a name or short description (100-character limit) if you create multiple notifications for the same event type. Each name must be unique, e.g. Behaviour- B1, Behaviour- B2, etc…

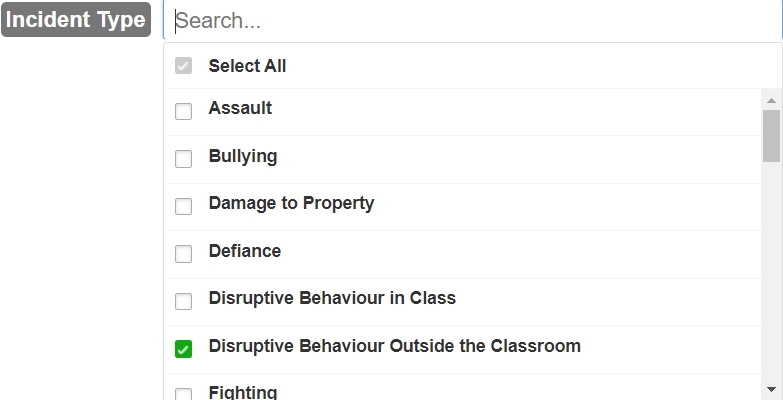
Next, select the incident type from the list. Alternatively, you can leave the field blank to apply the entire
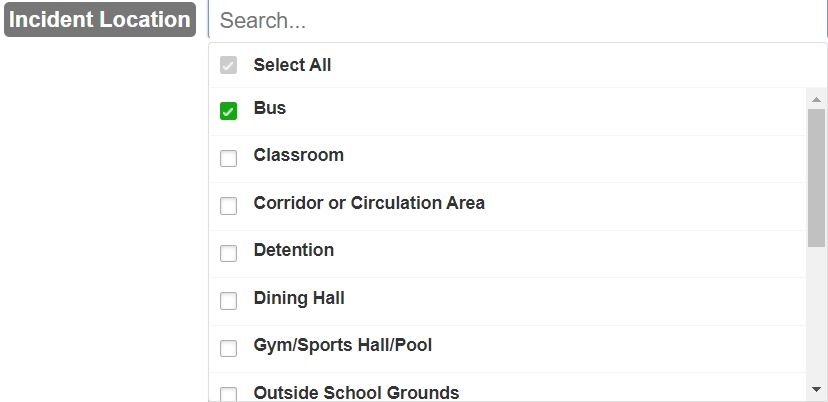
Then, select the location if you would like to inform the parents of an incident in a particular place or leave it blank.
Behaviour Notifications: Message Creation
Set the time you would like to send your message. This means that all behaviour points accrued throughout the day will be sent at the same time daily. Any behaviour points acquired outside of the time set will be queued to send the next day. For instance, if you have set the behaviour notification to send on Tuesday at 15:00 and a behaviour incident is added at 16:00, the message will not be sent until Wednesday at 15:00.
This is not a summary of behaviour points. The messages sent regarding behaviours will be separate, though they will be sent at the same time.

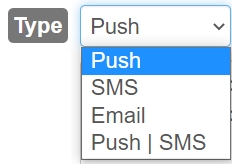
Select the type of message you wish to send: SMS, Email, Push (notification) or SMS | Push, which sends as both a text message and push notification.
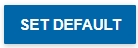
Then, compose your message. A default has been set; however, you can change this or restore a message to default after changes by clicking the Set Default button.

You can also add the following variables to your message:
| {{learner.forename}} {{learner.surname}} {{learner.form_group.name}} {{learner.form_group.room.code}} {{learner.form_group.room.name}} | {{learner.form_group.employee.title}} {{learner.form_group.employee.forename}} {{learner.form_group.employee.surname}} {{learner.house_group.name}} {{learner.year_group.name}} |
Afterwards, write the subject for the notification. The default subject is ‘New Behaviour Incident’— however, this can be changed to reflect each school’s preference.

Recipients
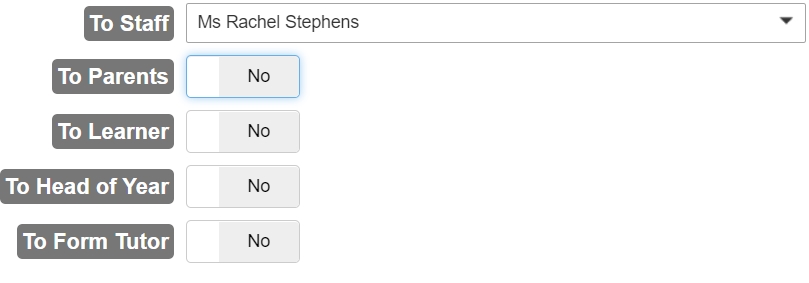
Lastly, choose the recipients of the notification. These can be staff members, parents, learners, heads of year and form tutors. You must select staff recipients individually, but you can simply turn the other user groups to ‘Yes’. This will also use ‘supervisors’ if this is enabled in your pastoral structure and Communicator.
Click ‘Save Rule’ once you have finished setting up the behaviour notification. This updates the notifications table or, if already created, updates the current notification with changes.

Save your notification by clicking the ‘Save’ button at the bottom of the page.

If you would like to learn more about notifications, see our tutorial.
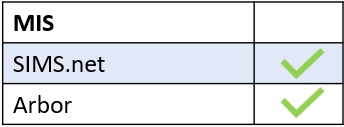
MIS Compatibility