School employees, such as Teachers, LSAs, Admin Staff, Technicians, Site Staff and others, can update their information using the Update Information icon on the Edulink One homepage. Though the Update Information icon remains the same for all employees, their view of the Edulink One homepage is different and varies between employees depending on their level of access.
Teaching staff will likely need to click the More icon to see the Update Information icon.
Furthermore, the view also varies if an employee is also a parent.
Additionally, employees can also view their information in Account Info, but they must use the Update Information icon to add or update basic details.

Accessing Your Account Info Video
To change your details, click the Update Information icon.

How Do I Update My Information as a School Employee? Video
Contact Details
The contact details stored relate to contact information, addresses as well as car details.
To change information, you can delete the old information by pressing the bin icon. To add new information, select the + button at the top of each category.
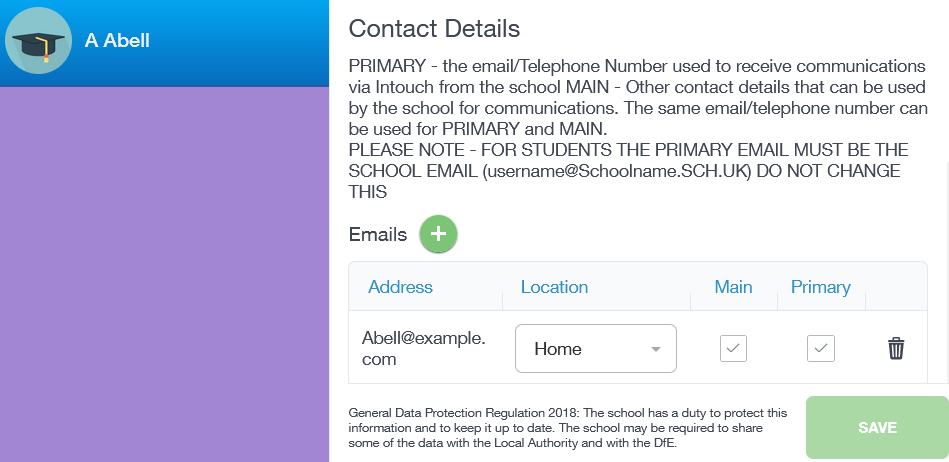
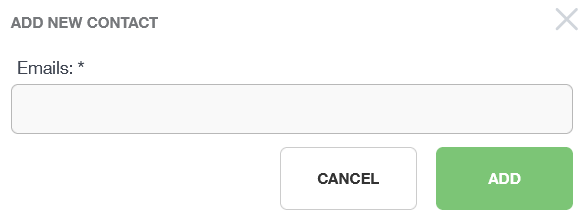
Update Emails
Emails: To add a new email, select the + Emails button, fill in the new email address and click ‘Add‘. Likewise, to remove an old email address, click the bin icon. All users can have more than one email address, can prioritise the email addresses and add a location to email addresses.
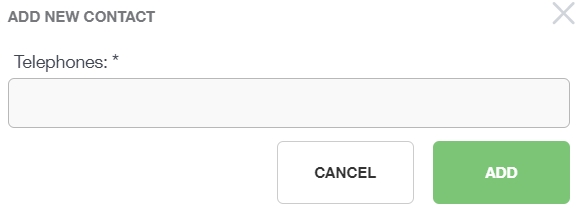
Update Telephones
Telephones: Click the + Telephones to add or update telephone numbers. To remove an old number, click the bin icon.

A new window opens where you can update their phone numbers or add a new one.
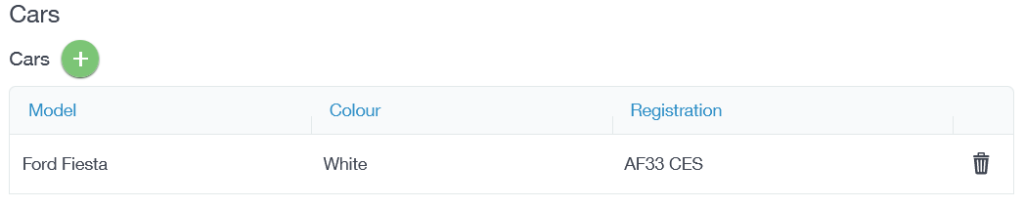
Update Cars
Cars: To update car details, you can bin information regarding an old vehicle and then add a new vehicle. You may also add additional vehicles if you drive to work in another car, motorbike etc…
To add a new car, click the + Cars button. Once the new model, colour and registration have been updated, click ‘Add‘.
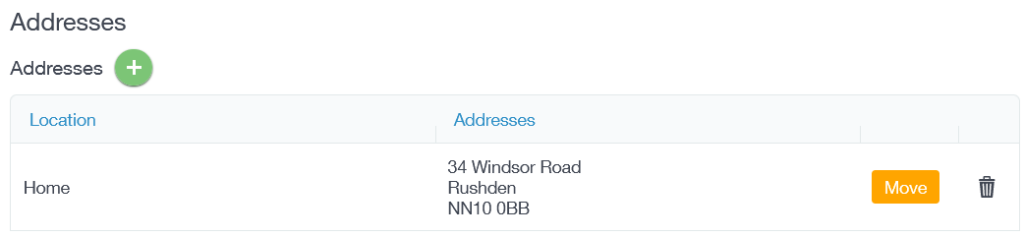
Update Addresses
Addresses: Click the + Addresses button to add an address. Fill in your postcode and house number and click Next.
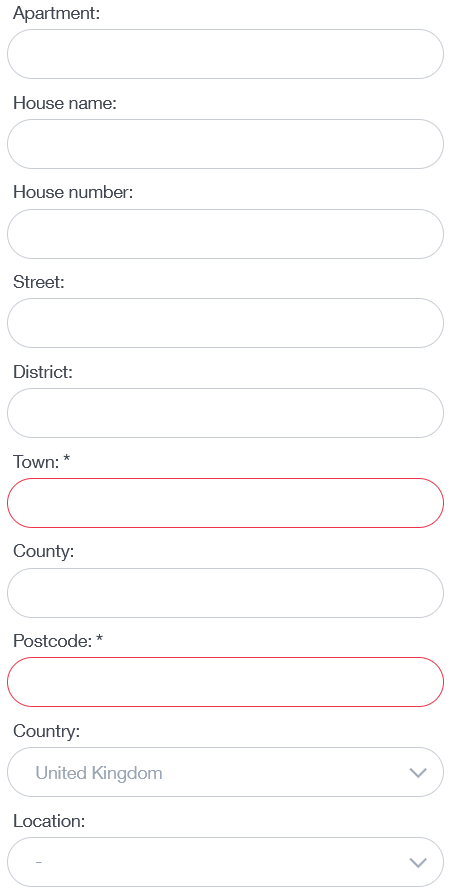
Further information required can be filled out after you click ‘Next‘, but fields such as Town and Postcode are required.
Further information required can be filled out after you click ‘Next‘, but fields such as Town and Postcode are required. Click ‘Done‘ which will take you back to Update Information.
To delete an old address click the bin icon.
Moreover, in the event of a move, you can click the Move button which moves all cohabitants to the new address, e.g. if an employee is also a parent, their children’s address will change as well.

Lastly, save any updates to your data by clicking the Save button. A green box stating ‘Success’ will appear.

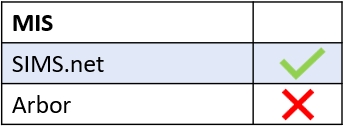
MIS Compatibility