Creating assessment grids for your school is often one of the most time-consuming admin tasks for your team. The Assessment tab in the administration settings allows administrators to create assessment grids which are visible in the Assessment icon on Edulink One’s user interface. The Assessment tab pulls all the relevant data aspects from SIMS Marsksheet Templates.
Log in to Edulink One and locate the administration settings in the top corner of the screen. Find the assessment tab and click on it.

After locating and clicking on the Assessment tab, a table will display a list of all the assessment grids created.
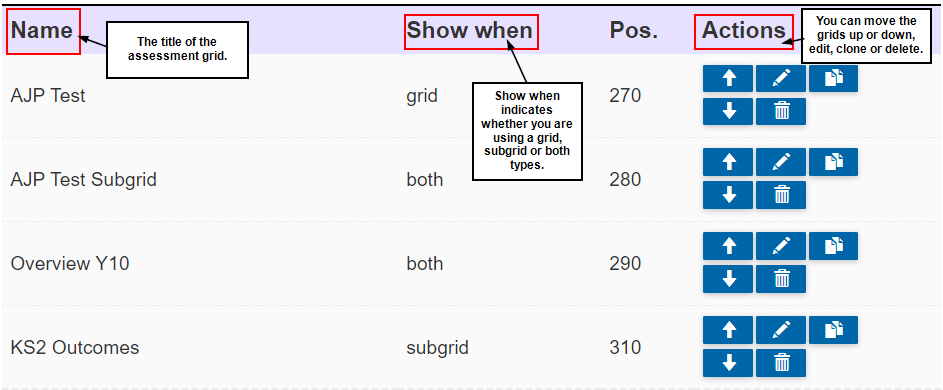
The Name column in the table indicates the title of the assessment grid, e.g. Summer ’21 Assessment Report.
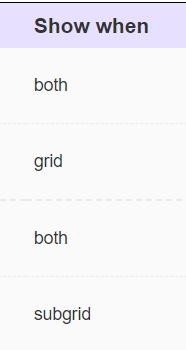
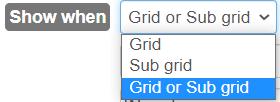
Secondly, the Show when column details whether the assessment is a grid, subgrid or both; subgrids are called from grids and can show things such as effort grades. The subgrid function is used for data that you do not want to be displayed all the time, so you can minimise it.
Thirdly, Pos. (positioning) indicates the priority of the data displayed on the grid when parents, learners and employees are viewing the Assessment icon. Use the arrows in Actions to move a grid up and down to change the priority position of the grid in the list and also the position of the grid in the tab view on the learner screen.

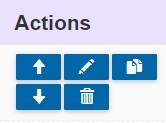
Finally, the last column is Actions where you can carry out a variety of tasks, such as using the arrow keys. Additionally, The pen icon allows you to edit your grid, the bin icon allows you to delete your grid and the copy icon allows you to clone a grid, so you can use the grid again for another purpose.
Create a New Assessment Grid
To create a new assessment grid, scroll to the bottom of the assessment grid table and click the + Create New Grid button.

Filtering Grid Aspects
In the +Create New Grid screen, there are two sections. Firstly, the filter section allows you to narrow down the SIMS assessment area you are searching for in the grid. Secondly, the grid itself is configured below the filters.
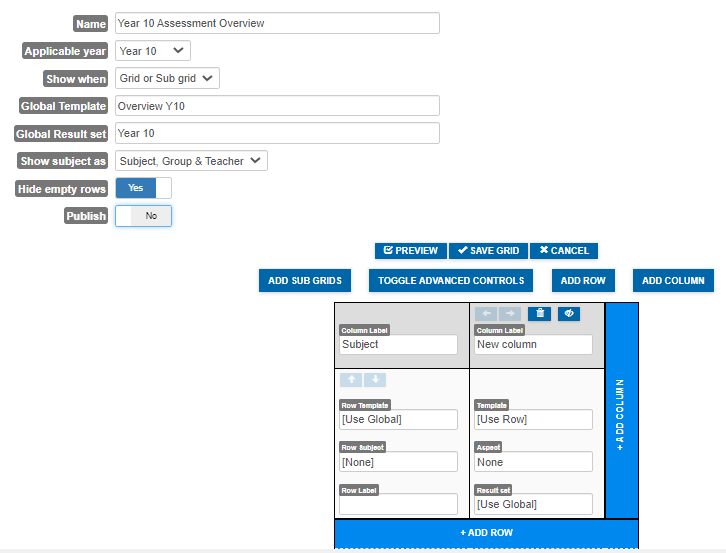
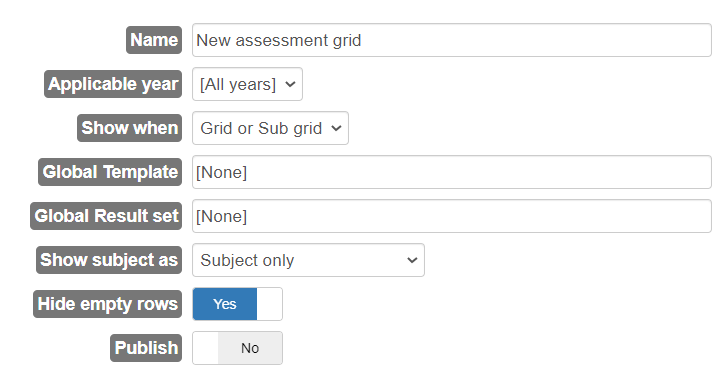
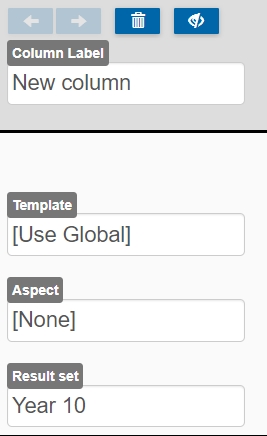
Name: Select a title for the assessment grid that you are creating. In the example above, Year 10 Assessment Overview is the title of the grid.

Applicable year: Choose the year group you are creating the grid for, e.g. Year 10.

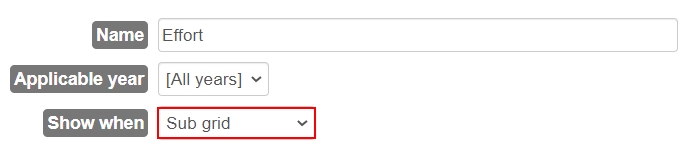
Show when: Filters the type of grid you want to create. You can choose from a single grid, a subgrid or enable both grid and subgrid. Grids are often used for the subject data and the subgrids are often used for other types of data, such as effort grades or KS2 Outcomes. If you label the ‘show when’ filter as both a Grid and a Sub Grid, it will appear as both, allowing you to select it as a subgrid.
Using Global Template and Global Result Set
Global Template: Using Global Templates helps narrow down the SIMS assessment area from SIMS to those that are most relevant. Select a template from the dropdown list, or you can type in keywords to narrow down your search for the correct one. Templates are unique to every school, so your SIMS Data Manager will know which one to use for each year group/ circumstance you are creating an assessment grid for. Templates can be overviews, but they may also be Year Group specific and/or relate to an assessment period.

Global Result Set: This allows you to select a particular data set to be applied to a year group, e.g. TP Year 10. In this example, Global Data Set will allow all data inputted by Year 10 teachers into SIMS Marksheets for the autumn term into Edulink One’s Assessment Grid. This can be configured in the assessment grid itself and can be left blank, but it does save time using this feature if you know the result set you are applying.

Subject and Hide Filters
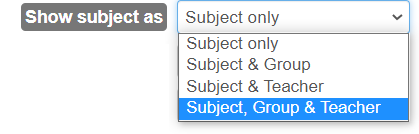
Show Subject as: This allows you to select what subject view you would like on the assessment grids. You can choose from showing the subject only, the subject and group (class/set), the subject and teacher, and the subject, group and teacher.
Hide empty rows: The hide empty rows filter is particularly useful to hide data that is not relevant to a learner. Every student has different subjects, particularly at KS4, so ‘hide empty rows‘ will filter out any subjects the learner is not taking. This helps to personalise each report. Turn ON to enable this feature.

Publishing Filter for Your Grid
Publish: It is recommended that you leave Publish OFF until you are ready to publish your reports. However, this may create some work at the end of the process when you must release your assessments.

Alternatively, you can hide assessments from parents and students until you are ready to release them in the General tab. Simply untick the user groups that you do not want to see the assessment data (parents and learners) and save these changes in the General tab. Once you are ready to publish your assessment data, go back into General and tick the user groups (parents and learners) which enables them to view the assessment. Save these changes when you are done. This must be done at every assessment point to prevent the early release of data.
Creating Assessment Grids
Create your assessment grids using the grid table and filters to help you. Schools have hundreds of assessment aspects to choose from, and they can change from year to year depending on the subjects offered and changes in assessment procedures.
The default template for the assessment grid is two rows and two columns. The first row and column relate to the Subject, e.g. English Language, Mathematics, PE Btech, Textiles etc… The subjects are pulled from your school’s SIMS. The second column relates to the data you want to input, e.g. Target Grade, Autumn Term Attainment, Spring Term Attainment, Mock Results etc…
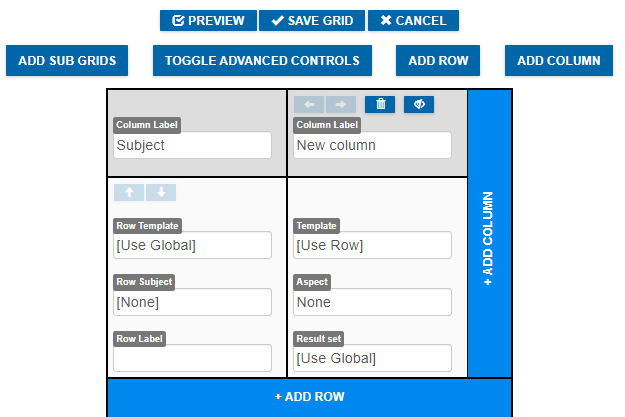
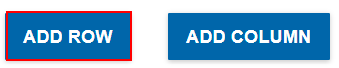
You can add rows and columns in two ways: by using the buttons at the top of the grid, or by adding rows and columns within the table itself, using the large + Add Row and + Add Column buttons.
Subject Column
To start, the subject column is the first column that appears in the assessment grid.
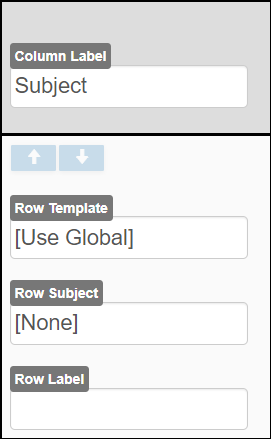
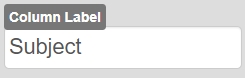
Column Label: Give your column a title. By default, Edulink One has Subject as the default for the first column as this is largely what comes first on assessments.
Row Template: If you have used the Global Template filter, you can simply leave the Row Template as [Use Global]. This will pick up the Global Template in the filter and apply it to the column. However, if you have left your Global Template blank, you can configure the Row Template here. Merely select a template from the dropdown list and select it (consult your SIMS Data Manager to help identify the correct template if unsure).

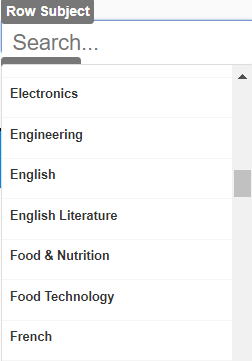
Row Subject: This filter relates to the specific school subject. Select the subject you want in this section using the dropdown list or type the subject name.
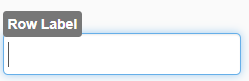
Row Label: You can type a Row Label to further specify the subject column.
Assessment Column(s)
You can customise the assessment columns to reflect the data you need to include in the grid.
At the top of the new column, there are arrow keys that move the column left or right, a bin to delete a column and a hide icon, allowing you to set up columns and hide the data until you are ready to publish that particular data set. For example, you want to set up your Year 10 marksheet for the entire year, including the target grade, autumn, spring and summer attainment settings, but it is only the autumn term. You can hide the spring and summer attainment columns and unhide them when you are ready to publish those assessment results.

Column Label: Create a title for your new column, e.g. target grade.

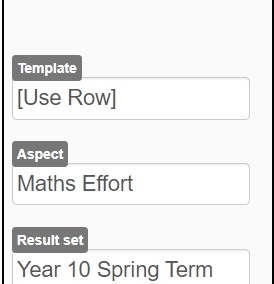
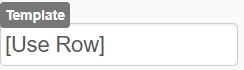
Template: If you are using a Global Template to filter your aspects, and you have selected [Use Global] in the Row Template, you can also use the filter [Use Row], which selects the row template automatically. Alternatively, you can select [Use Global] or any other template if you have not set a global template.

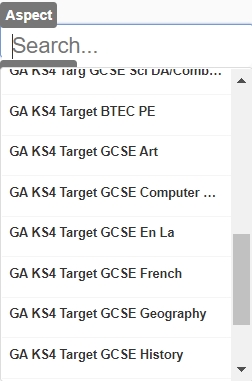
Aspect: At this juncture, you select the aspect you would like to be displayed in the column. You can scroll through the aspects and select one from the list, or if you know which aspect you are looking for, you can type in keywords to narrow down the search. Click the relevant aspect to apply it.

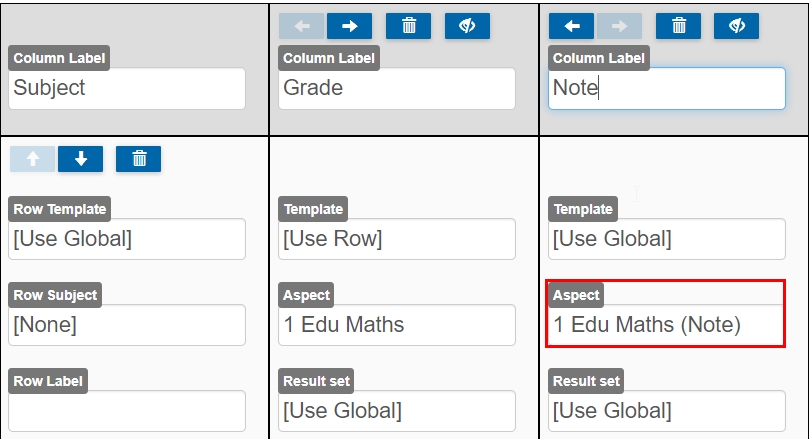
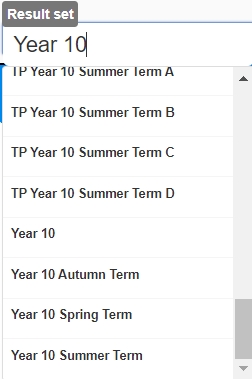
Result Set: Next, you need to choose the result set if you have not already selected a Global Result Set. The results are extracted from SIMS Marksheets where the teachers input their grades. Scroll to select a result set or type in part of the result set you are searching for. Click the appropriate result set.
Next Steps
At this point, you can add further columns, possibly in preparation for the entire year (you can hide using the hide icon if the data is irrelevant when publishing), or you can add more rows below to input other subjects’ data.
To add more columns for a subject, simply click the Add Column button or click the blue + Add Column bar, located at the side of the grid.


If you need to save your work, press the Save Grid button. This will return you to the main Assessment tab screen.

Previewing Your Grid
You can preview the grid you are working on to ensure the template, aspects and result sets are correct. Click the Preview button to view your work.
Select Learner to Preview: You must select a learner to preview your grid.
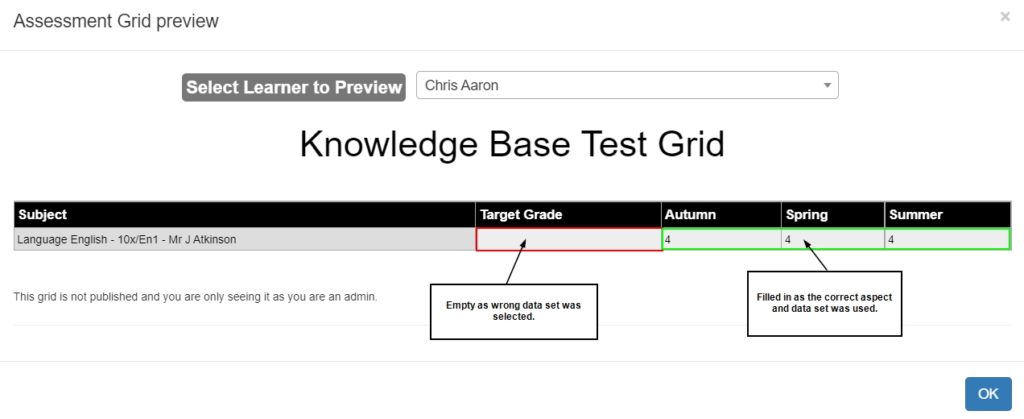
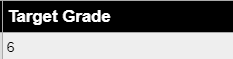
In the example above, the red square highlights that an incorrect filter was used. The green indicates that the correct information was used in the assessment columns.
If there is an error, click OK to return to the grid to correct the error. For instance, in the example above the target grade is not present; however, when the result set is corrected, the target grade appears.
If there are no errors present, then you can continue creating your grid or you can save your grid.
Adding New Rows
Once you have completed your first assessment grid row, you can add more rows with new subjects.
Tick the blue Add Row box, or for ease, simply click the blue + Row bar at the bottom of the grid.

In the same manner as columns, arrows appear indicating that you can move your subjects up and down. A bin icon is also present if a row requires deleting.

Complete the subject column and the assessment columns as per the steps above, just ensure that the template (if you are not using the Global Template filter), aspect and result set is relevant to the subject in the subject column, i.e. if the subject is Maths do not input the Music result set by mistake. However, if you do make an error, you can check in the preview window and select the correct data set.
Creating Assessment Grids Part 1: Video
Creating Sub Grids
Creating a subgrid in the Assessment tab is the same process as creating a grid. The only difference is that in the grid filters, you select the sub grid or grid or sub grid option in the Show when filter.
Continue to select the correct Global Template and a Global Result Set to narrow down the aspects in the subgrid.
Adding Rows
When adding information to the subject row and the assessment columns, subgrids behave in the same way as grids.
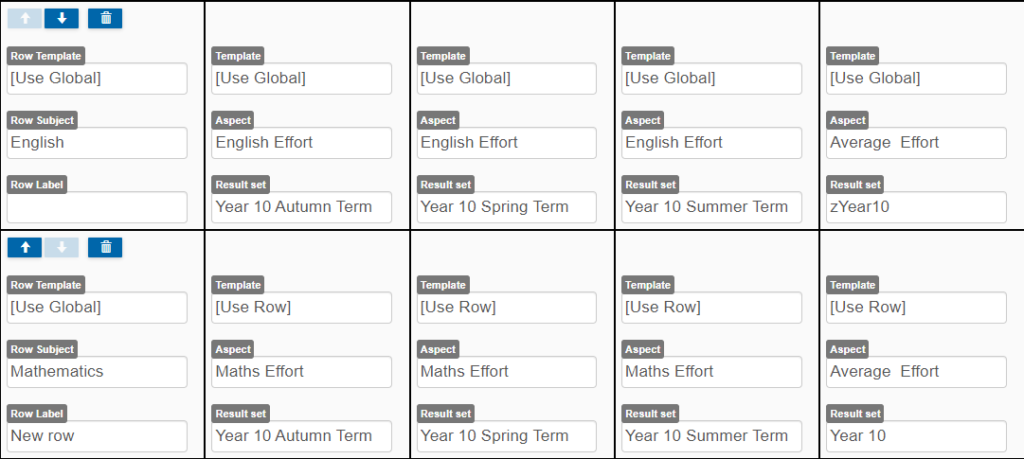
Row Template: Use the Global Template for your row template, or you can set the row template directly in the grid.
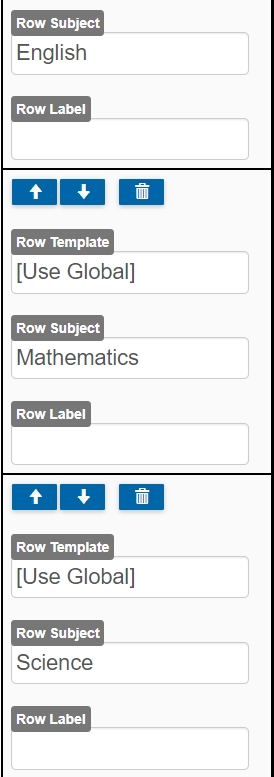
Row Subject: Add the row subjects as you would in a normal grid. For example, if you are adding effort grades for all subjects, you need to include each subject in the Row Subject field.
Row Label: You can type a Row Label to further specify the subject column, e.g. effort. This would come up as ‘Effort English’ as the label comes first.
Adding Columns
You add columns in a sub grid the same way as a grid.
Template: Ideally, use the Global Template previously formatted in the filters. However, you can specify a template in each column.
Aspect: Select the aspect you wish to use from the list of aspects— you can type part of the aspect to narrow it down further. In this case, Maths Effort is the aspect used for the effort grade.
Result Set: Like adding the result set in grids, adding a result set in subgrids is the same. You must select the appropriate result set for your column. You can preview your work to check that the aspect and result set are correct.

Once you have completed your subgrid, click the Save Grid button at the top of the grid table. Then, you can return to edit your grid in the main assessment tab window by clicking the pen icon.

Adding Sub Grids to a Grid
You can add subgrids to a grid that can be used for other kinds of data sets, such as effort grades, A2L, KS2 Outcomes, Mock Grades and other features.
To add a subgrid to your main grid, click the Add Sub Grids button.

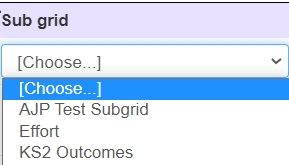
The Sub Grid Links window opens where you can select the type of subgrid (previously created) and what to link it to on the subject row.
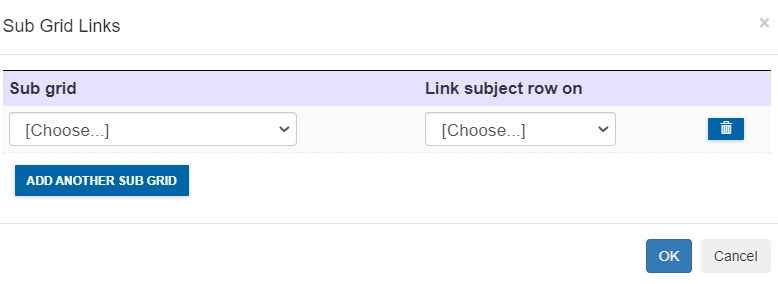
Sub Grid: Select the subgrid you would like to use from the dropdown list and click it.
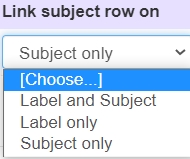
Link subject row on: The field you would like your subgrid to link onto to display correctly in the assessment grid. You can select from label and subject, label only or subject only. Unless you are using labels for a particular reason, it is recommended that you link to the Subject only.
You can also delete a subgrid(s) using the bin icon if you no longer need it or you are changing the data in the subgrid(s). For example, it could be that you would like the autumn Year 7 assessment to include their KS2 Outcomes; however, this may not be what you want to display in spring and summer.
Previewing Your Grid and Sub Grid(s)
Identically to previewing your main assessment grid, you can preview both your assessment grid and any subgrids at the same time.
Click the Preview button to view your grid and sub grid(s).

Select the learner you would like to use to preview your main grid and subgrid.

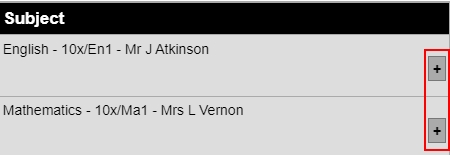
Sub grids are located next to the subjects (and class and/or teacher, depending on how Show Subject As is configured). Click on the + toggle to preview your subgrid.
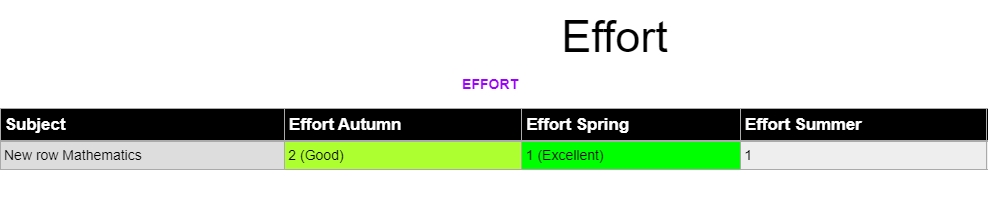
The subgrid toggle will open and display. To demonstrate, the example subgrid below uses effort grades. The Subject appears with the row label and the row subject, and each column displays the aspect and result set configured in the subgrid, in this instance the effort grade.
Moreover, two of the columns have been configured using the Toggle Advance Controls. The grade displayed corresponds to a particular colour. The summer effort grade has not been configured this way.
Once you are finished, press the OK button.
Save your grid by clicking the Save Grid button.

Advanced Controls
The Toggle Advanced Controls allows you to add additional formatting to the grids and subgrids.

Click the Toggle Advanced Controls button to begin.
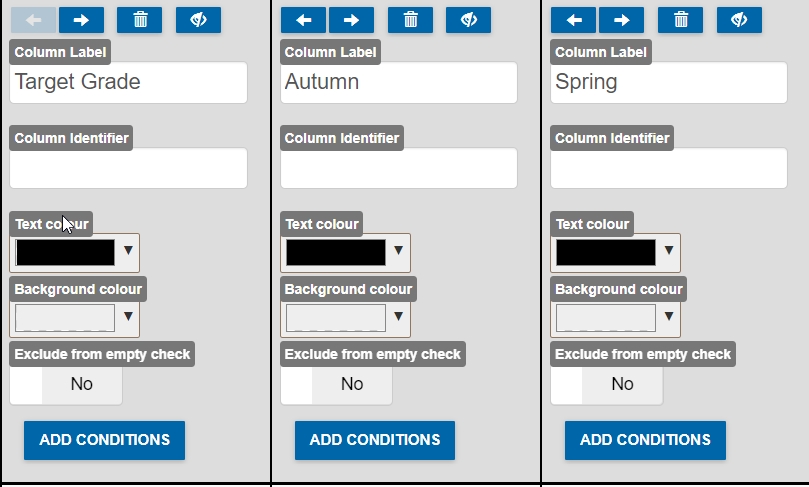
Column Label: The column label is the name that you have provided the column.

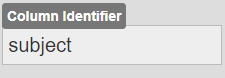
Column Identifier: Identifiers used in the Column Identifier allow you to add conditional formatting to the grid. For example, the first column label above is titled Target Grade, but you can add an identifier (variable) to aid in creating formulas, such as ‘tgt’ for target grade.
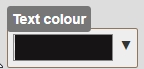
Text Colour: Select the colour for the grid’s text here.
Background Colour: Select the background colour for the main grid.

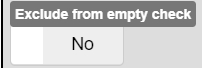
Exclude from empty check: This allows you to override the Hide Empty Rows field.
Adding Conditions
To add conditions to your grid, click the Add Conditions button to format it.

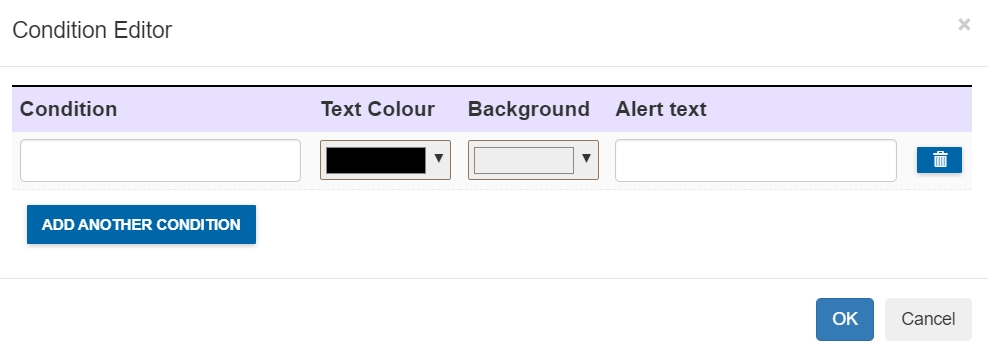
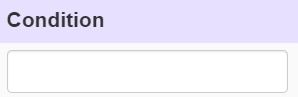
Condition: In the Condition field, write the formula you need to generate for a particular cell. You can use the column identifiers formatted in the Toggle Advanced Controls window. To illustrate, the condition for a target grade could be as follows: >tgt (greater than target grade), =tgt (equal to target grade), <tgt (less than target grade). This is an example, but you could subdivide this further and add more conditions for your purposes. Other conditions you can use are for example =”A” which will match an “A” grade in the cell or use the value of the cell so =9.
Text Colour: Select the text colour for the cell in the grid here.

Background: Select the colour you want the cell to be based on your formatting.
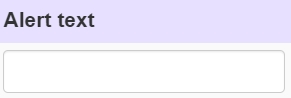
Alert Text: The alert text allows you to describe the meaning of the conditional formula, e.g. for the formula =tgt, your alert text would correspond as ‘On Target’. This will be visible in the grid or sub grid.
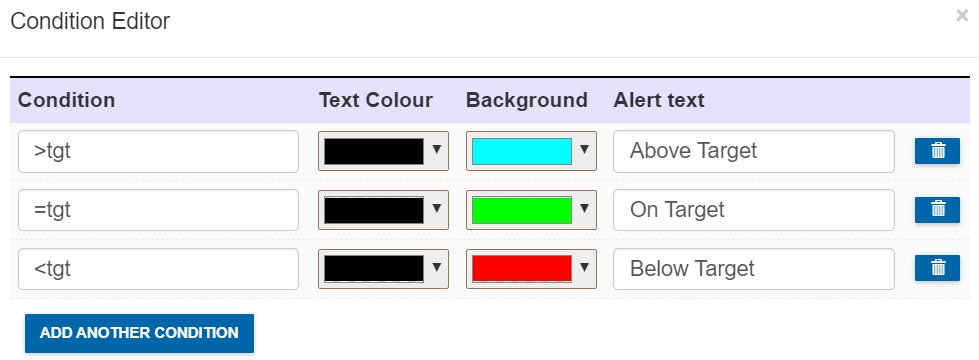
Add Another Condition: To add another condition to the cell, click the Add Another Condition button to input another formula.

Click the OK button to return to the main grid and press the Save Grid button to save the conditional formatting.

Publishing
When you are ready to publish your grid and subgrid(s), turn the publishing field to Yes. If you have left the publishing field ON, but you have hidden assessments from certain user groups (parents and learners), then return to the General Tab, find the ‘Hide assessment from’ field and untick them.

Other Actions
Cloning
Cloning is a fast way to replicate assessment grids which will save you time creating new ones. Additionally, you can use cloning to clone assessments from one year group to another, changing the year group, global template and result set to reflect the new year group. Moreover, this results in your conditional formatting being replicated from one group to the next.
Click the Clone button to clone a grid.
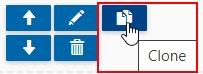
The clone will be added to your assessment grid list in the Assessment tab. Locate the clone and click on the pen icon to edit the clone to fit the new parameters, e.g. a Year 7 assessment grid cloned for Year 8 will need a new name, year group, global template and global result set, etc… to accurately reflect the year group change.
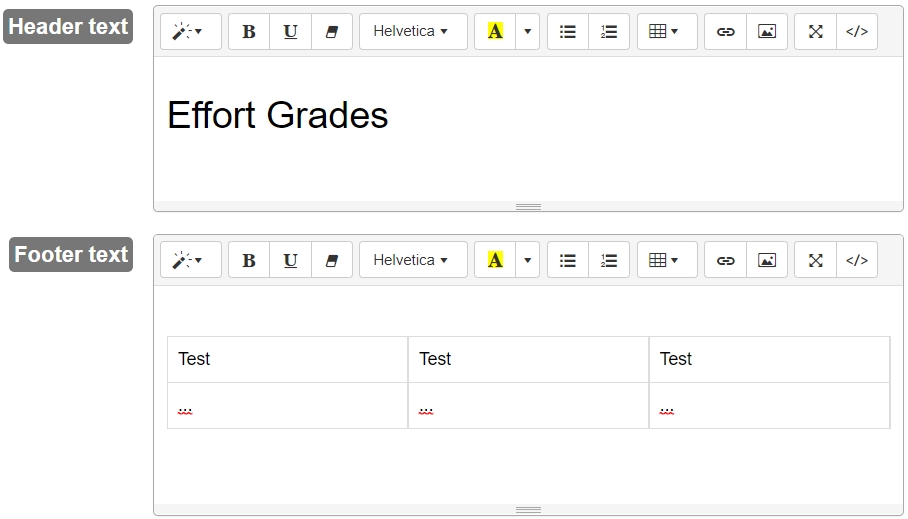
Adding Headers and Footers
You can add headers and footers to your grids. These are formatted at the bottom of the grid table in the assessment grid editor.
Headers and footers operate in the same fashion. You can add them to your grids to help provide details of data entries to parents and learners, helping them understand their meaning.
Not only can you write text in the text boxes, but there are options to include lists, tables, links, code and images (such as a school logo).
Additionally, you can also format the text in the same way as other Edulink One features. You can select the font, background and foreground colour, bold and underline, you can also remove font styles using the eraser icon.
Moreover, the text box has an option to select styling (wand icon). There is a dropdown list of different options, such as p for paragraph, header sizes, quote and code.
Creating Assessment Grids Video: Part 2
Saving
To save your new grids, scroll to the bottom of the Assessment tab window and click the Save button.

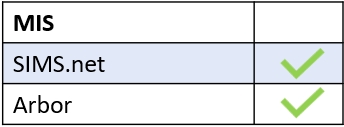
MIS Compatibility