Configuring the Homework Tab
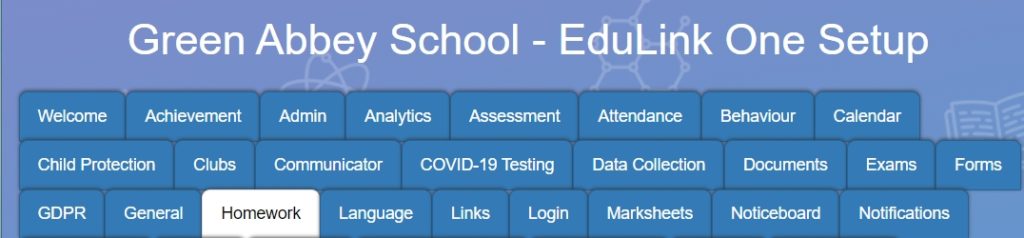
To configure the Homework tab, you (administrators) must log in to your Edulink One account and click on the Administration settings in the cog at the top of the screen. Locate the Homework tab and click on it.
Firstly, enable the homework screen (icon) for the user groups you would like to select. Tick the box beside the user groups to enable their homework function in Edulink One.

Add Homework Settings
For employees to add homework, the Employees add homework must be turned ON. This allows employees to set homework for their classes in Edulink One.

Require class to be set requires the teacher to select the class the homework is for in Edulink One. This should be set to ON.

The Learners add homework setting allows learners to add homework in Edulink One if a teacher sets the homework verbally. Set to ON if you would like to enable learners to use this function.

Hide Fields allows you to hide two specific fields within the homework function, the submitted field and the completed field.

Switch teacher allows authorised employees to see other teacher’s homework. Select the authorised individuals from the dropdown list.

Enable homework issues allows teachers to mark the homework as having an issue, such as not being handed in or incomplete. Additionally, the Homework issues as incomplete setting shows any homework issues as incomplete in the reporting function.

Calculate percentage complete based on: This setting allows you to select what you base your ‘percentage complete’ statistics on in the Report function of Homework. You can choose to base the percentage on whether the student has marked their homework as complete or whether the teacher has marked it as received.

Google Classroom
Some schools use Google Classroom to set homework tasks. Edulink One has a setting that allows schools to Enable Google Classroom, making these assignments visible in the learners’ Edulink One accounts. Whether you are using Google Classroom for logins or not, this setting must be configured. Below are two methods for configuring homework for Google Classroom: one for schools using Google Classroom logins and one for schools that are not using Google Classroom logins. Select the method appropriate for your school.
Using Google Classroom Integration for Logins
If your school is using integration for login (though it’s not necessary for homework), we pick up the users from the Google ‘use identity from’ field in our Login Tab. Ensure the Login via Google field is ON.

Whatever identity field you are currently using in your Google Classroom account MUST match the identity field you input into the Use Identity From field. For example, if your Google Classroom account is using the AD Email Field then the Use Identity From field must also be set to AD Email Field.
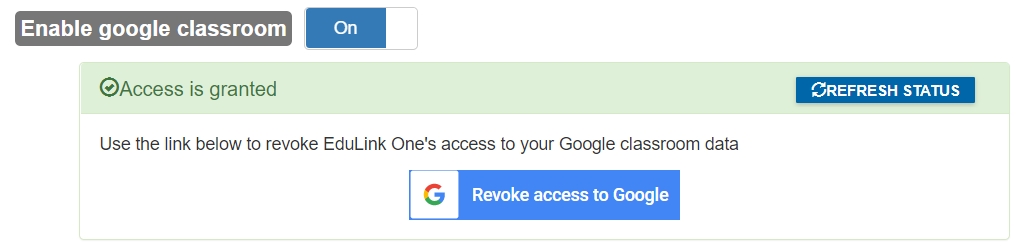
Then go to the Homework tab and turn ON Enable Google Classroom.

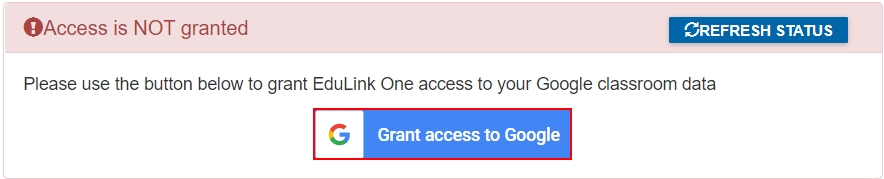
You must grant Edulink One access to your Google account by pressing the blue Grant Access to Google button, where you will need to use an admin username and password to grant Edulink One access. Then, Edulink One will pull in assignments to Homework. When the homework is ‘handed in’ in Google Classroom, it is marked as ‘complete’ in Edulink One.
Not Using Google Classroom for Integration
If your school is not using Google Classroom integration for logins (not necessary for homework), you must turn the Login Via Google field ON (this will be turned off later) in the Login Tab and set the ‘use identity from’ field.

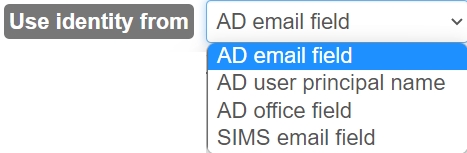
The Use Identity From field is where Edulink One ‘picks’ your users up from, you can select to use the AD email field, the AD user principal name, the AD Office field or the SIMS email field. Note that this should match the identity field you use for your logins.

Then, you will need to turn ON the Enable Google Classroom field in the Homework tab.

Next, grant Edulink One access to your Google Classroom account by pressing the blue Grant Access to Google button. You will need to use an admin username and password to grant Edulink One access. After allowing access, Edulink One will pull in assignments to Homework. When the homework is ‘handed in’ in Google Classroom, it is marked as ‘complete’ in Edulink One.

Crons run every 2 hours between 5:00 am and 9:00 pm to pull in homework. Teachers will see the homework on their screen, but there is no edit or clone function.
Coursework set in Google Classroom must have a future due date to be visible in Edulink One. Moreover, Edulink One also pulls in work 7 days past its due date.
Furthermore, administrators can also use the Revoke access to Google button below, in the event the school would like to disable access to Google Classroom. There is also a button to refresh your Google Classroom status if required.
Microsoft Teams
A number of schools use Microsoft Teams to set homework tasks. Edulink One allows schools to Enable Microsoft Teams, making these assignments visible in the learners’ Edulink One accounts. The account used to Grant access to Microsoft Teams needs to be the main Microsoft Administrator account for your school. Once access is granted, a box appears stating ‘Access is Granted’.
Whether you are using Microsoft Online for logins or not, you need to configure settings in the login tab. Below are two methods for configuring homework for Microsoft Online: one for schools using Microsoft integration for logins and one for schools that are not using Microsoft integration logins. Select the method appropriate for your school.
Using Microsoft Online Integration for Logins
If your school is using integration for login (though it’s not necessary for homework), we pick up the users from the ‘use identity from’ field in our Login Tab. Whatever identity field you are currently using in your Microsoft Online account MUST match the identity field you input into the Use Identity From field. For example, if your Microsoft Online account is using the AD Email Field then the Use Identify From field must also be set to AD Email From.

After you ensure your login identity fields match, you will need to turn ON the Enable Microsoft Teams field in the Homework tab.

You must grant Edulink One access to your Microsoft account by pressing the black Grant Access to Microsoft button, where you will need to use an admin username and password to grant Edulink One access. Then, Edulink One will pull in assignments to Homework. When the homework is ‘handed in’ in Teams, it is marked as ‘complete’ in Edulink One.

Crons for Microsoft run every two hours and pull in all homework. If you use software to create ‘terms’, Edulink One will pull in the current term.
Not Using Microsoft Online for Login
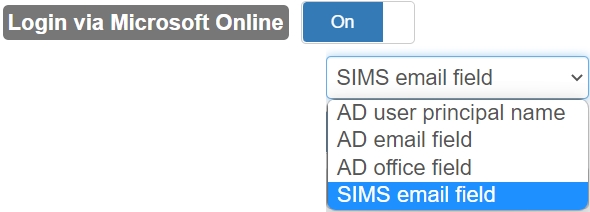
If your school is not using Microsoft integration for logins (it’s not necessary for homework), you must turn the Login Via Microsoft Online field ON in the Login Tab and set the ‘use identity from’ field. The Use Identity From field is where Edulink One ‘picks’ your users up from, you can select to use the AD email field, the AD user principal name, the AD Office field or the SIMS email field. Note that this should match the identity field you use for your logins.
Then, you will need to turn ON the Enable Microsoft Teams field in the Homework tab.
Next, you need to grant Edulink One access to your Microsoft account by pressing the black Grant Access to Microsoft button. You will need to use an admin username and password to grant Edulink One access. After allowing access, Edulink One will pull in assignments to Homework. When the homework is ‘handed in’ in Teams, it is marked as ‘complete’ in Edulink One.
Crons for Microsoft run hourly and pull in all homework. If you use software to create ‘terms’, Edulink One will pull in the current term.
For both methods used above, you can revoke Edulink One access to your school’s Microsoft account at any point by clicking the Revoke access to Microsoft button below. There is also a button to refresh your Microsoft Teams status if required.

Load Reporting
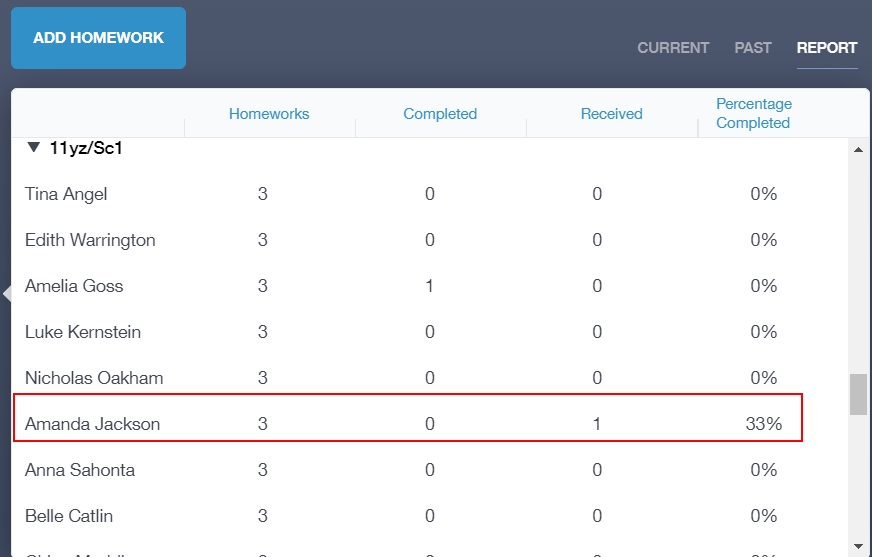
The Load Reporting button generates a report of homework set in Edulink One for each student by their teachers.

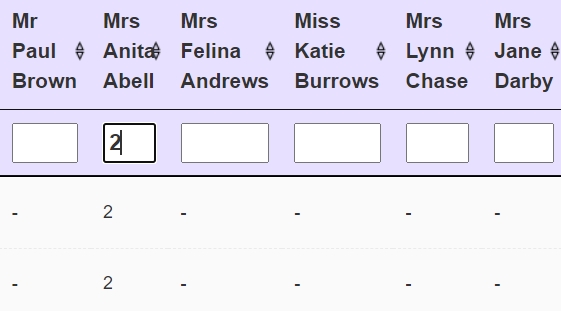
Within the table, every learner in a Year Group is visible horizontally and the teachers are visible vertically.
The numbers underneath each teacher relate to the pieces of homework that the teacher has set. The entries that say 0 means that the teacher is a teacher of that student, however, no homework has been set. The entries that say – means that this teacher does not teach this student.
Any entries that have numbers in them relate to how many pieces of homework the learner has had assigned to them.
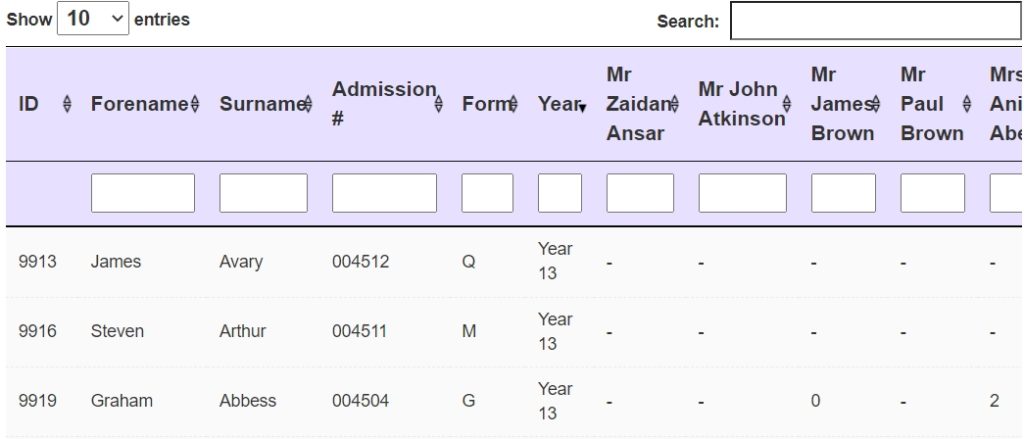
Moreover, administrators loading the report can filter by various fields: forename, surname, Admission number, Form and Year. The ID numbers for each learner are static.
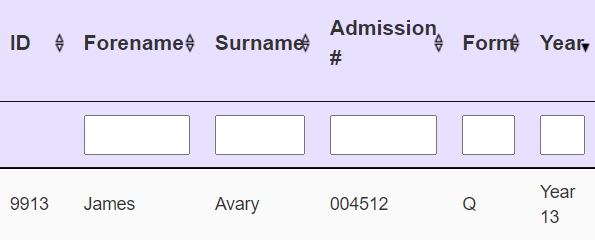
The filters below the teachers filter the number of homework assignments the learner has from their teacher. You must type in a number to see the values filtered, e.g. 1, 2, 3.
Additionally, administrators can use the search bar to narrow fields, if they know which field they are searching for.

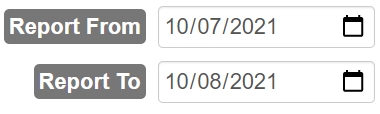
Administrators can alter the date range for the report at the bottom of the reporting table. Scroll to the bottom and select the Report From and Report To dates for your report in the calendars. Alternatively, you can type in the dates you require.
Additionally, administrators can refresh the report using the Rerun Report button.

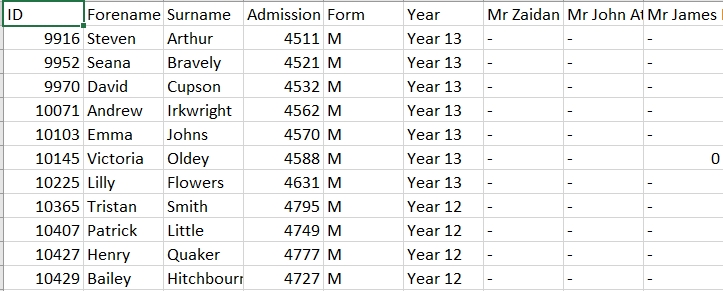
Administrators can also export reports as .csv and .xls files. You can select to export all of the data or just the filtered data. To do so, select the aspects you would like to export and press the Export button.

A download of the report generates— click on the download to open your file.
In the .csv or.xls, you can modify or print the fields of the report that you require.
To save the homework tab setup, click the Save button at the bottom of the page.

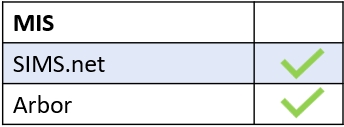
MIS Compatibility